
Free Pattern
Step-by-Step
Crochet
AmigurumiMini Frog Amigurumi Pattern with Bobble Eyes and Tiny Feet
Crochet an adorable mini frog amigurumi with bumpy bobble eyes and tiny feet using plush yarn. A quick, beginner-friendly stuffed animal pattern.
Level IntermediateTime 4-6 HoursHook 3 mmYarn Worsted
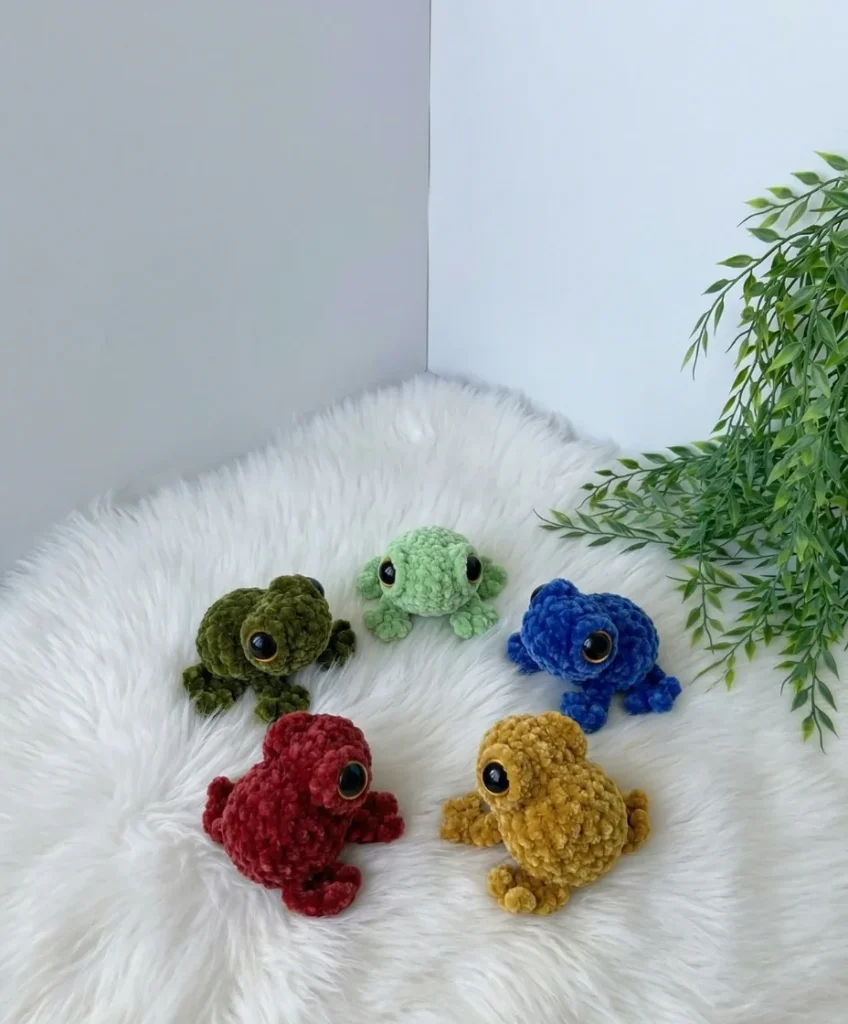
Pattern highlights
- Start the main body with a magic ring and build up through increase rounds to shape the rounded frog form.
- Continue working the body across all ten rounds, tracking stitch counts carefully with a stitch marker.
- Insert the 12mm safety eyes into the head area before stuffing gets too dense to work with.
- Stuff the body firmly in small sections, leaving a bit of room until the legs are attached.
- Crochet both legs separately, keeping stitch and round counts identical so the pair matches.
- Position and pin the legs against the body to check balance before sewing them securely in place.
- Finish stuffing the body fully once the legs are attached and close up any remaining opening.
- Embroider the yellow outline around each eye with cotton-blend yarn to complete the frog's expressive face.
About This Pattern
This Mini Frog Amigurumi is the kind of pattern that makes you smile the moment you finish the last stitch. With its round little body, tiny attached feet, and those unmistakable bulging bobble eyes, it captures everything charming about frogs in a compact, huggable shape. Made from plush or chenille yarn, this froggy has an irresistibly soft texture that begs to be squeezed, making it perfect for nursery shelves, desk companions, or a handmade gift for the frog enthusiast in your life.
The main body works up in ten straightforward rounds, giving you a satisfying, quick build without sacrificing that adorable amigurumi shape. You'll practice classic amigurumi skills like working in a continuous spiral, shaping increases for the rounded body, and attaching separately worked legs for dimension. This is a comfortable project for crocheters who've made an amigurumi or two before, though motivated beginners with some magic ring and single crochet experience can absolutely tackle it. Expect to spend an evening or a lazy weekend afternoon bringing this little guy to life.
Variations
I adore how this little frog comes together so quickly while still feeling like a real amigurumi achievement. Working the main body across just ten rounds means you get that thrilling increase-and-shape process without a marathon crochet session — you can genuinely finish this froggy in one cozy sitting. The plush or chenille yarn is a total game-changer here; it gives the finished piece a soft, almost velvety texture that's so satisfying to squish once it's stuffed. Attaching the separately made legs is one of my favorite parts of this pattern because it instantly transforms a simple round shape into something with real personality and a proper little stance. And don't even get me started on those bobble eyes paired with the hand-embroidered yellow outline — that tiny detail is what takes this from 'cute blob' to 'unmistakably a frog.' The 12mm safety eyes give it that glossy, wide-eyed expression that makes people say 'aww' the second they see it. This is the kind of project I reach for when I want a fast, cheerful win on my hook.
Common mistakes
- Starting the main body with a loose magic ring that leaves a visible hole at the center.
- Pull the tail yarn firmly after your first round of single crochets and give it a second tug once a few more rounds are complete to fully close the gap.
- Losing track of which round you're on across all ten rounds of the main body.
- Place a stitch marker in the first stitch of every round and move it up each time, especially through increase and decrease sections where stitch counts change.
- Overstuffing the body before attaching the legs, making it impossible to sew them on evenly.
- Stuff the body about 80% full first, attach the legs to establish the frog's stance, then add the final bit of stuffing through any remaining opening.
- Placing the 12mm safety eyes too close together or too high on the head.
- Insert the eye posts before snapping on the backs, and eyeball the spacing against the body width — count 3-4 stitches apart is a good general guide for this scale.
- Sewing the legs on at mismatched angles so the frog can't sit flat.
- Lay the stuffed body on a flat surface and pin both legs in place first, checking that the frog balances evenly before you sew them permanently.
- Embroidering the yellow eye outline with yarn that's too thick for the small scale.
- Use a thinner cotton-blend strand as specified and work small, even straight stitches around each eye rather than one thick loop for a cleaner look.


Intermediate
Progress Tracker
0 of 0 rounds
Tap a round to tick it off — your place is saved on this device.
Materials
- Medium-weight plush or chenille yarn (such as YarnArt Dolce) in one color of your choice — sample shown in colors 772 and 793
- D-3 (3 mm) crochet hook
- Safety eyes, 12 mm, 1 pair (sew-on or safety-lock style)
- Polyester fiberfill or hollow-fiber stuffing
- Yellow cotton-blend yarn, for embroidering the eye outline
- Yarn or tapestry needle with a wide eye
- Stitch marker
- Scissors
Main Body (make 1)
- Round 16 sc in MR. (6)
- Round 2sc, inc repeat 3 times around. (9)
- Round 3sc, inc, sc repeat 3 times around. (12)
- Round 42 sc, 3 sc in next st, work an Eye Bobble in the next st , 4 sc, work an Eye Bobble in the next st , 3 sc in next st, 2 sc. (16)
- Round 56 sc, dec twice, 6 sc. (14)Insert the 12 mm safety eyes now, placing each one through the center of the Eye Bobble made in Rnd 4.
- Round 62 sc, 3 sc decreased together , 4 sc, 3 sc decreased together , 2 sc. (10)
- Round 71 sc, attach a Leg here (see Legs, above) , 3 sc in next st, inc, 2 sc, inc, 3 sc in next st, attach the second Leg here , sc. (16)
- Round 8-9sc in each st around. (16)
- Round 103 sc, work through the Leg to attach it , 3 sc decreased together , 4 sc, 3 sc decreased together , work through the second Leg to attach it , sc. (12)
- Round 11dec 6 times. (6)Pull the opening closed and weave in the yarn tail. Using the yellow cotton-blend yarn, embroider an outline around each eye.Work the Main Body through Rnd 4, forming an Eye Bobble at each marked position, then continue to Rnd 5.Insert the 12 mm safety eyes through the center of each Eye Bobble, securing them from inside the piece.Continue to Rnd 7, attaching one Leg on each side exactly where indicated.Work Rnds 8–10, attaching the second connection point of each Leg in Rnd 10.Stuff the body firmly before working the final decrease round.Work Rnd 11, then pull the opening closed and weave in the yarn tail.Weave in any remaining ends.Keep your tension tight. This pattern uses a small 3 mm hook on purpose — tight stitches keep the stuffing from peeking through, which matters even more on a project this small.Watch Rnd 4 closely. The “3 sc in next st” sections are triple increases — three single crochets worked into one stitch, not three separate increases. Getting this right keeps your stitch count on track for the whole piece.Attach the legs as you go. Working the legs into Rnd 7 and Rnd 10 directly (rather than sewing them on afterward) keeps the seam invisible and the legs securely anchored. Take it slow on these two rounds and count your stitches as you work.Make the eye bobbles neat. When working the 4 dc bobble, keep an even tension on each loop before you pull them together at the top — this keeps the bump symmetrical and gives your frog a nice, expressive face.Using the materials in this pattern – a 3 mm hook and worsted-weight plush yarn – the finished frog measures about 6 cm (2.4 inches) tall. Your finished size will vary slightly depending on your hook size and how tightly you crochet.This pattern suits confident beginners and up, since it combines simple single crochet increases and decreases with a couple of techniques, like the bobble stitch and the chain-and-slip-stitch legs, that benefit from some crochet experience. Take your time on the leg and eye details and you will have no trouble finishing.This little frog packs a lot of charm into just eleven rounds, and those toe-tipped legs make it one of the most expressive tiny amigurumi you’ll crochet. Once yours is finished, we’d love to see it share your finished frog and tag us in your photos!Crochet Bobble Frog Amigurumi — Free Pattern Free No-Sew Mini Puppy Crochet Pattern Crochet Your Own Sweet Cuddly Stingray Friend
Assembly Crochet both Legs first, following the Legs instructions above.
Using the yellow cotton-blend yarn and your needle, embroider an outline around each eye for extra definition.
Tips & Tricks
Don’t overstuff. At this scale, a little stuffing goes a long way. Add small pinches at a time and stop as soon as the piece feels firm but still slightly squeezable.
Frequently Asked Questions What size is the finished amigurumi frog?
Can I use a different yarn than the plush yarn shown?
Yes, any worsted-weight yarn will work well for this pattern, though a plush or chenille-style yarn gives the frog its soft, velvety texture. Smooth cotton or acrylic yarn will produce crisper stitch definition and a slightly smaller finished size.
Do I need safety eyes, or can I embroider the eyes instead?
This pattern uses 12 mm safety eyes inserted during Rnd 5, then finished with a hand-embroidered outline in yellow yarn for extra definition. If you are making this for a young child, you can substitute embroidered eyes for the safety eyes for added security.
Is this pattern good for beginners?
You’ll Love Also This Alice the Frog Amigurumi — Free Crochet Pattern Crocheted Chicken on a Swing — Free Amigurumi Pattern
Ready to Start Stitching?
Candy Animals: 10 Tiny Crochet Amigurumi Patterns Crochet Snake Amigurumi Pattern: Coiling 70cm Plush Toy 1 thought on “Mini Frog Amigurumi Crochet Pattern”
Thank u for the pattern, Reply Leave a Comment Cancel reply
Legs (make 2)
Leg: sc, ch 6, sl st in the 3rd chain from the hook, then work two more sl sts into that same chain, ch 2, sl st in the 3rd chain from the hook, ch 2, sl st in the 3rd chain from the hook, sl st 3 along the base of the foundation chain.
Set both legs aside — you’ll attach them while working the Main Body.
Eye Bobble (make 2, worked directly into Rnd 4)
Eye bobble: Work a Bobble Stitch of 4 dc into a single stitch, closing all 4 loops together at the top to form a raised bump.
Important notes
💡 Use a D-3 (3mm) hook and keep your tension slightly tight for amigurumi — this keeps stitches dense enough that stuffing won't peek through the plush yarn.
💡 Because chenille-style yarn like YarnArt Dolce has a fuzzy texture, stitches can be harder to see, so count carefully and use a stitch marker every single round.
💡 Stuff firmly but in small pieces rather than one big clump — this helps the body hold its round shape without lumps or thin spots.
💡 Attach the safety eyes before you finish stuffing the head completely, since it's much easier to access the inside to secure the washers while there's still room to maneuver.
💡 Keep your yellow embroidery yarn tail long enough to weave in securely afterward, since chenille yarn can be slippery and knots may loosen over time.
💡 Work the two legs identically by counting your rounds and stitches carefully so your frog's stance looks symmetrical once both are sewn onto the body.
Original pattern: https://amigurumiarts.com/mini-frog-amigurumi-pattern/
FAQ
What yarn works best if I can't find YarnArt Dolce?
Any medium-weight plush or chenille-style yarn will work beautifully as a substitute. Just make sure it's a similar weight so your gauge and finished size stay consistent with the pattern.
Can I sew the eyes on instead of using safety eyes?
Yes, sew-on style eyes are mentioned as an option in the materials list. Just be sure to secure them very firmly with several passes of thread if the frog will be given to a small child.
How long does this frog take to make from start to finish?
Most crocheters finish the main body and legs in about 4-6 hours, including stuffing and assembly. It's a great project to complete in a single weekend or over a couple of relaxed evenings.
Why does my frog's body look lumpy after stuffing?
This usually means the stuffing was added in one large piece instead of small, even tufts. Try removing the stuffing and re-adding it in smaller amounts, pressing gently to fill out the rounded shape evenly.
Is this pattern suitable for a first amigurumi project?
It's rated intermediate mainly because of the leg attachment and eye embroidery detail, but a confident beginner comfortable with magic rings and single crochet increases can definitely give it a try. Just take your time with the stitch counts on each round.