
Free Pattern
Step-by-Step
Crochet
GarmentsA modern crochet poncho with ribbed collar pattern
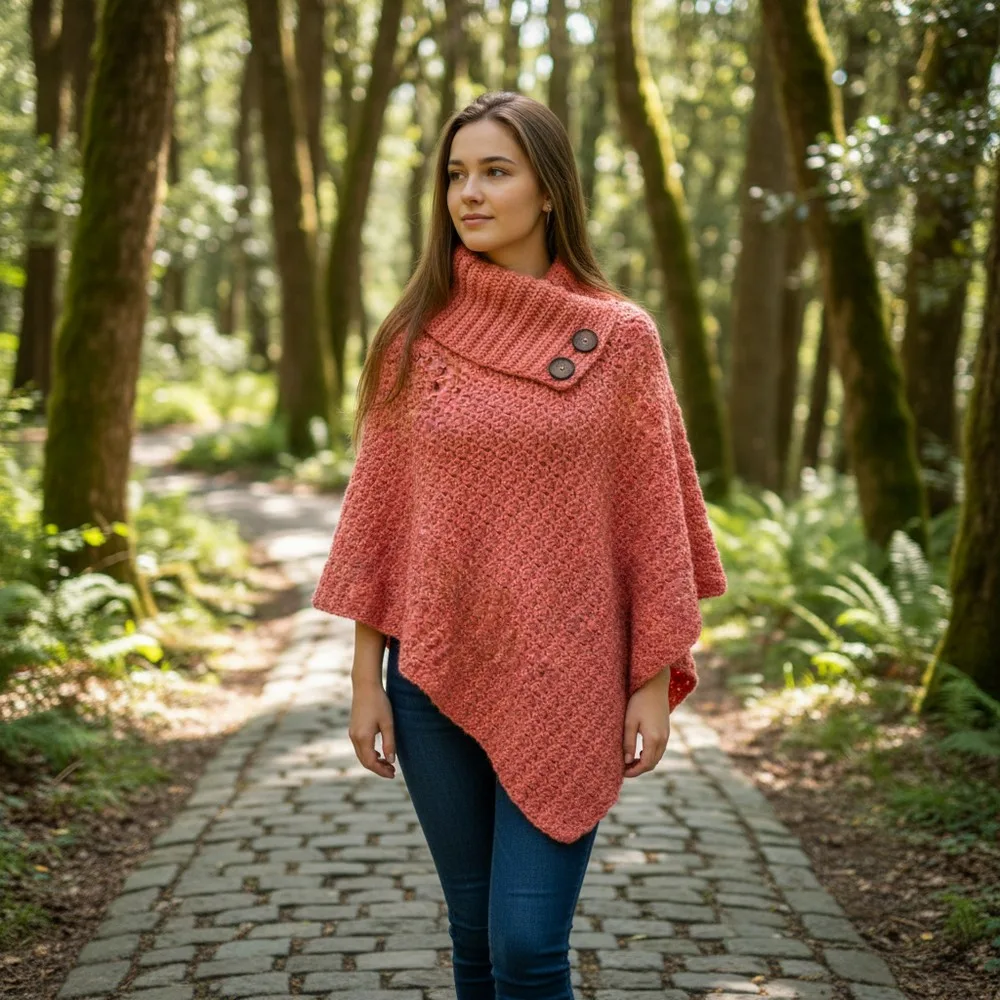
A two-rectangle crochet poncho with a ribbed collar, wearable open or as a turtleneck.
- Level
- Beginner
- Time
- 6-8 hours
- Hook
- 5 mm
- Yarn
- Worsted
Pattern highlights
- Chain a long foundation and work a straight row of single crochet to set the width.
- Turn and build the shell mesh, skipping stitches between each two-double-crochet-and-chain cluster.
- Repeat that shell row across many rows until the rectangle reaches the poncho body's length.
- Work a second rectangle in half double crochet through the back loop for the ribbed collar.
- Decide between wearing it open or extending the collar into a buttoned turtleneck.
- Add buttonholes to the collar flap if you want the turtleneck closure.
- Seam the collar to the body and sew on the buttons to finish.
About This Pattern
A poncho like this sits near the front of my notebook, between quick cowls and long sweaters. It asks for two rectangles and simple seaming, nothing more. That's why I keep pointing beginners toward it. The ribbed collar sets it apart from plainer ponchos I've logged before. I like that the shape does the work instead of complicated shaping. It's the kind of project I'd hand to someone finishing their first big piece.
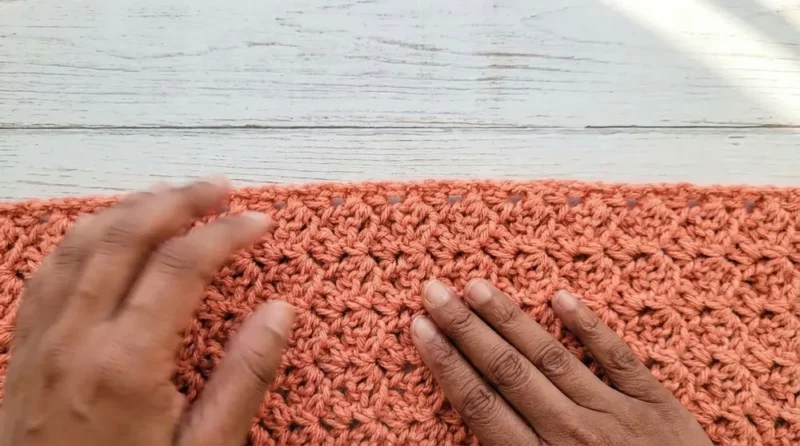
The body starts as a single crochet foundation row, then shifts into a shell mesh. Each repeat works two double crochets and a chain-2, skipping three stitches between clusters. That skip is what gives the fabric its open, breezy texture. The separate collar piece works entirely in half double crochet, through the back loop only. Row after row, that builds the rib that lets it stretch into a turtleneck. Two textures, two stitch heights, one seam holding them together.
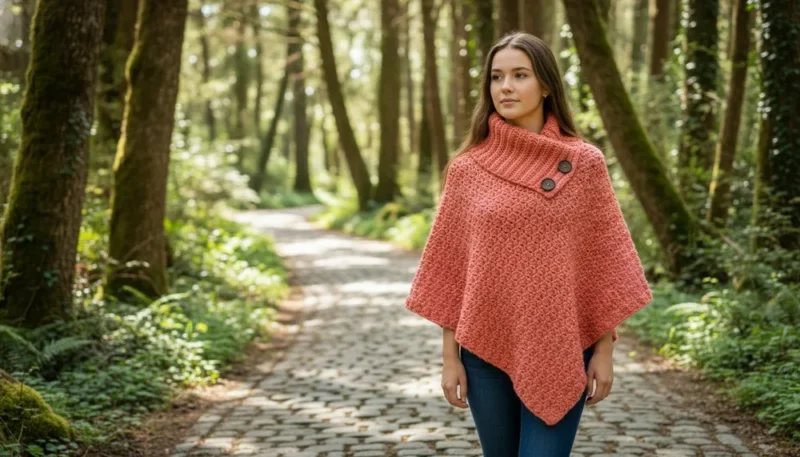
Finished, it reads as a modern poncho with the drape of something hand-knit. Worn open, the collar folds down into a simple funnel neckline. Buttoned up, it becomes a turtleneck with a little extra warmth around the throat. The mesh body moves easily over a shirt or dress. The rib collar keeps its shape wash after wash, at least in theory.
Worth knowing
What I like here is how little shaping is involved for how finished the poncho looks. Two rectangles, no increases, no decreases — the shell mesh and the ribbed collar do all the visual work. The skip-three shell pattern is forgiving; a slightly uneven repeat barely shows once blocked. The collar is the real reward. Working through the back loop only, row after row, builds a rib stretchy enough for a turtleneck. Real buttonholes are optional, if you want them. Unraveling extra length to form the buttonhole flap feels like a clever bit of engineering, not just decoration. It's a satisfying make for anyone who wants garment-level payoff without garment-level math.
Common mistakes
- Forgetting the right-side marker Place a stitch marker on the right side early. Without it, the shell rows are hard to tell apart once you're seaming.
- Miscounting the skip-three repeat Count carefully before working each shell cluster. One missed skip throws off the spacing for every repeat after it.
- Working both loops on the collar Keep to back loop only across the ribbing rows. Working both loops flattens the rib and kills the stretch needed for the turtleneck.
- Skipping a gauge check Swatch before starting if your drape feels off. A tighter or looser gauge changes both fit and how much yarn you'll need.
- Misplacing the buttonhole chain-1s Mark the buttonhole positions before working the ch-1, skip-1 row. Uneven spacing means the buttons won't line up with the flap underneath.


Beginner
Progress Tracker
0 of 0 rounds
Tap a round to tick it off — your place is saved on this device.
The kit
Yarn
- Lion Brand Wool-Ease, Worsted (#4/Medium), approx. 4–5 skeins (see blog for yardage by size)
Hook
- 5mm (H-8) crochet hook
Notions
- Yarn needle
- Scissors
- 2 large decorative buttons (about 1½”/4 cm in diameter)
- Measuring tape
Foundation
Ch 86 (for S/M; for other sizes, see Special Notes).
Round 1Sc in 2nd ch from hook and in each ch across. (85 sc) Turn.
Round 2Ch 3 , turn. In first st (base of ch-3), dc , ch 2 , sc (all in same st, first repeat made).Sk next 3 sts, in next st work [2 dc, ch 2, sc] (all in same st). Rep from * to * across.End after last repeat in final st.(You should have 22 repeats)
Round 3Ch 3 , turn. In first ch-2 space (from prior row), dc, ch 2, sc (first repeat made).In next ch-2 space, work [2 dc, ch 2, sc]. Rep from * to * across.In very last ch-2 space: work [2 dc, ch 2].Sc on top of beginning ch-3 (previous row) to finish/straighten edge.Place marker on this side of fabric; this is the right side (RS).
Round 4and onward: Repeat Row 3 for each new row: Ch 3 , turn, make [dc, ch 2, sc] in first ch-2 sp, [2 dc, ch 2, sc] in each subsequent ch-2 sp across, [2 dc, ch 2] in final ch-2 sp, sc on top of beginning ch-3 .Continue until rectangle measures 52” (132 cm) long (or desired length).Fasten off .
Assembly (Poncho Construction)
Lay rectangle RS up (marker helps identify).
Fold in half lengthwise so short ends align.
Place a marker 11” (28 cm) from the folded edge. This is the opening for the neck; do not seam this section.
Whipstitch the remaining open sides together (using tapestry needle and matching yarn): Start at marker, seam to lower edge of poncho.
Make a few knots at start and end of seam for security.
Leave a tail for weaving in.
Ribbed Collar
Foundation
Ch 30 .
Round 1Hdc in 3rd ch from hook (first 2 ch count as a st), and in each ch across. (28 hdc + 1 turning chain “stitch”)Turn.
Round 2Ch 2 (counts as first hdc), turn. Hdc in BL of each st across, hdc in top of initial ch-2 of previous row.Turn.Repeat Row 2 until collar measures 24” (61 cm) long .Do not fasten off or cut yarn—leave attached for potential adjustment and for seaming to neck opening.
Attaching Collar With Poncho RS out, position seam to the back.
Measure 1” from seam along the back neck, mark this point (start of collar attachment).
Insert collar, matching edge at marker, with working yarn at back.
Whipstitch collar to neck opening, starting and ending at markers (there will be a small overlapping flap of collar at front; this can be unraveled later as needed).
Weave in ends securely.
Optional (Finishing and Turtleneck Option)
For turtleneck
If desired, add buttonholes as follows: Unravel extra collar so overlapping flap is about 3–4” long.
With yarn still attached, ch 2 , and work a row of hdc in BL to first marker, ch 1, sk 1 (creates buttonhole), hdc BL to next marker, ch 1, sk 1, hdc BL to end.
Work another row of hdc BL , working 1 hdc into each st and into each ch-1 buttonhole space.
Fasten off , weave in end.
Bring flap under main collar and sew or whipstitch it down if not using turtleneck option.
Conclusion
You have created a modern, cozy poncho with a chic ribbed collar and the flexibility of wearing it open or as a turtleneck with buttons. The two-rectangle construction makes it ideal for beginners, and the simple stitch pattern provides lovely texture and drape.
Pattern Correction If your collar is not wide enough, add foundation chains or use a larger hook.
Be sure the body rectangle’s foundation chain is a multiple of 4 + 2 for neat repeats.
Tips Use a stitch marker to flag the right side early, making assembly easier.
Match gauge for best drape and size, or adjust hook/yarn.
Sew buttons securely; use matching thread/yarn and a tapestry needle.
If you don’t want the turtleneck, sew down the inner collar flap as described.
Block pieces gently for a smooth finish before seaming if desired.
From the collection
Finishing
- Weave in ends after fastening off both the body rectangle and the collar rows.
- Block both pieces flat before seaming, since the shell mesh drapes better once relaxed.
- Sew the collar to the body, then attach the two buttons if using the turtleneck closure.
Why it works
The body rectangle has no increases or decreases; width comes entirely from the length of the starting chain.
The shell mesh skips three stitches between each cluster, keeping the fabric loose rather than solid.
The collar is worked flat, row by row, in back-loop-only half double crochet, so it ribs vertically. That structure also lets you unravel the edge to lengthen the buttonhole flap.
What it becomes
- Layer it over a fitted long-sleeve shirt for a cool morning walk.
- Wear it over a simple dress when the afternoon turns breezy.
- Pair it with jeans and boots for a casual errand day.
Original pattern: https://redagapeblog.com/free-crochet-poncho-with-collar-pattern/
FAQ
Can I skip the turtleneck and buttons entirely?
Yes. The pattern notes you can sew down the inner collar flap instead of adding buttonholes. It still works fine as an open collar.
What size does the main chain make?
The sample chain given is for S/M; other sizes need a different starting chain length. Check the pattern's special notes before you begin.
Do I need special buttons?
Not especially, but the pattern calls for two large decorative buttons around one and a half inches across. Anything sturdy enough to sew through worsted weight fabric works.
How much yarn do I actually need?
The materials list estimates four to five skeins of worsted weight yarn, though exact yardage depends on size. It's worth checking that against your chosen size before buying.