
Free Pattern
Step-by-Step
Crochet
AmigurumiNo-sew amigurumi stingray crochet pattern
A no-sew amigurumi stingray built in flat rows with a simple sc join at the end.
- Level
- Intermediate
- Time
- 4-6 hours
- Hook
- 4 mm
- Yarn
- Super Bulky
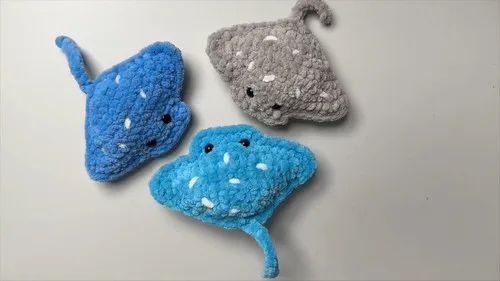
Pattern highlights
- Chain a short foundation and build the top piece upward, increasing at both edges every row.
- Repeat the same shaping for the bottom piece so the two halves match exactly.
- Work the head section in short flat rows to frame where the eyes will sit.
- Attach the safety eyes into the head section before the pieces are joined.
- Line up top and bottom pieces and single crochet around the edge to join them.
- Leave a gap near the face, stuff lightly, then close the remaining edge with more single crochet.
- Embroider the smile with black floss and add white yarn spots to finish the look.
About This Pattern
Every collector's shelf needs a sea creature eventually, and this stingray earns its spot. It sits apart from the round-bodied amigurumi I usually reach for. No spiraling rounds, no invisible decreases. Just two flat, fan-shaped pieces built row by row and joined at the edge. It is the kind of project that looks more complicated on a shelf than it actually was to make.
The whole thing runs on single crochet and one increase. That is the trick worth noting. The top and bottom pieces grow from a four-chain start into a wide diamond using increases at both edges of every row, which is a technique better known from granny-square corners than from amigurumi bodies. The head section breaks from that shape entirely, worked straight for two short rows to frame the face.
Once joined, it becomes a soft, flat-bodied stingray with a stitched smile and a single tail. The 10-stitch gap left near the face makes stuffing possible without unpicking the join. It is a piece built for a shelf or a play basket, not for standing upright, and that flatness is exactly its charm.
Worth knowing
There is something satisfying about a shape that grows itself. Increasing at both ends of every row on the top and bottom pieces turns a plain chain into a wide, symmetrical diamond without any counting tricks beyond keeping the two increases straight. Working the head section flat, then joining everything with a single crochet seam instead of a sewn one, means no yarn needle wrestling at the end. Leaving a 10-stitch gap for stuffing before closing the last stretch is a small bit of sequencing that pays off. It is a fast, forgiving amigurumi build, and the payoff is a stingray with real presence and a face that goes on last, once the shape is already sitting there waiting for it.
Common mistakes
- Losing track of the double increase Mark both edges of the row with a stitch marker or scrap yarn so the increase count stays even on each side.
- Top and bottom pieces coming out mismatched Count rows against the same reference as you work the second piece, not just stitch counts, since super bulky yarn can shift tension row to row.
- Stuffing before the seam gap is set Stuff only through the 10-stitch opening near the face after most of the join is complete, not earlier.
- Eyes placed too close together Leave the full 4 stitches between the eyes as the head section rows are worked, checking spacing before snapping the backs on.
- Smile embroidered before eyes are set Attach the safety eyes first so the floss smile can be placed in proportion to where they land.


Intermediate
Progress Tracker
0 of 0 rounds
Tap a round to tick it off — your place is saved on this device.
The kit
- Super bulky weight yarn (main color and belly color)
- 4mm hook
- 8mm black safety eyes
- Yarn needle
- Small amount of stuffing
- Scissors
- Black floss (for smile)
- White yarn (for spots)
Top Part of the Stingray
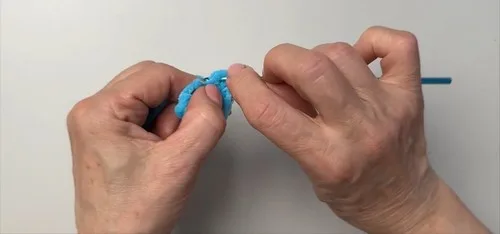
Round 1Create a slip knot; chain 4, turn; sc in the first stitch, inc in next, sc in third chain. (4 stitches)(4)
Round 2Chain 1, turn; work 2 sc in each stitch across. (8 stitches)(8)
Round 3Chain 1, turn; inc, 6 sc, inc. (10 stitches)(10)
Round 4Chain 1, turn; inc, 8 sc, inc. (12 stitches)(12)
Round 5Chain 1, turn; inc, 10 sc, inc. (14 stitches)(14)
Round 6Chain 1, turn; inc, 12 sc, inc. (16 stitches)(16)
Round 7Chain 1, turn; inc, 14 sc, inc. (18 stitches)(18)
Round 8Chain 1, turn; 18 sc across. (18 stitches)Fasten off and leave a tail to tuck in.(18)
Head Section
Round 1Reattach yarn at 7th stitch from edge; work 6 sc across. (6 stitches)(6)
Round 2Chain 1, turn; 6 sc across again. (6 stitches)(6)
Tail
Round 1Attach yarn at center back; pull yarn through to tail position; chain 11; work 10 sl st back along chain; make 1 sl st into the body to secure; fasten off and weave in tails.
Bottom Piece
Round 1Repeat steps for top piece exactly; at end of row 10, fasten off completely.
Assembly
Step 1Attaching Safety Eyes: Place safety eyes between the last two rows of the head section; leave 4 stitches between the eyes; attach the backs to secure.
Step 2Connecting the Two Parts: Line up top and bottom pieces; insert hook through final row stitch of both pieces, sc through both layers around; leave about 10 stitches open near the face; weave in any yarn tails; lightly stuff the center, keeping wings and face soft; finish sc around the rest of the body to close.
Step 3Embroidering the Smile: Thread black floss on a needle; bring floss up between rows of the head; make 1 horizontal stitch for mouth; bring floss down one row to form a small V; tie ends inside the body and hide.
Step 4Adding White Spots: Thread white yarn onto needle; bring yarn up through bottom to the top; add 7–8 small random stitches on the ray's back; bring yarn down, tie with starting tail, tuck inside.
Step 5Finishing Touches: Gently shape wings by bending outward; trim or tuck any loose yarn fuzz.
From the collection
Finishing
- Weave in the tails left from fastening off the top and bottom pieces before joining.
- Stuff lightly through the gap left near the face, keeping the wings and head soft rather than firm.
- Close the remaining single crochet seam around the body to finish the shape.
Why it works
Both the top and bottom pieces increase at both ends of every row, which is what pushes the flat foundation chain into a wide diamond body.
The head section is worked flat in short rows rather than in the round, since it only needs to bridge a narrow strip at one edge of the body.
Joining happens with a single crochet seam through both layers instead of sewing, and the open stretch left near the face is what allows stuffing after the join is mostly done.
What it becomes
- A soft desk companion for a nautical-themed shelf, sitting alongside other amigurumi sea creatures.
- A first ocean-animal toy for a young child, given its flat body and no-sew join.
- A simple gift for a baby shower or new arrival, paired with a small crochet fish or shell.
FAQ
Can I make this without safety eyes?
You could embroider the eyes instead with black floss, similar to the smile. Just plan the spacing before you sew, since the pattern calls for 4 stitches between them.
Why is the body flat instead of stuffed round like most amigurumi?
The top and bottom pieces are worked flat and joined at the edge, which suits a stingray's natural shape. It is meant to sit low and wide rather than stand plump like a round animal.
What yarn works best for this pattern?
The pattern calls for super bulky weight yarn in a main color and a separate belly color. That weight is what keeps the piece quick to work up with a 4mm hook.
How do I keep the stuffing from showing through the open gap?
Stuff lightly and keep it centered, away from the wings and face, before closing the remaining seam. The 10-stitch gap is only there for access, not for extra fullness.