
Free Pattern
Step-by-Step
Crochet
AmigurumiNo-sew crochet stingray amigurumi with wings and tail
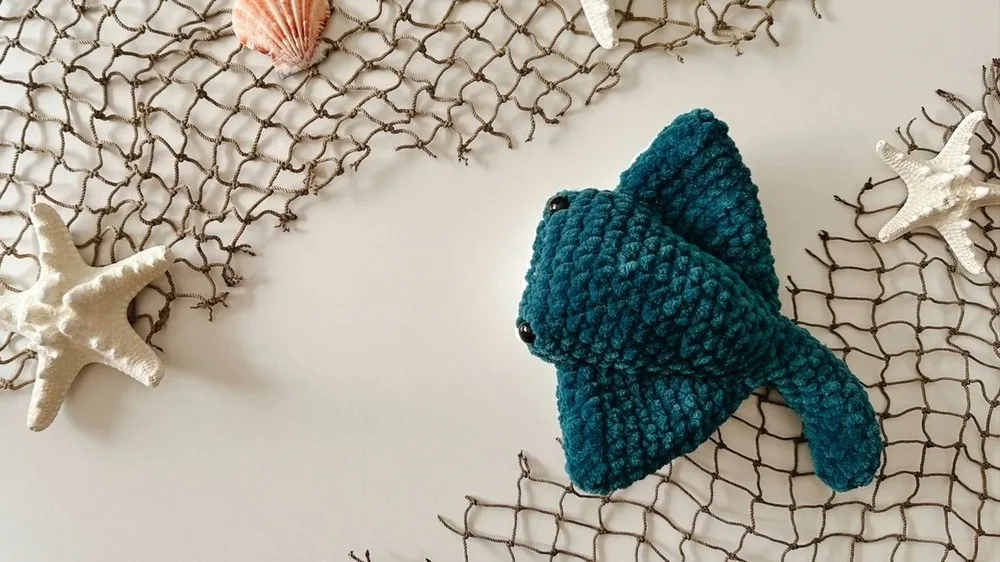
A single-piece crochet stingray body with a flat belly plate and shaping tail.
- Level
- Intermediate
- Time
- 4-6 hours
- Hook
- 5.5 mm
- Yarn
- Worsted
Pattern highlights
- Chain to form an oval base, then single crochet around both sides to close the shape.
- Work several plain rounds in single crochet to build up the body before adding eyes.
- Branch off two wings from the sides using new chains joined back into the body.
- Shape the wings further with an added round that brings the stitch count up.
- Crochet the belly plate flat in rows, increasing at the ends to form its own wing extensions.
- Shift to working the tail in the round, decreasing steadily while stuffing as you go.
- Sew the belly plate and wing edges to the body, then close and secure the tail's curve.
About This Pattern
Every collection needs a creature that swims instead of stands, and this stingray earns its spot. I keep a shelf for shapes that break from the usual round-body amigurumi, and a flat, winged body qualifies. It sits low, wide, and a little smug about it.
The technique here is the oval base. Chain 11, work single crochet up one side and down the other, and the shape that comes out is nothing like a sphere. From there the wings branch off with their own chains, and the belly plate is worked flat before it ever meets the body.
What comes out the other end is Stanley: a fluffy-yarn stingray with a blue top, a separate white belly, and a tail that curves once you sew through its edge. He is soft, he is oval, and he does not once ask for a needle-felted anything.
Worth knowing
I like a pattern that changes direction partway through. This one starts as a simple oval, single crochet in the round, and then sprouts two wings from chained extensions off the sides. That wing round, ending at a stated stitch count, is the fussy part, and it is satisfying precisely because it is fussy. The belly plate is worked flat in rows, a nice contrast to the body's rounds, and it has to end up matching the body's size before I sew it on. Then the tail decreases down to almost nothing while I stuff it as I go, which is the kind of multitasking that keeps a make from feeling like a chore. Fluffy yarn hides a multitude of uneven stitches too.
Common mistakes
- Losing the oval shape early Count carefully when working single crochet up one side of the chain and down the other. A skipped stitch flattens the oval before it can round out.
- Joining wings at the wrong point Match the connecting single crochet to the exact stitch where the wing meets the body. Use a stitch marker to hold the spot before you chain the wing base.
- Belly plate sized wrong for the body Check the belly plate against the body as you add rows, not after it is finished. Adjust row length before you start increasing the wing extensions.
- Overstuffing the tail too soon Stuff a little at a time as you decrease each round. A dense tail early on makes later decrease rounds hard to close.
- Skipping the safety eye timing Insert the eyes between the stated rounds, not after the body is closed. Fluffy yarn makes it hard to spot the placement gap later.


Intermediate
Progress Tracker
0 of 0 rounds
Tap a round to tick it off — your place is saved on this device.
The kit
- Fluffy yarn in white and blue, ensuring both are the same weight
- 5.5 mm crochet hook (primary hook)
- 3.75 mm crochet hook (for weaving in ends)
- Medium weight yarn (color not critical, will be hidden)
- Scissors, fabric pins, stitch marker
- 12 mm safety eyes (plain black)
- Fiberfill for stuffing
Body
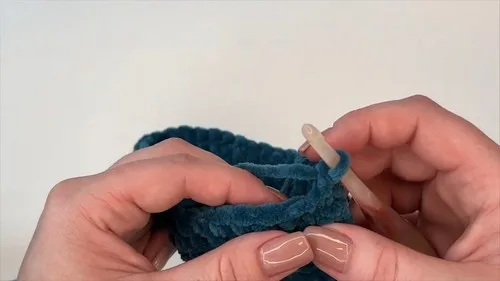
Round 1Chain 11 to start the base of the mouth.
Round 2Work 10 single crochets along one side of the chain, skipping the first chain, then work another 10 single crochets along the other side of the base chain, fulfilling the oval shape. (20)Insert safety eyes between Rounds 2 and 3.
Rounds 3–4Single crochet 20 stitches for two rounds. (20)
Round 5Begin forming the first wing by chaining 9, then single crochet in the next 8 chains; return to the body, single crochet in the next stitch to connect the wing, then single crochet 9 times along the body side edge; repeat the process for the second wing on the opposite side.
Round 6Work on shaping the wings further by adding stitches around both sides of each wing, ending with 52 stitches. (52)
Rounds 7–17Continue to shape the body with a combination of single crochets and decreases, focusing on slimming the body towards the tail; each round will gradually decrease in stitch count, leading up to Round 17, which prepares for the tail creation.
Belly Plate
Round 1Start with a slip knot and chain 11.
Round 2Follow the same initial steps as the stingray body for the first few rows to match the belly size.
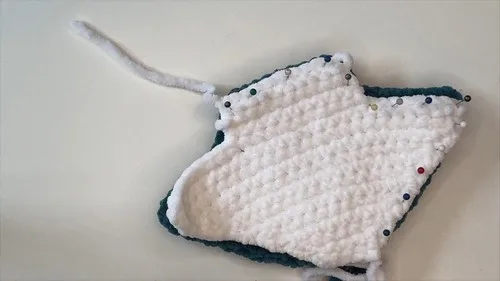
Round 3Work in rows, not rounds, increasing by chaining and adding single crochet rows to create two wing extensions from the main belly plate.
Round 4Continue adding rows, using increases at the ends for shaping, matching up to the body as you progress.
Tail
Stuff the tail as you go, ensuring an even fill.
Round 1After completing the belly plate, continue crocheting in the round at the tail base, decreasing to begin tail shaping.
Round 2Work single crochets for several rounds, gradually decreasing to shape the tail.
Round 3Finish the tail by decreasing to a few stitches and close off.
Assembly
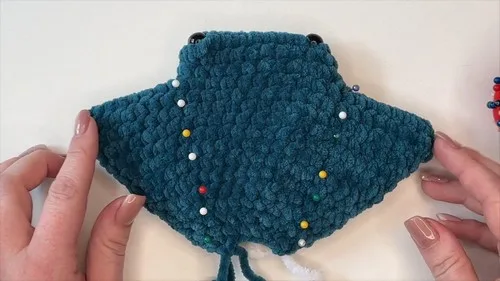
Step 1Sew on the belly plate to the underside of the stingray.
Step 2Use fabric pins to mark and sew the edges of the wings directly to the body, leaving the specified sections unstuffed for a more realistic appearance.
Step 3Add final details such as stuffing and closing the belly plate.
Step 4Attach the belly plate if not already attached.
Step 5Adjust the tail's curve by sewing through the edge and pulling to adjust the curvature.
Step 6Secure all loose ends and trim any excess yarn.
From the collection
Finishing
- Weave in all ends with the smaller 3.75 mm hook so they stay hidden in the fluffy yarn.
- Stuff the tail gradually as you decrease, keeping the fill even rather than packing it in at the end.
- Sew the belly plate and wing edges to the body, leaving the noted sections unstuffed, then adjust the tail's curve by pulling through its edge.
Why it works
The body starts as a chained oval rather than a magic ring, which is what gives it the flat, wide silhouette instead of a ball.
The wings are added mid-body by chaining out from the oval and single crocheting back in, joining with a connecting stitch into the existing round.
The belly plate is worked in rows, not rounds, so its two wing extensions can be increased at the ends and shaped to mirror the body separately.
What it becomes
- A soft toy for a child's room shelf, paired with other sea-creature amigurumi for a small ocean lineup.
- A handmade gift for someone who collects unusual crochet animals rather than the standard bear or bunny.
- A photo prop for craft-fair or online shop displays, shown alongside other fluffy-yarn amigurumi pieces.
Original pattern: https://crocheteverything.com/https-crocheteverything-com-crochet-amigurumi-strawberry-whale-pattern-for-beginners/
FAQ
Why start the body with a chain instead of a magic ring?
A chained oval gives the flat, wide base a stingray needs. A magic ring would pull the body into a ball instead.
Can I use a different yarn instead of fluffy yarn?
You can, as long as it matches the stated weight for both colors. The fluffy texture just helps hide stitch definition and uneven tension.
When exactly do the safety eyes go in?
Insert them between the second and third rounds of the body, before the oval closes in further. Waiting too long makes placement awkward.
Why is the belly plate worked separately instead of in the round?
Working it flat in rows lets you increase at the ends to shape its own wing extensions. That shape is then matched and sewn to the body afterward.