
Free Pattern
Step-by-Step
Crochet
AmigurumiA plush crochet cow lovey for baby comfort
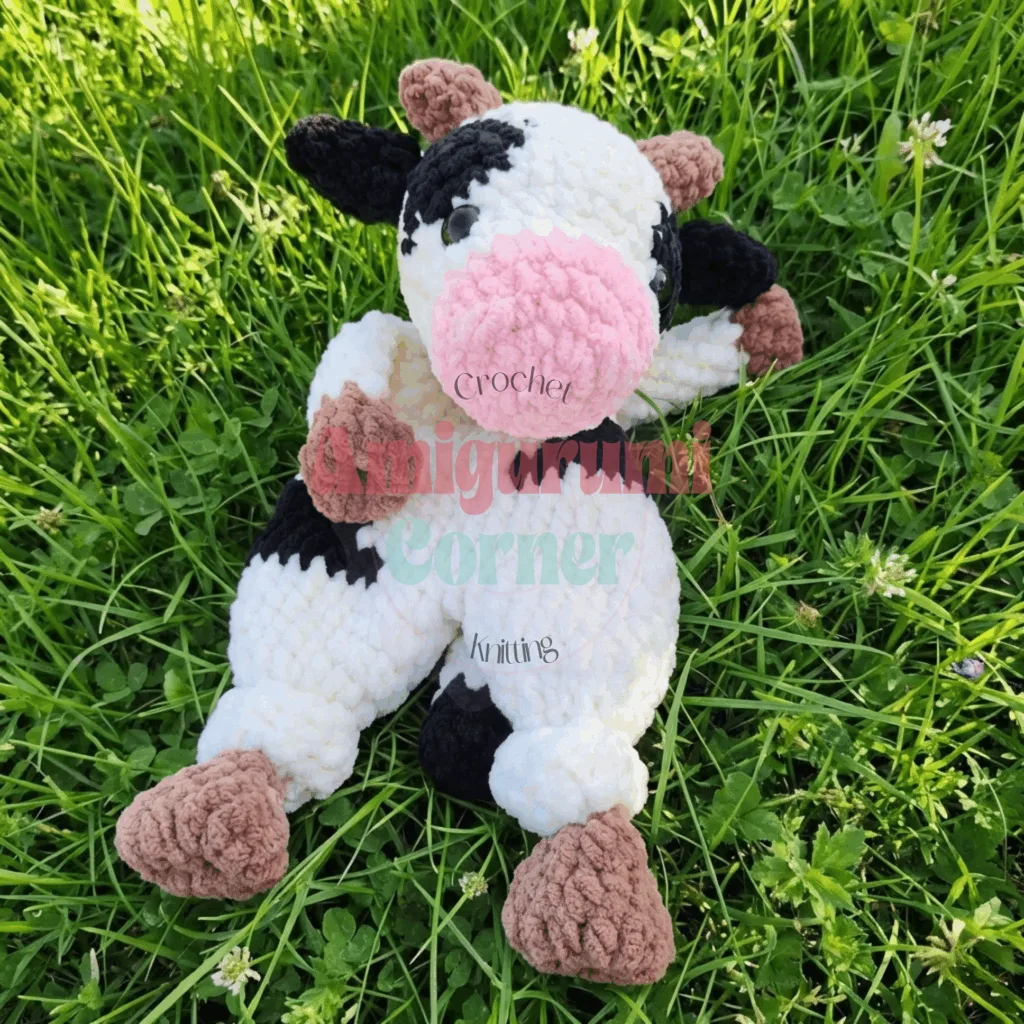
A crocheted cow lovey with ears, antlers, and a soft blanket body for a baby gift.
- Level
- Beginner to Intermediate
- Time
- 6-8 hours
- Hook
- 7 mm
- Yarn
- Bulky
Pattern highlights
- Start with the head, worked in the round from a magic ring through steady increases to its final shape.
- Make the antlers and ears next, small pieces that go quick once you've got the hook warmed up.
- Stitch two arms and a tail, simple shaping pieces that don't ask for much concentration.
- Work the legs and body as one long piece, the biggest single section of the whole lovey.
- Stuff the head and body before closing them, so the cow holds its shape under a baby's grip.
- Pin the antlers, ears, and face details in place first, checking spacing before you commit to sewing.
- Sew everything down, weave in every yarn end, and the lovey is ready to hand over.
About This Pattern
A lovey like this sits in the soft-toy corner of my notebook, not the amigurumi shelf proper. It's a blanket with a job: something a baby can grip, chew, and eventually drag everywhere. The cow shape keeps it appealing to adults buying gifts, while the flat body underneath does the actual comforting work. I keep seeing this format — head on a blanket — turn up as a baby-shower staple, and I understand why. It's low-risk to make and high-reward to give.
Technique-wise, every piece starts in a magic ring, then climbs through standard increase rounds — the head alone runs nineteen rounds before it's done. The ears are the fussy bit: they work in the round, flatten out for a single round with no increase, then shape again. Antlers and arms are quick, five rounds each, more about texture than engineering. Assembly is pin-first, sew-second, which is the right call when you're placing antlers and ears by stitch count rather than by eye.
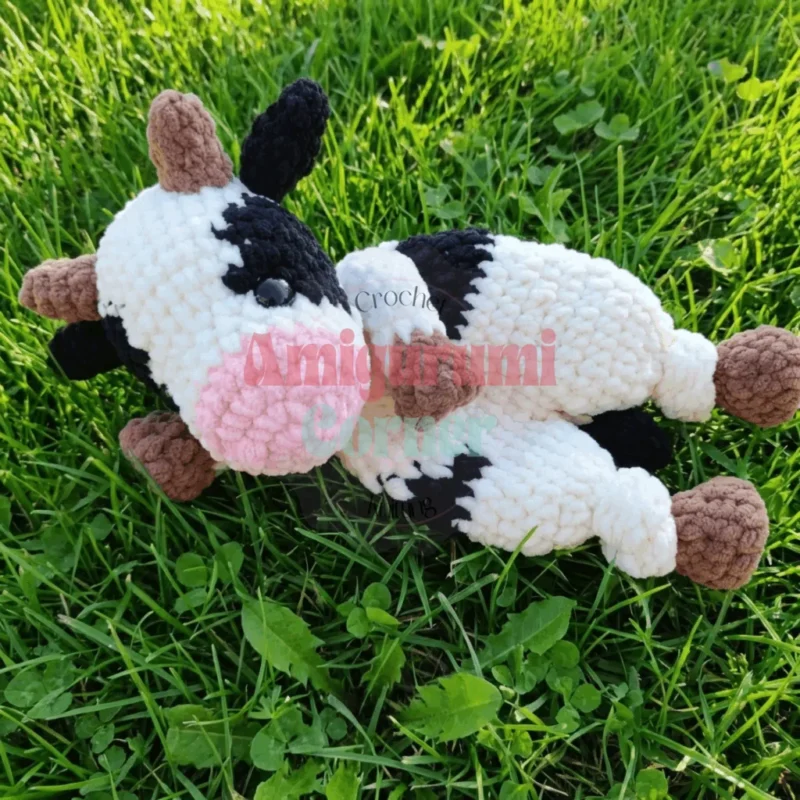
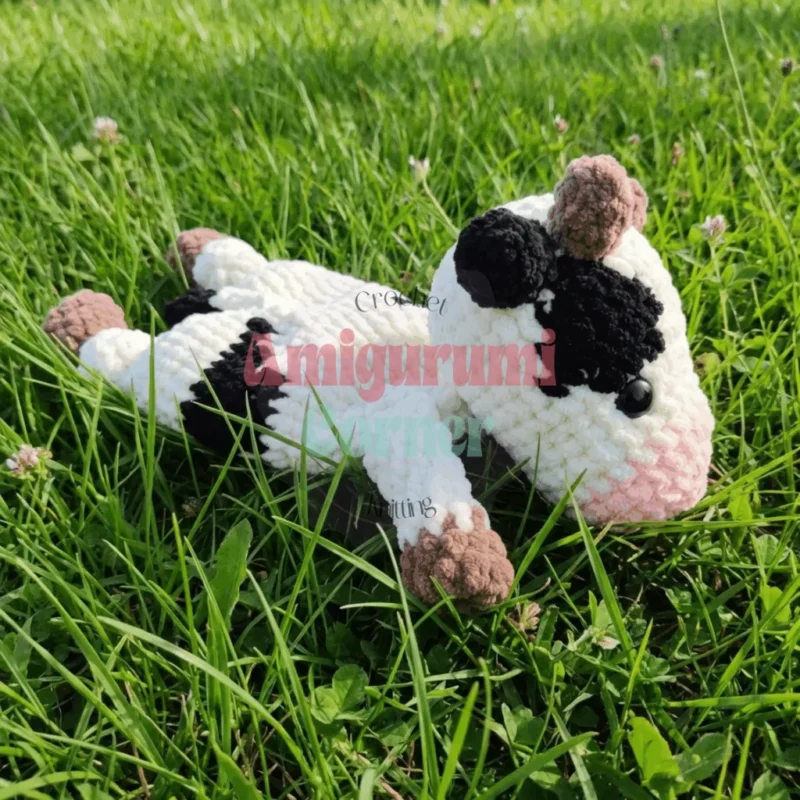
What comes out the other end is a plush cow face stitched onto a soft, oversized body — the part doing the blanket work. Safety eyes give it a fixed, sleepy expression; the antlers and ears give it personality past 'just a blob.' The tail and arms are small enough to be charming rather than fiddly. Stuffed and finished, it reads as a gift-shelf piece, not a shelf decoration — practical, washable, dense with character.
Worth knowing
What I like about this one is the contrast in scale. The legs and body run twenty-one rounds — a marathon. The antlers and tail wrap up in five rounds each. That variety keeps the project from going stale on a slow evening. The ears hide a nice technical moment: one plain round, no increase, right after two increase rounds. It's a small test of whether I'm reading the pattern or just stitching on autopilot. Assembly leans on pins before thread, so antler and ear placement isn't guesswork. It's forgiving work with just enough precision to keep me paying attention.
Common mistakes
- Skipping the ears' plain round Don't add an increase on round two of the ears — it's meant to sit flat. Count your stitches before moving on.
- Uneven antler shaping The antlers increase on one side only, so keep track of which edge you're on each round. Mixing up the sides gives you a lopsided pair.
- Losing the nostril spacing Mark nostril points with pins before stitching, since they need even spacing. Eyeballing it leads to a crooked face.
- Misplacing antlers and ears Both sit within a narrow band of head rounds, so pin first and compare both sides. Sew too early and you'll be unpicking stitches.
- Understuffing the body section The legs-and-body piece is the longest part of the lovey and needs firm, even stuffing. Thin spots show once the blanket gets handled.


Beginner to Intermediate
Progress Tracker
0 of 0 rounds
Tap a round to tick it off — your place is saved on this device.
The kit
Yarn
- Alize Velluto (100g/68m, 100% micropolyester):
- Color #340 (Powder)
- Color #60 (Black)
- Color #62 (Cream)
- Color #329 (Brown)
Alternative Yarn Options
- Bernat Blanket Sparkle
- Bernat Blanket Big Ball Yarn
- Premier Parfait XL
- Premier Basix Chenille
Additional Supplies
- 7mm crochet hook
- Black safety eyes, 18mm size
- Fiberfill for stuffing
- Sewing pins
- Scissors
- Darning needle
Skill Level
- Beginner to Intermediate
Head
Using 7 mm crochet hook and Alize Velluto #340 (Powder):
Round 16 sc in magic ring [6](6)
Round 2(inc) repeat 6 times [12](12)
Round 3(1 sc, inc) repeat 6 times [18](18)
Round 4(2 sc, inc) repeat 6 times [24](24)
Round 524 sc around [24] – 1 round Change yarn to Alize Velluto #62 (Cream):
Rounds 6–724 sc around [24] – 2 rounds In the next round, begin crocheting the black spots using #60 (Black). Stitches marked with blue color indicate color changes.
Round 85 sc, 3 sc, 2 sc, 4 inc, 10 sc [28](28)
Round 94 sc, 2 sc, inc, 3 sc, inc, 6 sc, inc, 3 sc, inc, 6 sc [32] Color Change Tip: To create a smooth transition, on the last stitch before the color change, insert your hook into the stitch, pull up a loop in the current color, yarn over with the new color and pull through both loops on the hook to complete the stitch in the new color.
Round 106 sc, 3 sc, inc, 2 sc, 2 sc, inc, 2 sc, inc, 1 sc, 3 sc, inc, 9 sc [36](36)
Round 116 sc, 8 sc, 7 sc, 8 sc, 7 sc [36](36)
Round 128 sc, 5 sc, 9 sc, 6 sc, 8 sc [36](36)
Round 139 sc, 3 sc, 11 sc, 4 sc, 9 sc [36](36)
Round 1424 sc, 2 sc, 10 sc [36] Eye Placement: Install safety eyes between rounds 8 and 9, with a distance of 10 stitches between them. Stuff the head lightly with fiberfill, inserting small amounts at a time until you achieve the desired shape. Take your time with this step.Continue crocheting using yarn #62 (Cream):
Rounds 15–1636 sc around [36] – 2 rounds
Round 17(4 sc, dec) repeat 6 times [30](30)
Round 18(3 sc, dec) repeat 6 times [24](24)
Round 19(2 sc, dec) repeat 6 times [18] Stuff head but do not overstuff.
Round 20(1 sc, dec) repeat 6 times [12](12)
Round 21(dec) repeat 6 times [6] Cut yarn leaving a few inches. Use a darning needle to thread through the outside loops of the remaining 6 stitches, pull tight to close. Use the needle to pull the yarn end up into the head to finish off.
Special Tip: With your fingers, gently press the eyes into the head so they are slightly recessed for a more realistic appearance.
Antlers (Make 2)
Using 7 mm crochet hook and Alize Velluto #329 (Brown):
Round 14 sc in magic ring [4](4)
Round 2Inc, 3 sc [5](5)
Round 3Inc, 4 sc [6](6)
Round 4Inc, 5 sc [7](7)
Round 5Inc, 6 sc [8] Fasten off and leave a long tail for sewing.
Ears (Make 2)
Using 7 mm crochet hook and Alize Velluto #60 (Black):
Round 15 sc in magic ring [5](5)
Round 25 sc around [5] – 1 round
Round 3Inc, 1 sc, inc, 1 sc, inc [8](8)
Round 42 sc, inc, 3 sc, inc, 1 sc [10](10)
Round 510 sc around [10] – 1 round
Round 6(dec) repeat 5 times [5] Fasten off and leave a long thread for sewing.
Arms (Make 2)
Using 7 mm crochet hook and Alize Velluto #329 (Brown):
Round 15 sc in magic ring [5](5)
Note: You will now continue to work with half double crochets. Any increases will be half double crochet increases, and any decreases will be half double crochet decreases.
Round 2(inc) repeat 5 times [10 hdc](10)
Rounds 3–410 hdc around [10] – 2 rounds
Round 53 hdc, dec, 3 hdc, dec [8] Change yarn to Alize Velluto #62 (Cream) or #60 (Black):
Rounds 6–108 hdc around [8] – 5 rounds Fold the arm in half and crochet through two layers with 4 sc. Fasten off and leave a long thread for sewing.
Tail
Using 7 mm crochet hook and Alize Velluto #60 (Black):
Round 14 sc in magic ring [4](4)
Round 2(inc) repeat 4 times [8](8)
Round 38 sc around [8] – 1 round
Round 4(dec) repeat 4 times [4] Change yarn to Alize Velluto #62 (Cream):
Rounds 5–74 sc around [4] – 3 rounds Fold the tail in half and crochet through two layers with 2 sc. Fasten off and leave a long thread for sewing.
Legs and Body
Using 7 mm crochet hook and Alize Velluto #329 (Brown):
Round 16 sc in magic ring [6](6)
Note: You will now continue to work with half double crochets. Any increases will be half double crochet increases, and any decreases will be half double crochet decreases.
Round 2(inc) repeat 6 times [12 hdc](12)
Rounds 3–512 hdc around [12] – 3 rounds
Round 6(dec) repeat 6 times [6] Change yarn to Alize Velluto #62 (Cream):
Rounds 7–176 hdc around [6] – 11 rounds
Round 18(inc) repeat 6 times [12](12)
Round 19(1 hdc, inc) repeat 6 times [18](18)
Round 20(8 hdc, inc) repeat 2 times [20](20)
Round 2120 hdc around [20] We are now done with the first leg. Fasten off and cut the yarn.
Important: The legs don’t get filled with stuffing.
Crochet the second leg by repeating rounds 1-21.
Round 221 ch, 20 hdc on the first leg, 1 hdc in chain of air loops, 20 hdc on the second leg, 1 hdc on the back chains of air loops [42](42)
Round 2342 hdc around [42] – 1 round
Round 24(12 hdc, dec) repeat 3 times [39](39)
Round 2539 hdc around [39] – 1 round
Note: There may be a hole between the legs. This can simply be closed at the end by sewing. Gently knot each leg.
Round 26(11 hdc, dec) repeat 3 times [36] In this round, begin crocheting the black spots on the body using #60 (Black). Stitches marked with blue color indicate the black spots.
Round 276 hdc, 13 hdc, 17 hdc [36] – 1 round
Round 284 hdc, dec, 2 hdc, 2 hdc, dec, 4 hdc, dec, 4 hdc, dec, 4 hdc, dec, 4 hdc, dec [30](30)
Round 299 hdc, 5 hdc, 16 hdc [30] – 1 round
Round 30(3 hdc, dec) repeat 6 times [24](24)
Round 3124 hdc around [24] – 1 round
Round 32(2 hdc, dec) repeat 6 times [18](18)
Round 3318 sc around [18] – 1 round Fold the body in half and crochet through two layers with 9 sc. Fasten off and leave a long thread for sewing.
Assembly
Step 1Attaching the Antlers: Attach the antlers between rounds 13 and 15, at a distance of 6 stitches from each other. Secure them with pins first, then sew them in place. Weave in the yarn ends.
Step 2Attaching the Ears: Attach the ears between rounds 13 and 14. Secure them with pins, sew them in place, and weave in the yarn ends.
Step 3Creating the Nostrils: Make the nostrils on the cow’s nose by marking points with pins between rounds 3 and 4. The distance between them should be 4 stitches. Make 5-6 stitches with thread from one pin to the other pin to create the nostril detail.
Step 4Attaching the Head: Attach the cow’s head to the lovey body between rounds 11 and 12. Make sure the eyes are looking straight ahead and the right side of the lovey is facing you. Sew securely and weave in the yarn ends.
Step 5Attaching the Arms: Attach the arms between rounds 29 and 31. Secure them with pins first, then sew them in place. Weave in the yarn ends.
Step 6Attaching the Tail: Attach the tail between rounds 23 and 24. Secure with pins, sew in place, and weave in the yarn ends.
From the collection
Finishing
- Insert the safety eyes into the head while there's still an opening to reach through.
- Stuff the head and the body section firmly, then close the openings so the stuffing stays put.
- Weave in every loose yarn end from the antlers, ears, arms, and tail before sewing everything together.
Why it works
The head's increases space out as it grows: single increases, then spaced with one stitch, then two. That's the standard way amigurumi rounds curve into a sphere.
The ears include one plain round with no increases, between two rounds that do increase.
The antlers increase on one side each round, not spaced evenly, pulling the shape into a point.
What it becomes
- A crib-side companion a baby can grip, chew, and eventually drag from room to room.
- A baby-shower gift that pairs well with a set of burp cloths or a swaddle blanket.
- A travel comfort object small enough to clip onto a diaper bag or stroller.
Original pattern: https://amigurumicorner.com/crochet-cow-lovey-pattern-soft-baby-security-blanket-tutorial/
FAQ
Is this pattern beginner-friendly?
It's listed as beginner to intermediate, so the techniques are approachable with a little amigurumi experience. The hardest parts are the ear shaping and keeping antler placement even.
What size hook does this use?
A 7mm crochet hook throughout, which keeps stitches quick and the fabric dense for stuffing.
Can I use a different yarn than Alize Velluto?
The pattern lists Bernat Blanket Sparkle, Bernat Blanket Big Ball, Premier Parfait XL, and Premier Basix Chenille. Any of those paired with a 7mm hook should behave similarly.
Why do the ears include a round with no shaping?
That plain round lets the ear flatten slightly before the next increases reshape it. It's a small pause in an otherwise steadily increasing piece.