
Free Pattern
Step-by-Step
Crochet
AmigurumiA plush crochet turtle amigurumi pattern for the collection
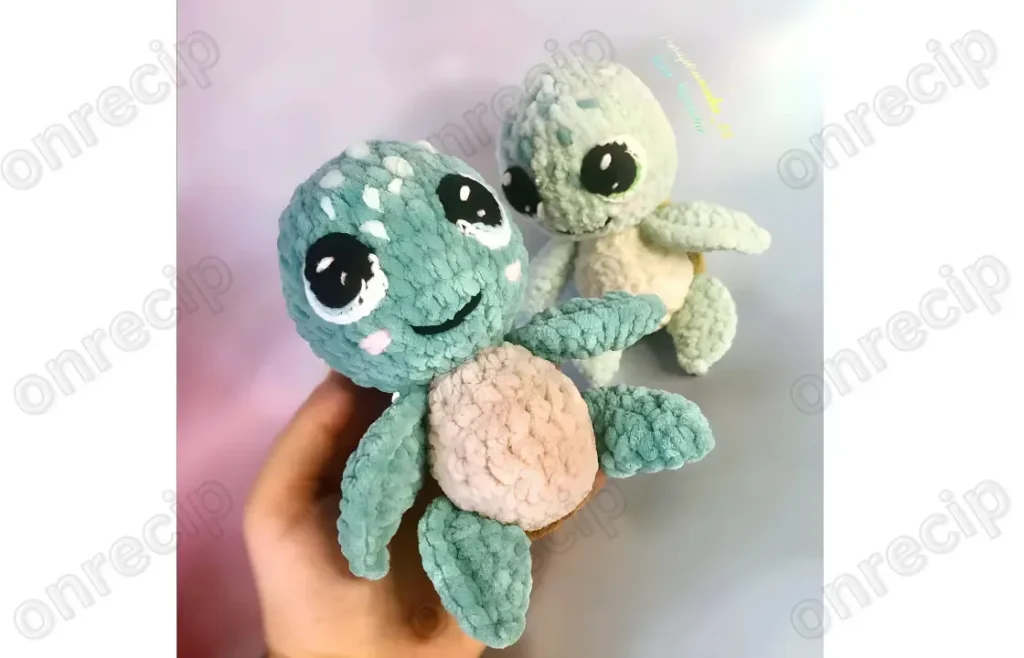
A plush turtle amigurumi worked in a few simple parts with a domed shell and soft stuffed body.
- Level
- Intermediate
- Time
- 4-6 hours
- Hook
- 4 mm
- Yarn
- Worsted
Pattern highlights
- Start the head with a magic ring, then work increase rounds until it reaches its full width.
- Keep working straight rounds through the bias loop section before shaping the rest of the head.
- Chain to start the shell, then build it flat in rounds around both sides of that chain.
- Shape the shell's dome by increasing at the short ends with taller stitches in between.
- Work the tummy as its own flat piece to close the underside later.
- Stuff the head and shell separately before joining them into one solid turtle body.
- Finish by sewing the tummy in place and securing any last seams.
About This Pattern
Every notebook of amigurumi needs a slow-moving creature, and this turtle earns its page. The body uses plush yarn for softness, with a thinner cotton yarn for crisp accents. I keep pieces like this filed next to other dome-shaped animals — turtles, snails, the occasional ladybug. It is not a weekend-afternoon toy. The shell alone asks for patience. But patience is half the appeal of amigurumi anyway.
The techniques stack up fast here. The head starts in a magic ring. It grows through standard increase rounds, then settles into straight single crochet — the bias loop section. The shell is worked flat, starting from a six-chain. It builds in rounds around both sides of that chain, like a flat oval. Increases cluster at the two short ends, which is how the dome keeps its curve. Two hook sizes keep the plush and cotton yarns each behaving correctly.
What comes off the hook is a small, solid turtle with real heft for its size. The shell sits high and rounded, more architecture than accessory. The tummy stays plain and soft — a quiet contrast to the shell's busy increases. Fiberfill gives the whole shape its weight, so it sits rather than flops. It reads less like a toy and more like a small sculpture that happens to be huggable.
Worth knowing
What I like about this turtle is the shell. Working it flat, from a chain, is a small puzzle every time. Single crochet, half double, and double crochet combine in the same round. The stitch heights shift to curve the dome without extra shaping rounds. The head is calmer — a standard magic ring sphere. But the bias loop section gives it a quiet visual seam, saving you from a perfectly featureless ball. Mixing plush yarn with a thinner cotton means two tensions to manage. I found that satisfying rather than annoying. It is the kind of make where the shell teaches you something and the head lets you rest.
Common mistakes
- Losing count in magic ring Use a stitch marker at the start of every round. The increases compound fast and a miscount shows by the fourth round.
- Flattening the shell's dome Don't skip the taller hdc and dc stitches along the sides. They're what lifts the shell instead of leaving it flat like the tummy.
- Working the chain's far side wrong When you turn to work the second side of the starting chain, go into the remaining loop of each stitch, not the stitch you just made.
- Losing the bias loop line Keep the marker on the same stitch column through the straight rounds, or the subtle seam line on the head will wander.


Intermediate
Progress Tracker
0 of 0 rounds
Tap a round to tick it off — your place is saved on this device.
The kit
- Plush yarn 100g/120m.
- Semi-cotton yarn Yarnart Jeans 50g/160m.
- Hook 4 mm and 1.75 – 2 mm.
- Fiberfill.
- Needle with a wide eye for sewing details.
- Marker (pin) to mark the beginning of the row.
- Scissors.
Head
Round 19 sc in MR (9)
Round 29 inc (18)
Round 3(2 sc, inc)*6 (24)
Round 4(3 sc, inc)*6 (30)
Rounds 5–730 sc (3 rows) bias loop
Round 8(4 sc, inc)*6 (36)
Rounds 9–1036 sc (2 rows) bias loop
Round 11(4 sc, dec)*6 (30)
Round 12(3 sc, dec)*6 (24)bias loop
Round 13(2 sc, dec)*6 (18)Insert filler.
Round 14(1 sc, dec)*6 (12)
Round 156 dec (6)
Shell
Rnd 1. 6 ch
Round 2We start knitting from the second ch from the hook: 1 sc, 2 hdc, 1 sc, 3 sc in one loop, 1 sc, 2 hdc, 1 sc, 3 sc in one loop (in the one that we skipped starting to knit from the second loop) (14)
Round 3hdc, 2 dc, 1 hdc, 3 inc , 1 hdc, 2 dc, 1 hdc, 3 inc (20)
Round 4hdc, 2 dc, 1 hdc, (1 sc, inc)*3, 1 hdc, 2 dc, 1 hdc, (1 sc, inc)*3 (26)Loop offset sc.
Round 5hdc, 4 dc, 1 hdc, inc, 2 sc, inc, 2 sc, one increase of 1 sc and 1 hdc, 4 dc, (2 hdc, inc hdc) * 3 (32)
Round 61 slst, 20 sc, inc hdc , 2 hdc, 4 inc hdc , 2 hdc, inc hdc, 1 sc (38)
Round 738 sl st behind the front wall of the loop
Round 83 sl st behind the front wall of the loop, ch, cut the thread.
Tummy
Ready to Learn More? Open the next page for Further Guidance!
Pages: 1 2
Finishing
- Weave in any loose ends from yarn changes before stuffing starts.
- Stuff the head and shell firmly with fiberfill, working it into the dome's curve so the shell doesn't collapse flat.
- Sew the tummy into place along the open edge, then close the final seam with the wide-eyed needle.
Why it works
The head increases every round at first, the usual way to build a sphere, then holds its stitch count steady for several rounds — that flat stretch is the bias loop section.
The shell starts flat, from a short chain, and is worked around both sides of it, which is how one piece becomes a solid oval instead of two side panels.
The shell's increases sit only at the short ends, with taller stitches along each side, which lifts the center into a dome instead of a flat disk.
What it becomes
- A shelf companion for a desk or reading nook, paired with other slow-built amigurumi animals.
- A soft weight for a bookshelf, standing in for a paperweight without the chill of glass or metal.
- A gift for a child's room, parked next to a stuffed animal collection rather than the toy bin.
Original pattern: https://onrecip.com/plush-turtle-free-amigurumi-pattern/
FAQ
Why does the shell start with a chain instead of a magic ring?
A flat oval needs two straight sides to grow from, and a chain gives you that start. A magic ring would only ever make you a circle, not an oval.
What is the bias loop section in the head?
It's the stretch of straight single crochet rounds after the head's increases finish. It reads as a subtle seam line rather than a plain ball shape.
Do I need both hook sizes, or can I use one?
The smaller hook keeps the thinner cotton yarn's stitches tight and even. The larger hook matches the plush yarn's thickness, so swapping sizes keeps both fibers looking correct.