
Free Pattern
Step-by-Step
Crochet
AmigurumiSmall stuffed cat amigurumi pattern for beginners
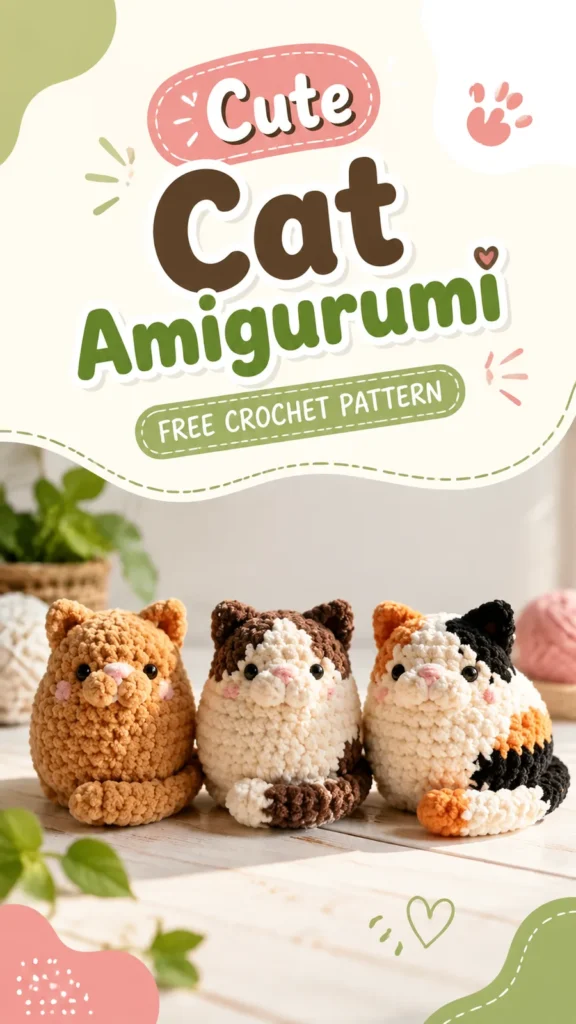
A beginner cat amigurumi pattern worked in continuous single crochet rounds.
- Level
- Beginner
- Time
- 4-6 hours
- Hook
- 3.25 mm
- Yarn
- Worsted
Pattern highlights
- Start the body at the base and work upward in continuous rounds without joining or turning.
- Increase steadily through the early rounds to widen the body into its rounded middle.
- Shift to decreases in the later rounds to pull the fabric inward and form the head.
- Set the body aside and crochet two small ears and four small legs separately, each worked in short rounds.
- Stuff the body gradually as you close the top, shaping it with your fingers as you go.
- Attach the ears near the top of the head, the legs around the lower body, and the tail where it suits the silhouette.
- Finish with embroidered facial details so the cat gets its expression last.
About This Pattern
Every notebook needs a starter amigurumi, and this cat earns the spot. It is the kind of pattern I'd hand to someone who owns a hook but has never shaped a head out of single crochet. Small, round, forgiving. Nothing about it asks for advanced math or a second skein just to test an idea.
The technique here is continuous rounds, no joining, no turning, just a stitch marker tracking the start of each round. Increases widen the body through the middle rounds, then decreases pull the top back in to form the head. An invisible decrease using front loops only keeps that shaping smooth instead of pointed.
What comes out the other end is a compact, oval-bodied cat with upright ears and a curved tail, built to hold its stuffing without sagging. It photographs like the miniature crochet cats it was modeled after. Plush chenille yarn gives it a fuzzier finish; smooth cotton or acrylic makes counting stitches easier.
Finished size: approximately 4 inches (10 cm) tall. Gauge: approximately 20 single crochet stitches and 22 rounds in 4 inches (10 cm). This pattern uses US crochet terminology.
Worth knowing
I like projects where the shaping does the talking, and this one shapes itself entirely through increase and decrease math. Watch the body round out through the middle rows, then watch it pull back in for the head, no separate pieces required until the ears and tail join in. The invisible decrease is worth practicing here specifically, since front-loop-only shaping is what keeps the head rounded instead of ridged. Two tiny ears worked in three short rounds each give you a quick, satisfying finish before you commit to the body. It is a small enough project that mistakes in tension show up fast, which actually makes it a good teacher. Beginner-friendly, but not boring to make.
Common mistakes
- Losing track of the round start Keep the stitch marker in the first stitch of every round and move it forward each time. Skipping this makes continuous rounds impossible to count.
- Decrease rounds look pointed, not rounded Use the invisible decrease through front loops only instead of a standard decrease. It distributes the shaping more smoothly.
- Embroidered face comes loose later Secure both yarn ends firmly inside the stuffed body rather than just at the surface. A quick knot on the outside will not hold.
- Body ends up flat instead of round Add stuffing in small amounts throughout the closing rounds, not all at once at the end. Shape with your fingers as you add it.


Beginner
Progress Tracker
0 of 0 rounds
Tap a round to tick it off — your place is saved on this device.
The kit
- Worsted weight yarn in main cat color, approximately 70 yards (64 meters)
- Small amount of contrast yarn for ears and facial details
- Polyester fiberfill stuffing
- 3.25 mm crochet hook (US D-3)
- Yarn needle
- Stitch marker
- Embroidery thread for facial features
Body and Head
Work in continuous rounds. Do not join rounds. Place a stitch marker in the first stitch of each round.
Round 1Make MR, 6 sc into ring. (6)
Round 2Inc in each stitch around. (12)
Round 3(Sc in next stitch, inc) repeat 6 times. (18)
Round 4(Sc in next 2 stitches, inc) repeat 6 times. (24)
Rounds 5–8Sc around. (24)Special stitch - Invisible decrease: Insert the hook into the front loop only of the next two stitches, yarn over, pull through both loops, yarn over again, and complete as a single crochet. This creates smoother shaping.
Round 9(Sc in next 2 stitches, dec) repeat 6 times. (18)
Round 10(Sc in next stitch, dec) repeat 6 times. (12)Add stuffing firmly before closing the body.
Round 11Dec around. (6)FO and weave in the yarn end.
Ears Make 2
Round 1Make MR, 4 sc into ring. (4)
Round 2(Sc, inc) repeat 2 times. (6)
Round 3Sc around. (6)
FO leaving a long tail for sewing.
Legs Make 4
Round 1Make MR, 6 sc into ring. (6)
Rounds 2–3Sc around. (6)Add a small amount of stuffing if desired.
FO leaving a sewing tail.
Crochet Construction and Stitch Analysis
The visible style of this type of cat toy is best recreated with a compact amigurumi structure. The main body is crocheted as one continuous piece, while the ears, legs, and tail are made separately and attached afterward.
Body: Rounded tube shape worked from the bottom upward in continuous rounds.
Head shaping: Created by increasing stitches around the center and decreasing toward the top.
Ears: Small triangular pieces made with short rounds and attached near the top of the head.
Facial details: Embroidered eyes, nose, and whisker details create a soft handmade expression.
Texture: Tight single crochet stitches provide the dense fabric needed for stuffed toys.
Pro Tip: For a smoother amigurumi shape, keep your tension firm and use a stitch marker at the beginning of every continuous round. Small changes in tension can noticeably affect the finished size.
Tail
Chain 10.
Starting in the second chain from hook, work 9 sc across.
FO leaving a long sewing tail.
Assembly
Step 1Sew the ears to the top sides of the head area.
Step 2Attach four legs evenly around the lower body.
Step 3Sew the tail to the back of the cat and shape it into a gentle curve.
Step 4Embroider eyes, a small nose, and whiskers using yarn or embroidery thread.
Safety NotePlastic safety eyes may not be suitable for babies or children under three years old. For baby-safe versions, use securely embroidered eyes and facial details instead.
Finishing
- Weave in the starting tail from the magic ring before you begin stuffing, so it does not get buried loose.
- Stuff the body gradually as the decrease rounds close the head, checking firmness before the opening shrinks too far to adjust.
- Sew the ears in place near the top of the head, then embroider the eyes, nose, and whiskers last to set the expression.
- After assembling the cat, gently adjust the stuffing to create a smooth rounded shape. Lightly steam blocking is not usually required for amigurumi, but careful shaping with your fingers can improve the final appearance.
- care, hand washing with mild soap is recommended for stuffed crochet toys. Allow the piece to air dry completely while reshaping the body if needed.
Why it works
The body starts with 6 single crochets into a magic ring, then doubles every round early on, which is what produces the oval widening rather than a straight tube.
No round is joined or turned; the stitch marker exists only because continuous rounds have no other way to mark where one round ends and the next begins.
The ears are worked as separate flat-ish pieces in just three rounds each, kept small on purpose so they read as triangular once sewn flat against the curve of the head.
What it becomes
- A soft toy for a toddler's shelf, small enough to tuck into a diaper bag alongside a board book.
- A desk companion for a crochet-loving coworker, paired with a tiny crocheted mouse or ball of yarn as a set.
- A travel-size amigurumi gift that fits in a stocking-sized gift bag with a handwritten care note.
Original pattern: https://duniarecipe.com/cute-cat-amigurumi-crochet-pattern-free-diy-cat-toy-tutorial/
FAQ
Can I use plush chenille yarn instead of worsted weight?
Yes, plush yarn gives it a fuzzier stuffed-animal look. Just know that a fuzzier yarn makes stitch counting harder, so go slow with the increases.
Why does the pattern use a smaller hook than usual?
A smaller hook tightens the fabric so stuffing doesn't show through the gaps between stitches. It's a standard amigurumi trick, not a typo.
What is the invisible decrease for, exactly?
It's a front-loop-only decrease that makes the head shaping look smoother than a regular decrease. I'd practice it once on scrap yarn before the real decrease rounds.
Do I need to join each round?
No, this pattern works in continuous rounds with no joining or turning. That's why the stitch marker matters so much, it's your only marker of where rounds begin.