
Free Pattern
Step-by-Step
Crochet
AmigurumiSunflower Turtle Amigurumi: A Petal-Topped Shell Pattern
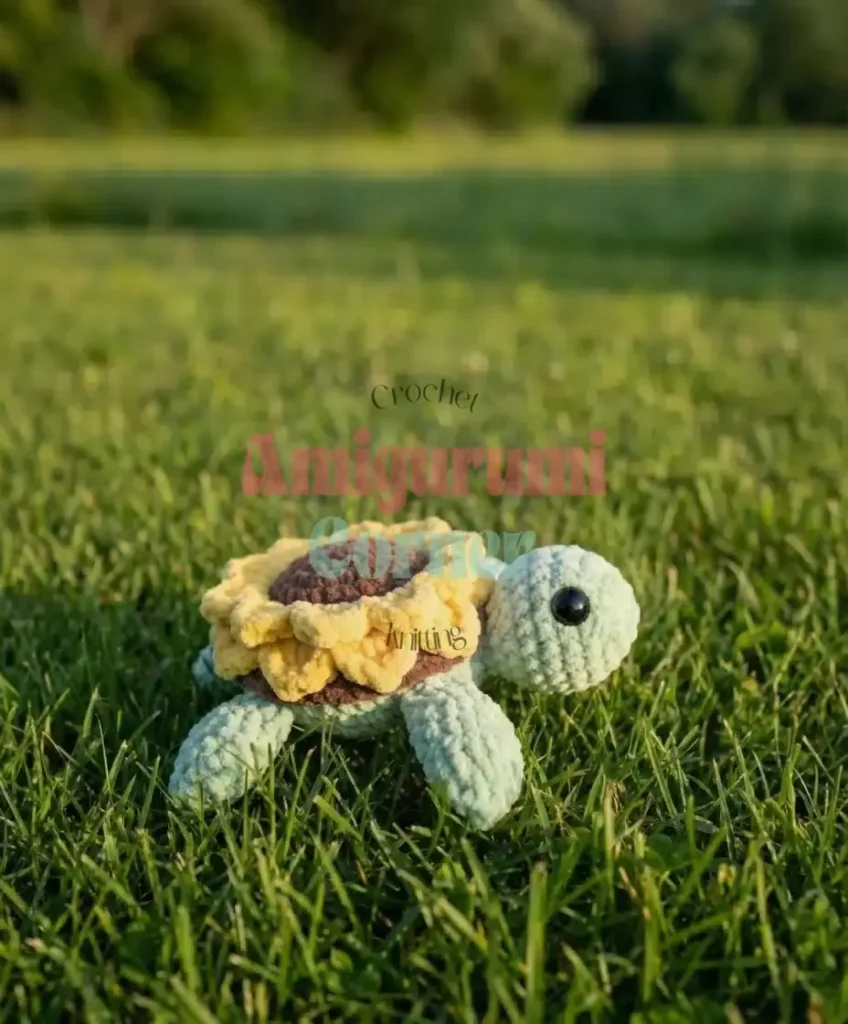
A small crochet turtle with a sunflower shell, built in continuous rounds with safety eyes.
- Level
- Intermediate
- Time
- 4-6 hours
- Hook
- 4.5 mm
- Yarn
- Worsted
Pattern highlights
- Start the shell and body as one continuous piece, beginning in the shell's brown or chocolate color.
- Make four flat fins separately, working two short rows per fin before setting them aside.
- Crochet the head on its own in a spiral, building up through increase and even rounds.
- Set the safety eyes into the head before closing it, since stuffing comes before attachment.
- Attach the head to the body in two stages, slip-stitching the top stitches first for a stable neck.
- Make the short tail last, leaving it unstuffed and a long tail for sewing it on.
- Crochet two flower centers and layer them to build the double petal effect on the shell.
About This Pattern
I keep a shelf for the pieces that mix a body with something botanical. This turtle belongs there. The shell doubles as a sunflower, which is a tidier solution than I expected the first time I read through it. It is the kind of pattern that makes me want to clear space before I even pick up the hook.
The techniques are the usual amigurumi toolkit, but used with intent. Magic ring starts, continuous spiral rounds, increases spaced to dome a shell, and a flat two-row piece for the fins. The head attaches in two stages, which is not something I see often. That detail is worth slowing down for.
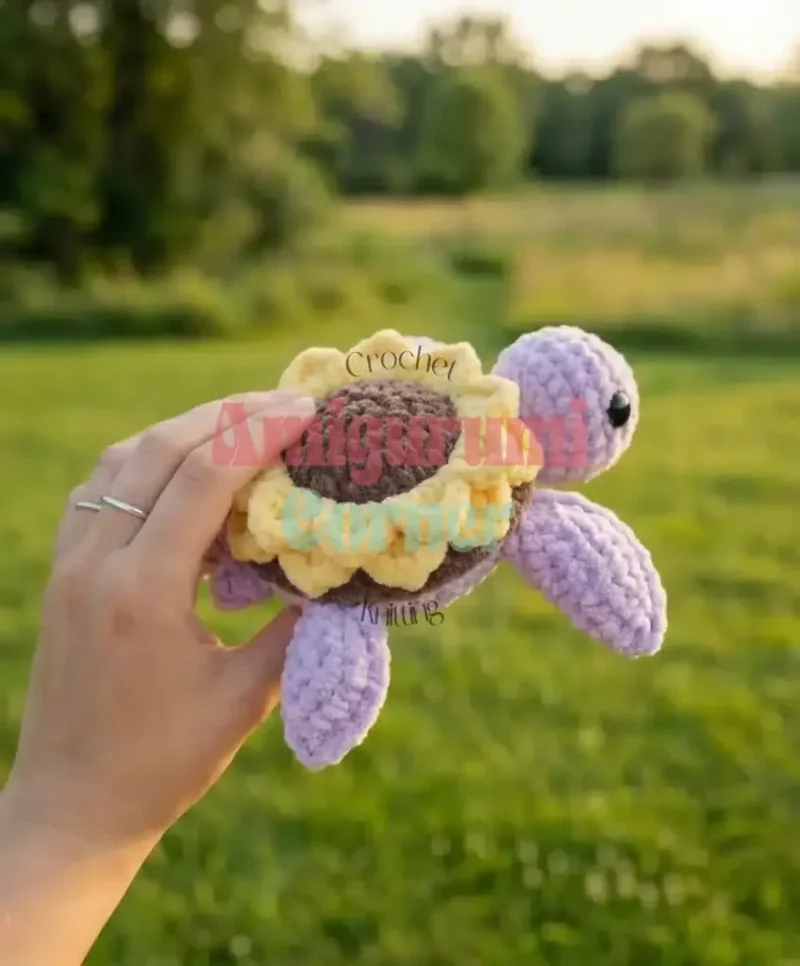
What comes out the other end is a small turtle, about 5 to 6 inches tall, with a layered sunflower face for a shell. Four fins, a short tail, safety eyes set into a head worked separately. It reads as fussy on paper. In the hand it is compact and oddly sturdy.
Worth knowing
The satisfaction here is in the two-stage head attachment. Slip-stitching the top four stitches first, then finishing the join, gives a neck line that actually looks like a neck instead of a lump. The fins are a nice change of pace too, worked flat over two rows with a single increase row instead of the usual spiral. And the flower center, made twice and doubled up for the shell, turns a round piece into something with real dimension. Nothing here is hard on its own. It is the sequencing that makes the piece feel considered rather than just assembled.
Common mistakes
- Losing the spiral marker on the body Move the stitch marker up at the end of every round on the shell and head. It is easy to drift a stitch without noticing.
- Turning the fins the wrong way Remember the fins are flat, not spiraled, so chain and turn at the end of each row. Skipping the turn warps the shape.
- Setting eyes before stuffing enough Push stuffing in around the eye posts before you close the head. Thin stuffing there lets the eyes sit crooked.
- Rushing the two-stage head join Flatten the head opening and line up the eyes level before placing the first slip stitch. A skewed start throws off the whole neck.
- Overstuffing the tail The tail is meant to stay unstuffed for a flatter finish. Leave it soft and just close the opening with the sewing tail.


Intermediate
Progress Tracker
0 of 0 rounds
Tap a round to tick it off — your place is saved on this device.
The kit
Crochet hook
- 4.5mm (adjust size based on your tension and yarn brand)
Tools
- Tapestry needle for weaving in ends
- Polyfil or preferred stuffing
- 12mm safety eyes (2)
- Stitch marker
- Scissors
Fins (Make 4)
Make 4 in body color
Step by step: The shell and body are worked as one piece Start with shell color (brown/chocolate):.
Round 1In a magic ring, sc 5. DO NOT JOIN. (5)
Round 2Ch 1 and turn. Inc in each st across. Fasten off. (10)Step by step: [Sc 1, inc] repeat around. (24).Weaving the tails: On two of the fins, weave the middle tail from making the magic circle to the end with the finished tail. For the other two fins, weave both ends to the other side. The ends will go inside the turtle as you attach them to the body.
These flat fins will be attached with the flat edge facing the tail end of the turtle and the rounded edge facing forward.
Head
Make 1 in body color
Round 1In a magic ring, sc 8. (8)
Round 2Inc in each st around. (16)
Round 3Sc in each st around. (16)
Round 4Sc in each st around. (16)
Round 5Sc in each st around. (16)Step by step: In the front loop only, sc in each st around. (24).This creates a ridge where the shell color ends. Change to body color before you begin the next round.(Color Change to Body Color): Working in the back loop only from Round 6, sc in the first 10 sts.
Attach the bottom half of the turtle’s neck: Using slip stitches, attach through the top 4 stitches of the head’s opening. To do this, flatten the head opening so it’s level with the eyes. The top four stitches should align when the eyes are level and facing up. Insert your hook through one stitch on the head, then through the corresponding stitch on the body, pull yarn through and complete the slip stitch. Repeat for a total of 4 slip stitches.
Step by step: Continue with sc in the remaining 10 stitches. (24).
(Attaching Fins, Head, and Forming Body): This is the crucial assembly round. Follow carefully: Sc 2
Attach first fin (right back): Work through the first 2 stitches of the fin AND the next 2 stitches of the body simultaneously, creating 2 sc that go through both layers. The flat edge of the fin faces toward the tail, rounded edge faces forward.
Step by step: Sc 3.
Attach second fin (right front): Work through 2 fin stitches and 2 body stitches simultaneously with 2 sc.
Step by step: Sc 1.
Attach bottom of head: Work sc through the bottom 4 stitches of the head opening, going through both the head and body. This secures the head completely and leaves a small neck opening. Make sure the head is well-stuffed before completing this step.
Step by step: Sc 1.
Attach third fin (left front): Work through 2 fin stitches and 2 body stitches simultaneously with 2 sc.
Step by step: Sc 3.
Attach fourth fin (left back): Work through 2 fin stitches and 2 body stitches simultaneously with 2 sc.
Step by step: Finish the round with sc 2. (24).
Begin stuffing here: Before stuffing the body, make sure the head and neck have enough stuffing. The neck should be firm enough to support the head upright. Stuff the body as you continue to work.
Step by step: [Sc 1, inv dec] repeat around. (16); Continue stuffing the body firmly.
Insert 12mm safety eyes between rounds 2 and 3, spacing them about 5-6 stitches apart.
Round 6Inv dec in each st around. (8)
Round 7Sc in each st around. (8)Fasten off and weave the end inside. Stuff the head lightly before you attach it to the body. The head should be soft and slightly squishy, not firmly stuffed.
Tail
Make 1 in body color
Round 14 sc in a magic ring. (4)
Round 2[Sc 1, inc] × 2. (6)
Round 3Sc in each st around. (6)Fasten off, leaving a long tail for sewing. Do not stuff.
Flower Center (Make 2)
Make 2 in brown/chocolate yarn
Round 16 sc in a magic ring. (6)
Round 2Inc in each st around. (12)
Round 3[Sc 1, inc] × 6. (18)
Round 4[Sc 1, inc, sc 1] × 6. (24)
Round 5Sc in each st around. (24)Fasten off invisibly and weave in the ends. Make sure both circles are identical in size.
Double-Layer Petals
Special Stitch: Picot stitch (p): Ch 2, sl st in second chain from hook.
Assembly and Petal Construction:
Place both brown circles with right sides facing out (good sides showing). You will work the petals through both loops of both flower centers simultaneously, creating a stuffed flower.
Join yellow yarn (or your chosen petal color) into both loops of the aligned brown circles using a sl st.
Petal Pattern: Work the following pattern 12 times around the entire edge: [Ch 2, (dc, trc, p, trc, dc) in next st, ch 2, sl st in next st] × 12
As you work: When you are more than three-fourths done with the petals, begin stuffing the flower center through the opening. Continue working the petal pattern while stuffing, ensuring the flower is plump but not overstuffed. The petals should create a ruffled, dimensional sunflower effect.
Fasten off and weave in the ends securely.
Flower Variations
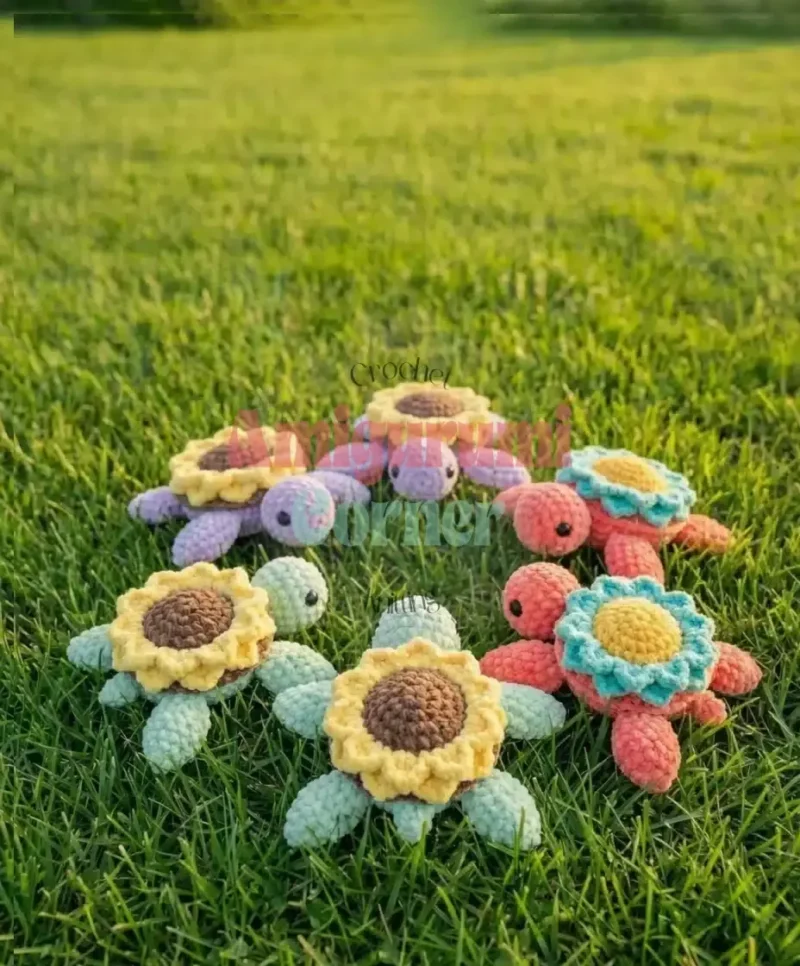
Daisy Style: Use white or cream for petals Use yellow for center Work only one layer of petals Multi-Color Sunflower: Alternate yellow and orange yarn every 3 petals
Creates a variegated petal effect Rose Style: Use pink or red for petals Use darker center color Work petals closer together (every stitch instead of every other)
Simple Flat Flower: Work petals on only one circle instead of two Sew or glue flat to shell Lighter weight and less yarn
Assembly
Step 1Attaching the Head (Round 7 & 8): Understanding the head attachment: The head is attached in two stages for maximum security and to create a natural-looking neck. Round 7 – Top attachment: Flatten the head opening so the eyes are level and on top
Step 2The top 4 stitches of the head will be slip-stitched to the body
Step 3Insert your hook through the first stitch on the turtle’s head
Step 4Insert through the corresponding stitch on the body
Step 5Pull yarn through both and complete the slip stitch
Step 6Repeat 3 more times for a total of 4 slip stitches Round 8 – Bottom attachment: When you reach the head position in Round 8, work regular sc through the bottom 4 stitches
Step 7Go through one stitch on the head, then through one stitch on the body
Step 8Complete the sc as normal
Step 9This method is stronger than slip stitches and fills in the bottom of the neck
Step 10There will be a small opening remaining – this is normal and creates the neck definition
Step 11Make sure the head is well-stuffed before completing this step
Step 12Attaching the Fins (Round 8): Fin positioning and technique: Understanding fin orientation: Each fin has a flat edge (the side where you worked increases in Round 2)
Step 13Each fin has a rounded edge (the original magic ring side)
Step 14The flat edge always faces toward the tail
Step 15The rounded edge faces forward
Step 16The fins are worked with the “right side” (good side) facing out Right-side fins vs. left-side fins: The attachment direction differs slightly for right and left fins: Right-side fins (right back and right front): Attach through the second fin stitch first, then the first stitch
Step 17This ensures proper orientation Left-side fins (left front and left back): Attach through the first fin stitch first, then the second stitch Attachment technique: When you reach a fin attachment point, hold the fin against the body
Step 18The flat edge should touch the shell, rounded edge pointing forward
Step 19The tails you wove to the side should be on the inside
Step 20Insert your hook through the first stitch of the fin (based on side)
Step 21Insert through the corresponding body stitch
Step 22Pull through both and complete the sc
Step 23Repeat for the second stitch
Step 24The single crochets should be visible underneath the fin in an unbroken row Checking your work: The fin should be touching the shell as you work
Step 25You should see an unbroken row of sc beneath the fin
Step 26The tails are inside the body
Step 27The fin sits at the correct angle (forward-facing) Fin placement order in Round 8: Right back fin (stitches 3-4)
Step 28Right front fin (stitches 8-9)
Step 29Left front fin (stitches 15-16)
Step 30Left back fin (stitches 20-21)
From the collection
Finishing
- Weave in ends from the fins and tail before they get buried under the shell.
- Stuff the head firmly as you close the final rounds, checking the eyes sit level.
- Slip-stitch the head to the body in its two stages, then attach the fins and tail last.
Why it works
The fins are worked flat, turning after each row, rather than in the spiral used everywhere else on the body.
The head increases steadily from its magic ring start through the early rounds, then holds a flat stitch count through the middle rounds to form a dome before attaching.
The two-stage slip-stitch join at the head's top stitches lets the neck sit at an angle instead of square to the body, which is why it is handled separately from the rest of the assembly.
What it becomes
- A desk companion that sits well next to a succulent or a small plant pot.
- A gift for someone who collects garden-themed amigurumi or sunflower decor.
- A soft addition to a nursery shelf, paired with other small stuffed animals.
Original pattern: https://amigurumicorner.com/sunflower-turtle-amigurumi-crochet-pattern/
FAQ
Why is the head attached in two stages?
It keeps the neck looking natural instead of stiff. The top stitches are slip-stitched first to anchor the angle, then the rest follows.
Why are the fins worked flat instead of in the round?
A flat two-row piece gives a simple, slightly curved shape without extra shaping. It is a quicker make than a spiraled piece would be.
Do I need to stuff the tail?
No, the pattern leaves the tail unstuffed. It is closed with the long sewing tail left after fastening off.
What gives the shell its sunflower look?
The flower center is made twice and layered, which is the double-layer petal effect described in the pattern. It sits on top of the body rather than replacing it.