Free Pattern
Step-by-Step
Crochet
BagsSunset coral gradient braided bag crochet pattern
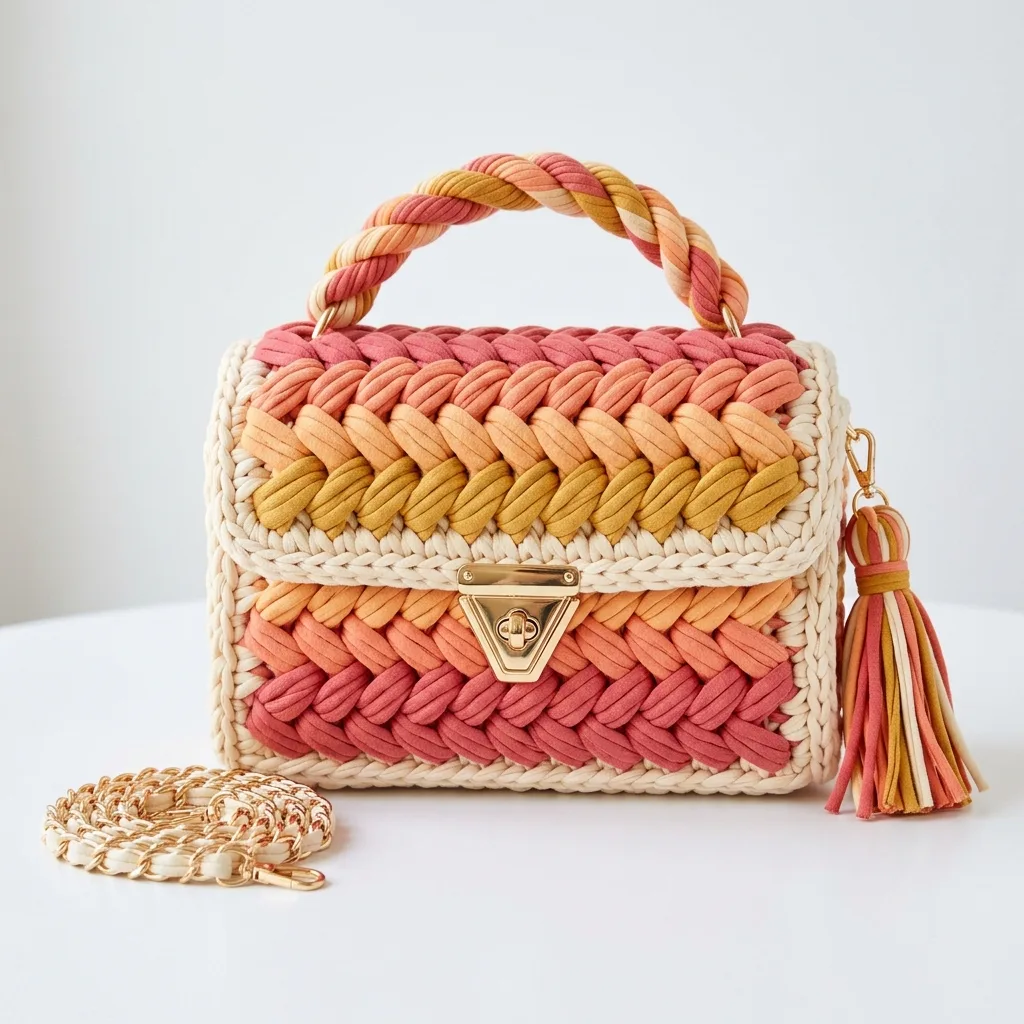
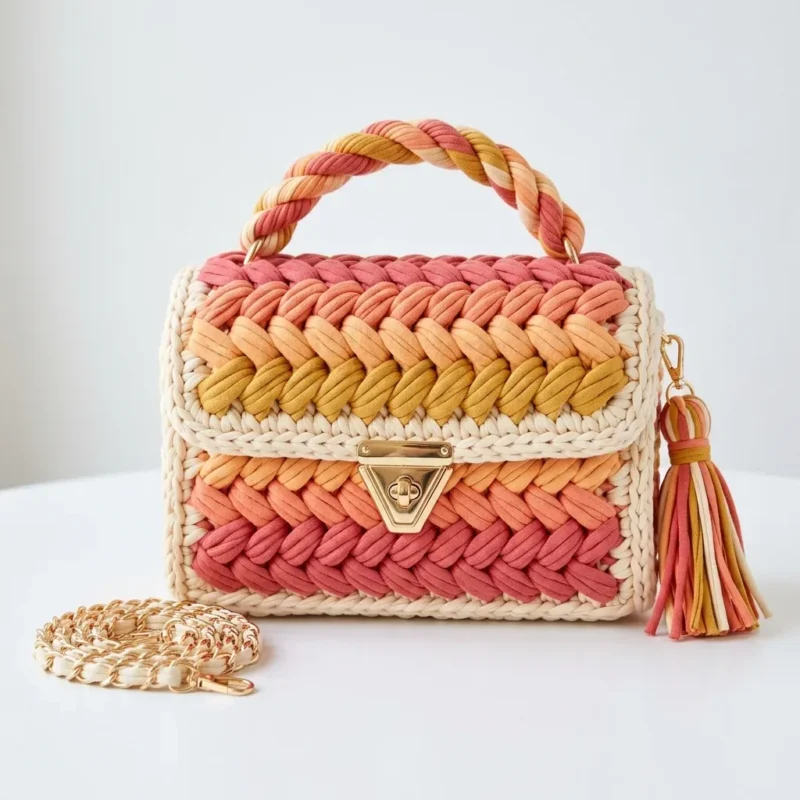
A gradient braided tote worked in t-shirt yarn, from cream to mustard, with a stiffened base.
- Level
- Intermediate
- Time
- 4-6 hours
- Hook
- 10 mm
- Yarn
- Super Bulky
Pattern highlights
- Start the base by working rounds with increases at each corner to shape a rectangle.
- Build the body upward through a few rounds of plain single crochet before the color work begins.
- Move into the gradient section, working puff stitches and changing colors every round or two.
- Shape the back panel flat in rows, starting with single crochet and moving into the puff stitch pattern.
- Attach the handles through the D-rings once the body is finished.
- Finish by adding the base stiffener and lining for structure.
About This Pattern
I keep a running list of t-shirt yarn makes. This bag earns a place near the top. Trapillo projects move fast under a chunky hook, so the scale feels different. This gradient piece sits between a craft-fair statement bag and an everyday market tote. It's the project I pick up when I want visible progress and shifting color. The colors move from cream to mustard, round by round.
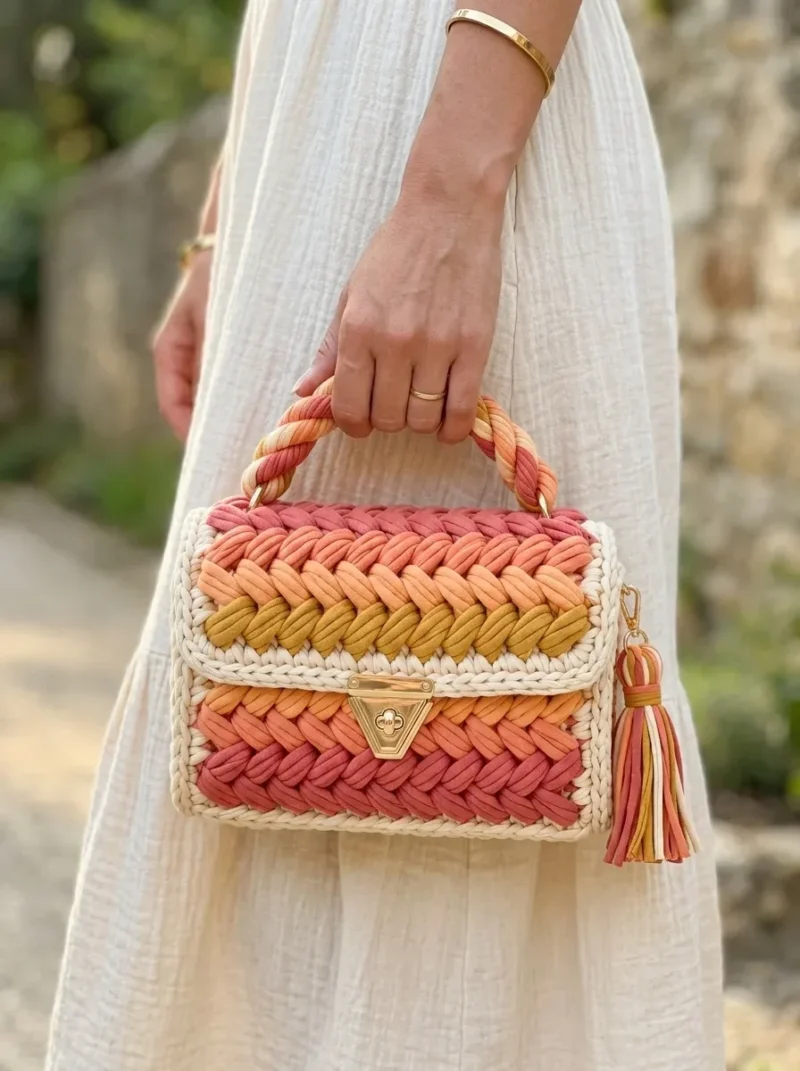
The finished bag is a rectangular tote with a braided, textured body. Two D-rings or O-rings anchor the handles at the top. A plastic canvas or cardboard insert stiffens the base, and a fabric lining keeps the inside tidy. The gradient runs from cream through dusty rose, coral, apricot, and mustard. It's a piece that looks hand-dyed, though it's really just color-blocked yarn.
Worth knowing
What I like here is the puff stitch gradient. Watching cream shift into rose, coral, apricot, and mustard feels like painting with stitches. The back-loop-only round is a small, satisfying trick: one round, and the base suddenly holds its shape. T-shirt yarn moves fast under a chunky hook, so the braided section grows visibly within an hour. I also like that the back panel breaks into flat rows after all those rounds. Add the D-rings and a stiffened base. This stops being a swatch exercise and becomes a bag I'd actually carry.
Common mistakes
- Losing count at the corners Count stitches after round 1 and place a marker at the start of the round. Recount if the corner increases feel uneven.
- Skipping the BLO round Working round 2 through both loops instead of back loops only leaves the base soft. Check that you're only picking up the back loop before you single crochet.
- Abrupt color jumps in the gradient Changing colors too suddenly breaks the ombre effect. Follow the color change pattern round by round so the gradient reads smoothly.
- Uneven puff stitch tension Pulling loops too tight or too loose makes the braided texture look lumpy. Keep your loops a consistent height before closing each puff.
- Treating back panel as a round Part 5 is worked in rows, so remember to turn at the end of each row. Forgetting to turn twists the puff stitch pattern.
Intermediate
Progress Tracker
0 of 0 rounds
Tap a round to tick it off — your place is saved on this device.
The kit
Yarn
- T-shirt yarn or trapillo, approximately 250g total
Colour A
- Cream or off-white (100g)
Colour B
- Dusty rose or coral pink (50g)
Colour C
- Soft coral or peach (50g)
Colour D
- Light orange or apricot (30g)
Colour E
- Golden mustard or ochre (30g)
- Popular t-shirt yarn brands include Hoooked Zpagetti, Lily Sugar’n Cream T-shirt yarn, or Bobilon. Any chunky ribbon-style yarn with similar weight will work beautifully.
Hook
- 10mm or 12mm crochet hook (adjust based on your yarn thickness and tension)
Notions
- Two small D-rings or O-rings for handle attachment
- Tapestry needle for weaving ends
- Stitch markers
- Scissors
Optional but Recommended
- Plastic canvas or cardboard for base stiffening
- Fabric lining material
- Gauge
- Gauge is flexible with t-shirt yarn because the material varies between brands. Work a small swatch of 10 single crochet stitches across 5 rows. Your swatch should measure approximately 4 inches by 3 inches . If your stitches are much larger, go down a hook size. If they’re tighter and smaller, go up a hook size.
Optional but Recommended
Plastic canvas or cardboard for base stiffening Fabric lining material Gauge
Gauge is flexible with t-shirt yarn because the material varies between brands. Work a small swatch of 10 single crochet stitches across 5 rows. Your swatch should measure approximately 4 inches by 3 inches . If your stitches are much larger, go down a hook size. If they’re tighter and smaller, go up a hook size.
Don’t stress too much about exact gauge here. This bag is forgiving, and slight size variations won’t affect the finished look.
Abbreviations and Stitch Definitions Let me define every stitch before we begin. You can refer back to this section anytime.
Ch = Chain. Yarn over, pull through the loop on your hook. This creates the foundation and adds height.
Sl st = Slip stitch. Insert hook into stitch, yarn over, pull through both the stitch and the loop on your hook. Used for joining and invisible movement.
Sc = Single crochet. Insert hook into stitch, yarn over and pull up a loop (2 loops on hook), yarn over and pull through both loops. One of the most basic stitches.
Hdc = Half double crochet. Yarn over, insert hook into stitch, yarn over and pull up a loop (3 loops on hook), yarn over and pull through all 3 loops. Slightly taller than single crochet.
Puff st = Puff stitch. (Yarn over, insert hook into stitch, yarn over and pull up a loop) 3 times in the same stitch (7 loops on hook), yarn over and pull through all 7 loops, chain 1 to secure. This creates the raised, braided texture you see on the bag front.
Inc = Increase. Work 2 stitches into the same stitch.
BLO = Back loop only. Insert your hook under just the back loop of the stitch instead of both loops.
Step by Step Crochet Pattern The Base
The base creates the rectangular bottom of your bag. We’ll work this flat in rows using Colour A (cream).
Round 1Ch 17. Sc in 2nd ch from hook and in each ch across. (16 sc)
Round 2Ch 1, turn. Sc in each st across. (16 sc)
Round 3through 8: Repeat Row 2. (16 sc per row) At the end of Row 8, do not fasten off. We’ll continue directly into the sides.
Your base should measure approximately 8 inches by 3 inches . If it’s significantly different, check your tension and adjust as needed.
Building the Sides
Now we transition to working in joined rounds around the entire base. This builds up the walls of the bag.
Part 4
Round 1Setup Round with Colour A Ch 1, do not turn. Work 2 sc in the corner stitch. Continue sc evenly along the short edge (approximately 6 sc), work 2 sc in the corner. Sc across the long foundation chain edge (16 sc), work 2 sc in the corner. Sc along the next short edge (6 sc), work 2 sc in the corner. Sc across the remaining long edge to meet your starting point. Sl st to join. (Approximately 52 sc)Count your stitches and place a marker at the beginning of the round.
Round 2Ch 1. Working in BLO only, sc in each st around. Sl st to join. (52 sc) Working in BLO creates a crisp edge at the base, helping your bag stand upright.
Round 3and 4: Ch 1. Sc in each st around through both loops. Sl st to join. (52 sc) The Gradient Braided Section
This is where the magic happens. We’ll work puff stitches in colour blocks, changing colours every round or two to create the gradient flow.
Round 5(Begin Colour B, dusty rose): Join Colour B. Ch 2 (counts as first part of puff). Work puff st in same st. *Skip 1 st, work puff st in next st.* Repeat around, adjusting as needed to end evenly. Sl st to join top of ch-2.The skipped stitches and puff stitches create that distinctive braided, herringbone look. Your stitch count will reduce slightly. Don’t worry. The puffiness compensates for the reduced count.
Round 6Continue with Colour B. Ch 2. Work puff st in each space between puff stitches from the previous round. Sl st to join.Round 7 (Change to Colour C, soft coral): Join Colour C. Repeat Round 6 pattern. Work puff stitches in the spaces between previous puffs.Round 8: Continue with Colour C. Repeat puff stitch pattern.Round 9 (Change to Colour D, light orange): Join Colour D. Repeat puff stitch pattern.Round 10 (Change to Colour E, golden mustard): Join Colour E. Repeat puff stitch pattern.
Round 11Switch back to Colour A (cream). Ch 1. Sc in each puff stitch and space around, working evenly to create a smooth edge for the flap section. Sl st to join. (Approximately 40 to 45 sc)Fasten off and weave in ends neatly.
The Front Panel
The front of the bag features the same gradient pattern but in a slightly different arrangement for visual interest.
Looking at your bag, identify the front panel (one of the long sides). You’ll work the front separately if desired, or the gradient rounds above have already created your front panel effect.
For this design, the front panel gradient flows upward from coral to rose, creating contrast with the flap which flows downward from rose to mustard.
The Flap The flap covers the top opening and holds the clasp hardware.
Part 5
Round 1With Colour A (cream), join yarn at the back panel top edge. Ch 1. Sc across the back panel only, approximately 16 to 18 stitches. Turn.
Round 2Ch 1. Sc in each st across. Turn. (16 to 18 sc)Row 3 (Begin Colour B): Join Colour B. Ch 2. Work puff stitch pattern across. Turn.Row 4: Continue puff stitch pattern with Colour B. Turn.Row 5 (Change to Colour C): Join Colour C. Continue puff stitch pattern. Turn.Row 6 (Change to Colour D): Join Colour D. Continue puff stitch pattern. Turn.Row 7 (Change to Colour E): Join Colour E. Continue puff stitch pattern. Turn.
Round 8Border with Colour A Join Colour A. Ch 1. Sc evenly around all edges of the flap, working 3 sc in each corner to create smooth edges. Sl st to join.Fasten off and weave in all ends.
The Twisted Rope Handle This handle uses all gradient colours twisted together for that gorgeous multicoloured rope effect.
Step 1: Cut 6 strands of t-shirt yarn, each approximately 40 inches long. Use 1 or 2 strands of each gradient colour (B through E).
Step 2: Gather all strands and tie a knot at one end. Secure this end to something stable, like a doorknob or the back of a chair.
Step 3: Hold the other end and begin twisting all strands together clockwise. Keep twisting until the yarn feels tight and wants to kink back on itself.
Step 4: Carefully fold the twisted rope in half, allowing the two halves to wrap around each other naturally. This creates the beautiful twisted rope effect.
Step 5: Knot both ends to secure.
Step 6: Thread each end through a D-ring, then fold the end back and secure by wrapping with matching yarn or stitching tightly.
Attaching Hardware
From the collection
Finishing
- Weave in every color-change tail with a tapestry needle before shaping the bag.
- Cut the plastic canvas or cardboard to fit, then slip it into the base along with the fabric lining.
- Attach the handles to the D-rings or O-rings and secure with a few extra stitches.
Why it works
Round 1 of the base works two single crochet into each corner stitch. That increase is what turns the foundation chain into a rectangle.
Round 2 works in back loops only. That single round creates the ridge separating the base from the side walls.
Part 5 works in rows, not rounds. It shapes only the back panel rather than the bag's full circumference.
What it becomes
- A market tote for grocery runs, roomy enough with the stiffened base to hold its shape.
- A weekend overnight bag, paired with simple knits so the gradient braiding stands out.
- A display piece at craft fairs, shown alongside other trapillo makes to show off the color blocking.
FAQ
Can I use regular yarn instead of t-shirt yarn?
You can try a chunky ribbon-style yarn of similar weight, but gauge and drape will shift. T-shirt yarn gives this bag its structure, so thinner yarn may need extra rounds or a smaller hook.
What if my base won't stand up straight?
Check that round 2 is worked in back loops only; that's the round that creates the stiffening ridge. Adding the plastic canvas or cardboard insert also helps it hold its shape.
Do I have to add the fabric lining?
No, the lining is listed as optional but recommended. It keeps items from poking through the braided puff stitches and tidies the inside.
How much yarn do the gradient colors actually need?
The materials list gives rough amounts, cream at 100g and the four accent colors at 30 to 50g each. Buy a little extra if your tension runs loose.