Free Pattern
Step-by-Step
Crochet
WearablesTerracotta Sunset Crochet Sneaker Boots Free Pattern
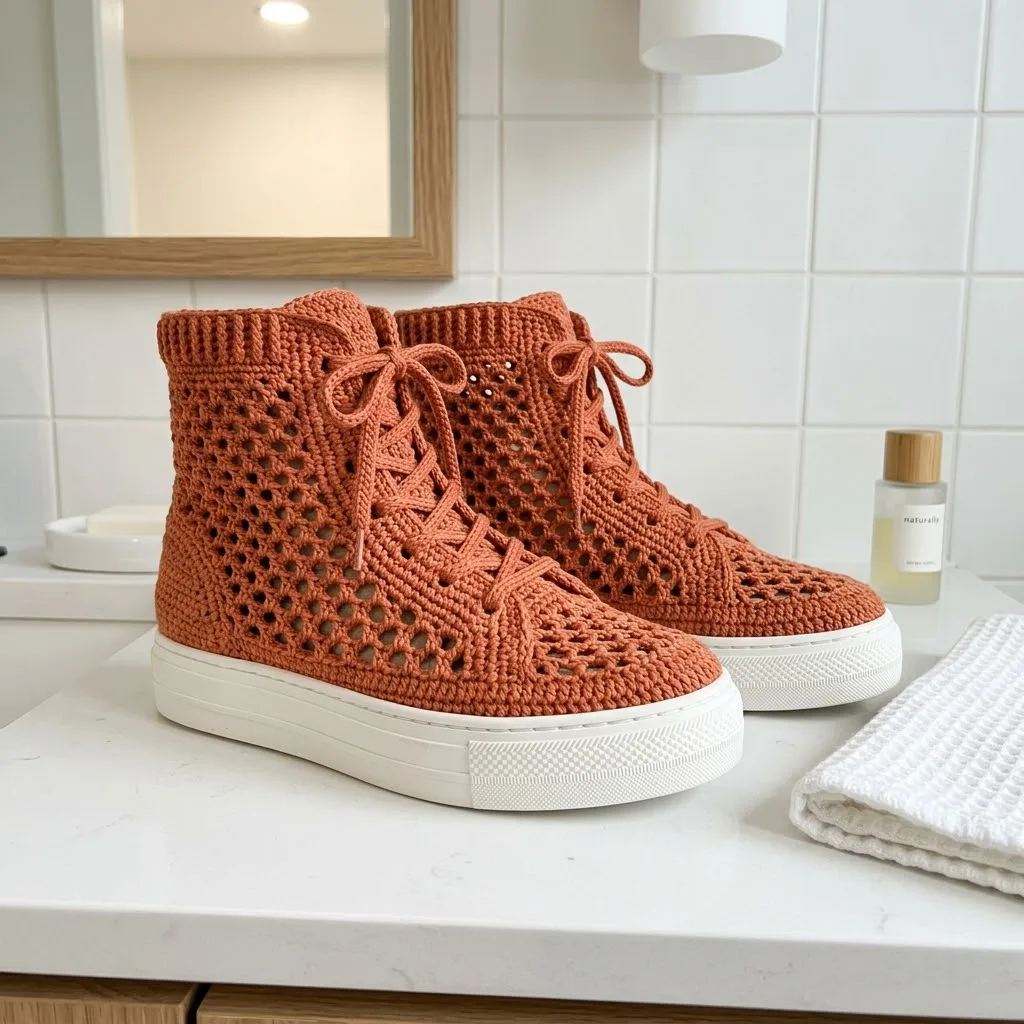
Crochet cozy terracotta sneaker boots with a sturdy rubber sole and cuffed ankle top. Free pattern with gauge, sizing tips, and full construction guidance.
Level IntermediateTime 4-6 HoursHook 4.0 mmYarn Worsted
Pattern highlights
- Work a gauge swatch first to confirm your stitches match the target before starting the sole.
- Crochet the sole in 7 rounds, attaching stitches directly around the pre-punched holes of the rubber base.
- Build the upper boot body over 5 rounds, working up from the sole into the ankle cuff.
- Check the fit against your foot periodically as the upper rounds progress to catch any sizing issues early.
- Finish the top edge to create the 5.5-inch cuff height once the upper rounds are complete.
- Crochet or braid your own cord for laces, working to about 60 inches in length.
- Weave in all ends securely, especially around the sole, then lace up and wear your finished boots.
About This Pattern
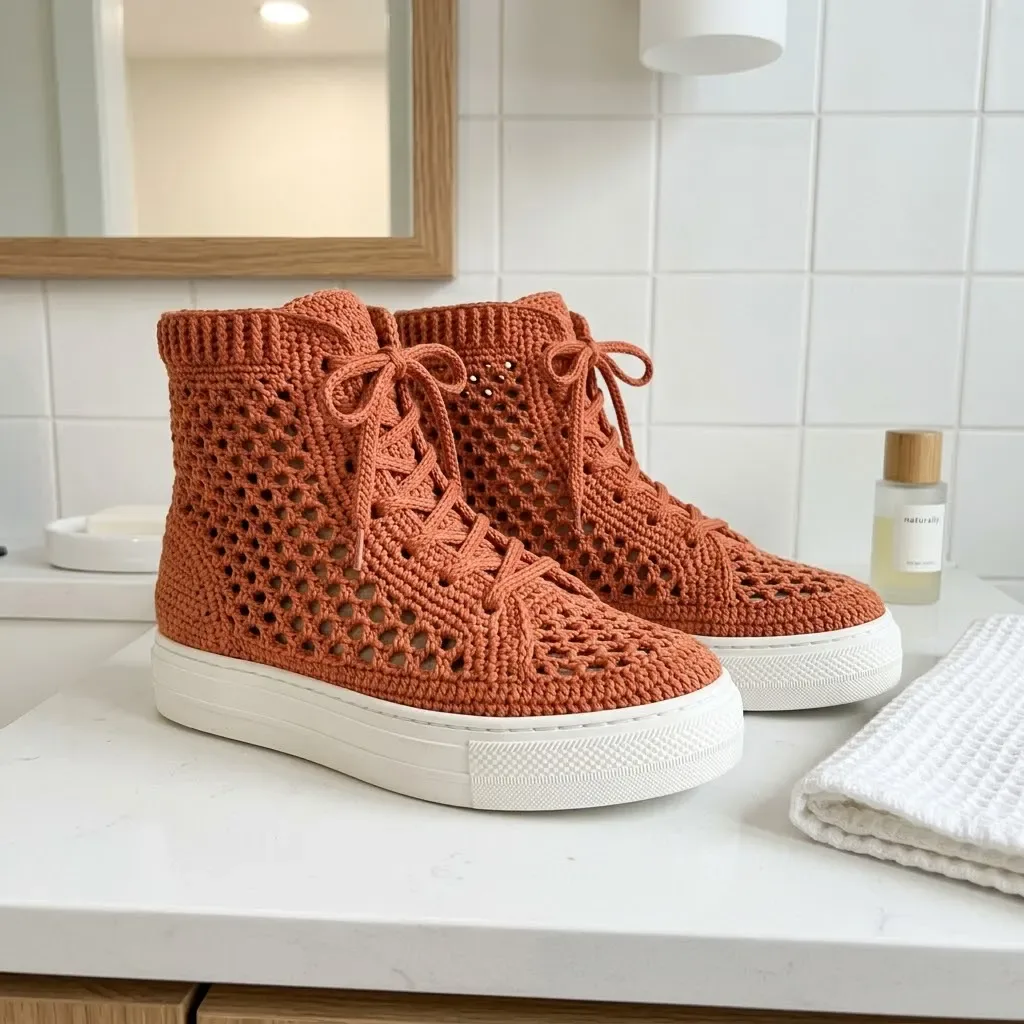
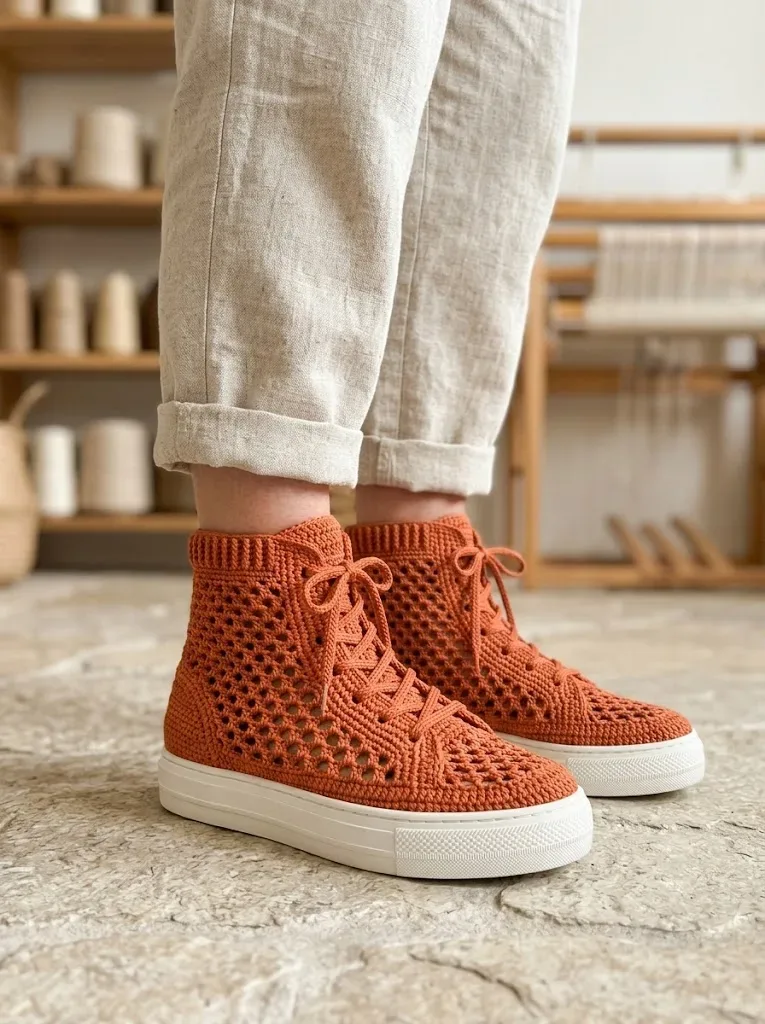
These Terracotta Sunset Sneaker Boots take crochet footwear to a whole new level by combining a soft, stitched upper with a real rubber sneaker sole for durability you can actually walk in. Built over a 7-round sole base and a 5-round upper body, they're perfect for crocheters who want a project that's both functional and fashion-forward. If you've ever wished you could crochet something you'd genuinely wear out the door, this is it.
This pattern uses core techniques like working in the round, single crochet shaping, and attaching stitches to a pre-punched sole, making it ideal for confident beginners ready to level up or intermediate crocheters looking for a satisfying weekend build. Expect to spend roughly 4-6 hours total, split between the sole rounds and the upper. Gauge matters more here than in most projects since these are meant to fit your actual foot.
This pattern is written for a Women's US size 7-8 (European 38-39). The finished boots measure 9.5 inches with a 5.5-inch height from sole to cuff and a stretchy 10-inch circumference, giving you a snug, comfortable fit with a bit of give. In warm terracotta cotton, they have that earthy, sunset-toned look that pairs beautifully with fall wardrobes. They also make a genuinely impressive handmade gift for anyone who loves cozy, one-of-a-kind footwear.
Common mistakes
- Skipping the gauge swatch before starting the sole rounds.
- Since these boots need to actually fit your feet, always work a swatch first. If your 18 stitches and 20 rows don't measure 4 inches, adjust your hook size up or down before committing to the full sole.
- Attaching stitches unevenly around
- Use a stitch marker to mark your starting hole each round and count holes carefully before you begin. Uneven spacing here throws off the whole shape of the upper, so take it slow on round 1.
- Rushing through the 5 upper rounds
- Try the boot on (or measure against your foot) periodically as you work the upper. It's much easier to adjust tension or stitch count early than to rip back finished rounds.
- Choosing a non-cotton or overly stretchy yarn for structure.
- Stick with 100% cotton or a sturdy cotton blend as recommended. Acrylic or superwash wool can stretch out of shape and won't hold the boot's structure the way cotton does.
- Forgetting to weave in ends securely
- These areas get the most stress from walking, so weave ends in multiple directions and trim close. Loose ends near the sole will unravel quickly with wear.
Intermediate
Progress Tracker
0 of 0 rounds
Tap a round to tick it off — your place is saved on this device.
Materials
Yarn
- Approximately 250-300 yards of worsted weight cotton yarn (weight category 4) in terracotta or your chosen color
- 100% cotton or a cotton blend is recommended for structure and breathability; brands like Lily Sugar'n Cream, Drops Safran, or Scheepjes Catona work wonderfully
Hook
- 4.0mm (G/6) crochet hook for the main body
- 3.5mm (E/4) crochet hook for tighter sections like the toe (optional)
Sole
- Pre-made rubber sneaker soles with pre-punched holes (available online from craft suppliers)
- Size should match your foot measurement
Additional Supplies
- Tapestry needle for weaving ends
- Stitch markers
- Scissors
- Measuring tape
- Approximately 60 inches of crocheted or braided cord for laces (we'll make these)
Sole
Pre-made rubber sneaker soles with pre-punched holes (available online from craft suppliers)
Size should match your foot measurement
- Round 1Using your 4.0mm hook, join yarn to any pre-punched hole at the back heel of the sole. Work 1 sc into each hole around the entire sole, placing a stitch marker at the center front toe and center back heel as you go. Join with sl st to first sc. Count your stitches and note the number.*Most standard soles have approximately 50-60 holes. Your stitch count will depend on your specific sole.*
- Round 2Ch 1 (does not count as stitch throughout), sc in each st around. Join with sl st. (50-60 sc)
- Round 3Ch 1, working through BLO only , sc in each st around. Join with sl st. (50-60 sc)This back loop round creates a nice edge and helps the upper portion stand up from the sole.Part 2: Building the Toe Box The toe box uses dense single crochet for durability and structure.
- Round 4-6Ch 1, sc in each st around. Join with sl st. (50-60 sc)
- Round 7(Beginning toe shaping): Ch 1, sc to 3 sts before center front marker, dec, sc in marked st, dec, sc in remaining sts around. Join with sl st. (2 sts decreased)(2)
- Round 8Ch 1, sc in each st around. Join with sl st.
- Round 9Repeat Round 7, decreasing before and after center front. (2 sts decreased)(2)
- Round 10Ch 1, sc in each st around. Join with sl st. You should now have a nicely shaped toe area that curves inward at the front.Setting up for mesh (Round 11):
Part 3: Creating the Mesh Side Panels
Here's where the magic happens. The mesh pattern creates those beautiful honeycomb-style openings you see in the finished sneaker.
- Round 11Ch 1, sc in first 10 sts (this will be your tongue area at center front), *ch 2, sk 1 st, dc in next st* repeat around until you reach 10 sts before starting point, sc in last 10 sts. Join with sl st.
Mesh Pattern Rounds 12-18:
- Rounds 12-18Ch 1, sc in first 10 sts, *ch 2, dc in next ch-2 sp* repeat across mesh section, sc in last 10 sts. Join with sl st.Continue this pattern, keeping the center front 20 stitches in solid single crochet (this forms the tongue and lace panel) while working the mesh pattern around the sides and back.Part 4: Shaping the Tongue At Round 15, we'll separate to create the tongue.Tongue Rows (worked flat): Sl st to center front, ch 1, turn.
Tongue, Sides & Cuff
- Row 1Sc in first 10 sts of tongue section only. Ch 1, turn. (10 sc)
- Rows 2-12Sc in each st across. Ch 1, turn. (10 sc)
- Row 13Sc2tog, sc in next 6, sc2tog. Ch 1, turn. (8 sc)
- Rows 14-16Sc in each st across. (8 sc) Fasten off and weave in ends. The tongue should reach just above the ankle.
Part 5: Continuing the Boot Sides Rejoin yarn at the side of the tongue base to continue the boot height.
- Rounds 19-24Continue mesh pattern around sides and back only, working flat rows and joining at opposite side of tongue. Maintain stitch count by working sc at the ends where the mesh meets the tongue edges.
Part 6: The Ribbed Ankle Cuff This is my favorite part. The ribbed cuff adds such a professional, finished look.
- Cuff Round 1Ch 1, sc in each st and ch-sp around the entire top opening, including across the back of the tongue. Join with sl st. Count stitches and adjust to an even number if needed. (Approximately 48-52 sc)
- Cuff Round 2Ch 1, sc in BLO of each st around. Join with sl st.
- Cuff Rounds 3-10Repeat Round 2.This back loop only technique creates the beautiful horizontal ridges you see in the finished cuff.
- Final RoundSl st loosely in BLO of each st around. Fasten off.Chain approximately 150 stitches or until your chain measures about 50-55 inches. Sl st in second ch from hook and in each ch across. Fasten off and trim ends.Repeat to make a second lace.Weave laces through the eyelets in a classic criss-cross pattern.Weave in all remaining yarn tails using your tapestry needle. I recommend weaving through at least 2 inches of stitches in different directions to secure ends.
Part 7: Creating Lace Eyelets
The lace holes are created by the natural gaps in the mesh pattern along the tongue edges. If you want more defined eyelets, use your hook to gently widen the spaces where the solid tongue section meets the mesh.
Alternatively, you can add crocheted eyelets by working a row of (ch 3, sl st) along each side of the tongue opening.
Part 8: Making the Laces
Part 9: Finishing Your Crochet Sneaker Boots
Blocking (optional but recommended): Dampen the finished boots lightly with water and stuff with tissue paper or a shoe tree to shape. Allow to dry completely.
Important notes
💡 Always swatch first — with 18 stitches and 20 rows equaling 4 inches as your target, even a small tension difference can mean boots that are too tight or too loose to wear comfortably.
💡 Place a stitch marker at the start of each round on both the sole and upper — with only 7 and 5 rounds respectively, it's easy to lose track of where a round begins.
💡 Choose rubber soles with pre-punched holes that match your hook's typical stitch spacing; if holes are too far apart or close together, your first round will look uneven.
💡 Save your cord-making (the 60 inches of laces) for last, once you know exactly how long you need them based on your finished boot's lacing pattern.
💡 Block your finished uppers lightly before final assembly if the cotton yarn feels stiff — this helps the stitches relax into shape and fit more comfortably against your foot.
📏 This pattern is written for a Women's US size 7-8 (European 38-39). To adjust the fit, add or subtract foundation rows for length, and add or subtract rounds for width and height.
More photos
FAQ
Do I need special rubber soles for this pattern, and where do I find them?
Yes, you'll need pre-made rubber sneaker soles with pre-punched holes, which are available from online craft suppliers. Make sure to choose a size that matches your actual foot measurement before you begin the sole rounds.
What yarn works best for sturdy, wearable boots like these?
100% cotton or a cotton blend worsted weight yarn (weight category 4) is strongly recommended for structure and breathability. You'll need approximately 250-300 yards to complete one pair.
How stretchy is the fit, and what if my foot is between sizes?
The finished circumference is about 10 inches with some stretch built in, so it accommodates a small range of foot widths. If you're between sizes, swatch carefully and consider adjusting your hook size slightly rather than changing stitch counts.
Do I need to make my own laces, or can I use store-bought ones?
The pattern includes instructions for making your own crocheted or braided cord laces, about 60 inches long. You can absolutely substitute purchased laces or ribbon if you'd rather skip that step.