
Free Pattern
Step-by-Step
Crochet
GarmentsTextured drop-shoulder pullover sweater pattern
A rectangle-built pullover with alternating sc and dc rows and easy drop-shoulder sleeves.
- Level
- Intermediate
- Time
- 4-6 hours
- Hook
- 5 mm
- Yarn
- Worsted
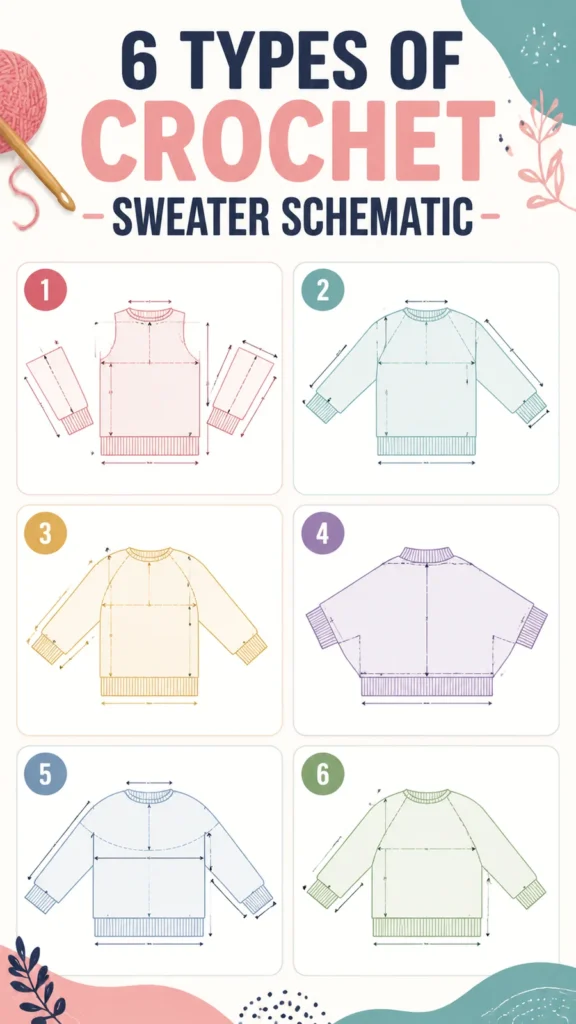
Pattern highlights
- Chain and work the back panel in alternating single and double crochet rows until it reaches the stated length.
- Repeat the same row pattern for the front panel, then split the work for the neckline partway up.
- Decrease each shoulder section gradually until the stitch count matches on both sides.
- Crochet two matching sleeves using the same alternating stitch rows, worked flat.
- Join the front and back panels at the shoulders, leaving the neckline opening clear.
- Set the sleeves into the arm openings and seam them in place.
- Block the finished sweater gently before wearing.
About This Pattern
Every notebook needs a plain pullover in it. This is the page I turn to when I want a sweater that doesn't ask for a chart, just steady rows and patience. It sits alongside my other garment entries as the reliable one, not the showy one.
The technique here is just two rows traded back and forth: single crochet, then double crochet. No shaping tricks except where the front panel splits for the neckline. It's the kind of texture that rewards consistency more than skill.
What comes out the other end is a drop-shoulder pullover, the body worked flat in two rectangles, sleeves added after. It reads as relaxed and a little oversized, built for layering rather than fitted wear.
Worth knowing
There's something satisfying about a sweater that's honest about its construction. No hidden increases, no mystery shaping, just single crochet and double crochet rows stacked until the panel hits length. The front panel's neck split is the one moment of real decision-making, where the rows divide into two shoulders and taper stitch by stitch. I like that the sleeves are their own small project, worked flat and attached after, so the whole thing can be built in pieces instead of one long haul. It's a pattern that teaches patience with repetition, and the drop-shoulder shape forgives a looser gauge than a fitted set-in sleeve ever would.
Common mistakes
- Losing count across sc and dc rows Check the stitch count at the end of every row before turning. A single dropped stitch compounds fast over this many rows.
- Uneven shoulder decreases Decrease on the same side consistently every other row on both shoulder sections. Mismatched shoulders show at the seam.
- Skipping the neckline stitch count Leave exactly the stated stitches unworked for the neckline gap before continuing. Guessing here throws off the shoulder join later.
- Blocking too aggressively Ease the fabric into shape rather than stretching it while wet. Alternating sc and dc rows distort easily under tension.
- Mismatched sleeves Work both sleeves from the same chain count and row count. Set them side by side before seaming to confirm they match.
- Incorrect gauge If your fabric is larger or smaller than expected, adjust your hook size before beginning the full project. Swatch first to confirm your gauge matches the pattern.


Intermediate
Progress Tracker
0 of 0 rounds
Tap a round to tick it off — your place is saved on this device.
The kit
- The original crochet sweater pattern below uses suggested materials because exact yarn information cannot be determined from a visual reference alone. The goal is to create a practical sweater with balanced drape, texture, and comfort.
Project type
- Handmade crochet pullover sweater
Skill level
- Confident beginner to intermediate
Season
- Fall, winter layering, and cool spring days
Yarn
- Suggested worsted weight (#4) acrylic, cotton blend, or soft wool blend
Yarn Quantity
- Approximately 1600 yards / 1460 meters
Hook
- 5 mm US H-8 crochet hook
Gauge
- 14 stitches x 10 rows = 4 x 4 inches / 10 x 10 cm in stitch pattern
Finished Size
- Approximate Medium: 42 inch / 107 cm bust circumference
Terminology
- US crochet terms
Back Panel
Special Stitch Pattern — Textured Stitch: Work one row of single crochet followed by one row of double crochet. Alternate these two rows throughout the sweater body.
Chain 76.
Row 1Sc in second ch from hook and across. Turn. (75 sc)
Row 2Ch 2, dc across. Turn. (75 dc)
Row 3Ch 1, sc across. Turn. (75 sc)Rows 4-76: Repeat Rows 2 and 3 until the panel measures approximately 22 inches / 56 cm long. Fasten off.
Sleeves
Make two identical sleeves.
Chain 34.
Row 1Sc in second chain from hook and across. Turn. (33 sc)
Row 2Ch 2, dc across. Turn. (33 dc)
Row 3Ch 1, sc across. Turn. (33 sc)
Rows 4–12Repeat Rows 2 and 3. Increase Row: Ch 1, 2 sc in first stitch, sc across until last stitch, 2 sc in last stitch. Turn. (35 sc)Repeat the textured stitch pattern and increase row every 8 rows until you have 45 stitches.Continue without increases until sleeve length reaches approximately 18 inches / 46 cm. Fasten off.
Front Panel
Work the same as the back panel until Row 62.
Neck shaping:
Row 63Work 28 stitches in pattern, skip 19 stitches for neckline, attach yarn to remaining stitches and work across 28 stitches.
Rows 64–76Work each shoulder section separately, decreasing one stitch at the neckline edge every other row. Continue until each shoulder has 24 stitches. Fasten off.(24)
Neckline and Border
Join yarn at the neckline edge. Work one round of single crochet evenly around the opening. Join with a slip stitch. Add a second round if a thicker neckline finish is preferred. Fasten off and weave in all ends.
Assembly
Step 1Block the front, back, and sleeve pieces gently to match measurements.
Step 2Place front and back panels together with right sides facing outward.
Step 3Join shoulder seams using a whip stitch or mattress stitch.
Step 4Attach sleeves by aligning the sleeve center with the shoulder seam.
Step 5Sew side seams from the bottom hem to the underarm.
Step 6Sew sleeve seams from cuff to underarm.
Finishing
- After assembly, lightly block the sweater to relax the stitches and improve the shape. Avoid stretching aggressively because crochet fabric can become distorted when wet.
- best care, wash the sweater according to the yarn label instructions. Lay the garment flat to dry and reshape the sleeves and neckline while damp.
Why it works
The back panel is worked flat from a single starting chain, so the whole piece grows as one rectangle with no side shaping.
The front panel matches the back exactly until the neckline row, where the stitches split into two separate shoulder sections.
Each shoulder decreases one stitch every other row, which tapers the neckline edge gradually instead of in one cut.
Construction Tip: Always compare measurements with your own body measurements before joining pieces. Handmade garments depend heavily on gauge, yarn choice, and personal fit preferences.
Important: Crochet fabric stretches differently depending on yarn fiber and stitch tension. Checking your gauge before making the full garment helps prevent unexpected sizing changes.
What it becomes
- A cool-weather layering piece over a long-sleeve top or turtleneck.
- An everyday pullover for fall errands or cool spring mornings.
- A relaxed topper for jeans or leggings when the drop-shoulder fit suits casual wear.
Original pattern: https://duniarecipe.com/crochet-sweater-pattern-layout-ideas-for-easy-diy-sweater-making/
FAQ
Why alternate single and double crochet instead of just one stitch?
The combination gives the fabric structure without making it stiff. It's sturdy enough for a garment but still has some give.
Can I make this sweater fitted instead of oversized?
The drop-shoulder shape is built into the rectangular panels, so a fitted look would need different shaping. As written, it's meant to sit relaxed.
Do the sleeves need to match the body's row pattern exactly?
Yes, the sleeves use the same alternating sc and dc rows as the panels. That keeps the texture consistent across the whole sweater.
How do I know when the neckline is wide enough?
The front panel splits at a set stitch count, leaving a specific number of stitches unworked for the opening. Follow that count rather than eyeballing it.