
Free Pattern
Step-by-Step
Crochet
HatsTextured post stitch elf hat crochet pattern
A top-down elf hat pattern built on post stitch texture and a layered edging.
- Level
- Intermediate
- Time
- 4-6 hours
- Hook
- 4.0 mm
- Yarn
- Light Worsted
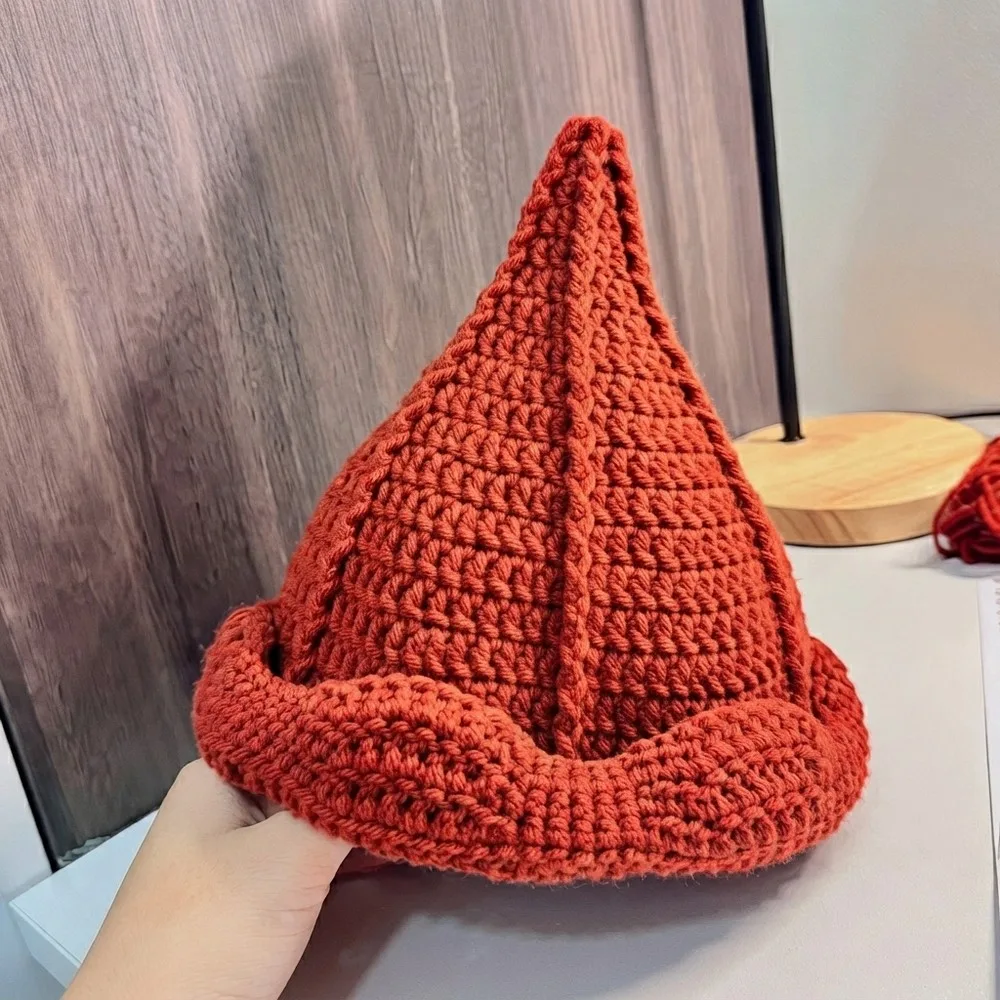
Pattern highlights
- Start in a magic ring so the crown closes without a hole at the center.
- Build the first rounds in plain double crochet to set a stable base.
- Shift into alternating front and back post stitches to raise the ribbed texture.
- Continue through the body rows, letting increases fall where the pattern places them.
- Work the shaping rounds that taper the sides down toward the brim.
- Finish with the layered edging, moving through single, half-double, and double crochet in sequence.
- Weave in ends and block lightly to let the ribbing and edging settle into shape.
About This Pattern
This one sits in the notebook under 'small but fussy.' Not a blanket, not a scarf — a hat that asks for attention on every row. I keep a shelf for projects like this, ones that look simple from across the room and turn out to be anything but. The elf hat earns its spot there.
What comes out the other end is a small, densely textured cap with a shaped crown and a multi-stitch edging that mixes single, half-double, and double crochet in one row. It's a hat that photographs well because the texture does the work. No embellishment needed.
Worth knowing
The appeal here is the post stitch alternation — front post, back post, trading places row by row until the surface ripples like knit rib. I like that the pattern never explains it as decoration; it's just how the increases get hidden. The magic ring start means no gap at the crown, which matters more on a hat than almost anything else you'll make. And the edging is its own small project: single crochet giving way to half-double, then double, then back again, all in one continuous sweep. It's the kind of finish that makes a plain hat look deliberate. For an intermediate maker, this is a chance to get post stitches into your hands without committing to a full garment first.
Common mistakes
- Losing the magic ring tension Pull the tail firmly before working the first round so the center closes without a visible gap.
- Confusing front and back post direction Check whether the hook goes in front-to-back or back-to-front before each post stitch; the two directions sit next to each other constantly in this pattern.
- Skipping the marker at round start Place a stitch marker at the first stitch of each round so increases and post stitch alternation stay lined up.
- Tension drift through post stitches Keep post stitches at the same tension as the surrounding double crochet, or the ribbing will look uneven once blocked.
- Rushing the multi-stitch edging Work the single, half-double, and double crochet sequence slowly and count stitch groups as you go, since there's no repeat to fall back on.
Intermediate
Progress Tracker
0 of 0 rounds
Tap a round to tick it off — your place is saved on this device.
The kit
- Milk cotton yarn (soft, medium-light weight recommended)
- 4.0 mm crochet hook
- Stitch marker
- Scissors
- Yarn needle
Foundation
Magic Ring: Make a magic ring with two yarn loops. Tighten after completing stitches.
Round 1Ch 1. Work 6 sc into the magic ring. Pull the ring tight to close. Join or continue in rounds.
Body of Hat (Rows 2–20)
Round 2Sl st to join. Chain 2. Work 1 dc in every stitch around (6 dc). Join or work continuous.
Round 3Chain 2. 1 dc in stitch, then 1 dc into the post (body) of that same stitch. Repeat around. (Creates front and back post double crochet alternation.)
Round 4Chain 2. 1 dc in the first stitch, then 1 dc into the post of the next stitch. Repeat around.
Round 5Chain 2. 2 dc in the first stitch, 1 dc in the post of the next stitch. Repeat around.
Round 6Chain 2. 1 dc in first stitch, 1 dc in second stitch, then 1 dc into the post of the third stitch. Repeat around.
Round 7Chain 2. 2 dc in first stitch (increase), 1 dc into the post of the third stitch. Repeat around.
Round 8Chain 2. 1 dc in the first stitch, 1 dc in second stitch, 2 dc in the third stitch (increase), 1 dc into the post of the fourth stitch. Repeat around.
Round 9Chain 2. 1 dc in first 3 stitches, 2 dc in fourth stitch (increase), 1 dc into the post of the fifth stitch. Repeat around.
Round 10Chain 2. 1 dc in first 2 stitches, 2 dc in third stitch (increase), 1 dc in fourth and fifth stitches, 1 dc into the post of the sixth stitch. Repeat around.
Round 11Chain 2. 1 dc in first 5 stitches, 2 dc in sixth stitch, 1 dc into the post of the seventh stitch. Repeat around.
Round 12Chain 2. 1 dc in first 3 stitches, 2 dc in fourth stitch, 1 dc in fifth, sixth and seventh stitches, 1 dc into the post of the eighth stitch. Repeat around.
Round 13Chain 2. 1 dc in first 7 stitches, 2 dc in eighth stitch, 1 dc into the post of the ninth stitch. Repeat around.
Round 14Chain 2. 1 dc in first 4 stitches, 2 dc in fifth stitch, 1 dc in sixth through ninth stitches, 1 dc into the post of the tenth stitch. Repeat around.
Round 15Chain 2. 1 dc in first 9 stitches, 2 dc in tenth stitch, 1 dc into the post of the eleventh stitch. Repeat around.
Round 16Chain 2. 1 dc in every stitch (total 12 stitches).
Round 17Chain 2. 1 dc in first 5 stitches, 2 dc in sixth stitch, 1 dc in seventh through tenth stitches, 1 dc into the post of eleventh and twelfth stitches.
Round 18Chain 2. 1 dc into the post of every stitch around, creating texture.
Round 19Chain 2. 1 dc in first 2 stitches, continue 1 dc in each stitch; at the specific increase stitch do 2 dc, then 1 dc into the post.
Round 20Chain 2. 6 dc, 2 dc in seventh stitch (increase), 6 dc, 1 dc into the post.
Hat Border / Edging
Final Row 1Chain 1. Work 3 sc, 2 half-double crochets (hdc), 5 double crochets (dc), 2 hdc, 3 sc.
Final Row 2Chain 1. Work 3 sc, 2 hdc, 2 dc, 2 dc in one stitch (increase), 2 dc, 2 hdc, 3 sc.
Final Row 3Chain 1. Work 3 sc, 2 hdc, 6 dc, 2 hdc, 3 sc to finish the edging.
Assembly
Step 1Weave in all ends securely.
Step 2Block gently if desired to shape the ribbing and edging.
Step 3The hat’s finished circumference measures approx. 25 cm (10 inches), height around 12 cm (4.7 inches).
Step 4Adjust by adding or reducing body rows to fit a larger or smaller head size.
From the collection
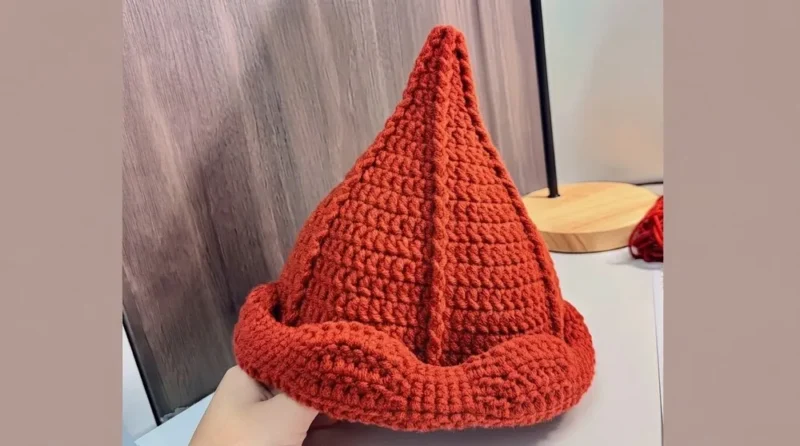
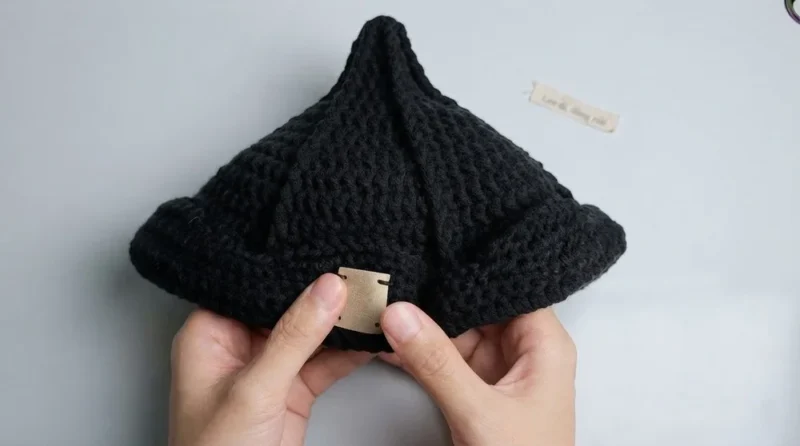
Finishing
- Weave in all ends securely, working them through the post stitch texture so they stay hidden.
- Check the join points at the crown and along the edging for any loose stitches before trimming yarn.
- Block gently if desired, easing the ribbing and edging into their final shape while damp.
Why it works
The crown starts flat from a magic ring, then rounds 2 through roughly 6 increase steadily to widen the hat before the post stitch pattern takes over.
The front and back post double crochets alternate stitch by stitch across the body rows, which is what produces the vertical ribbed look without a rib stitch.
The edging is worked as one long sequence of single, half-double, and double crochet rather than a repeated round, which lets the border curve smoothly around the brim's shape.
Gauge is not critical for this pattern, but aim for a firm fabric with the recommended hook and yarn. Approximate gauge: 16 dc x 8 rows = 10 cm.
What it becomes
- A soft accessory for a baby or toddler photo session, paired with a simple knit blanket.
- A textured gift hat for a new parent, worked in a color to match a nursery.
- A practice piece for learning post stitches before moving on to a full post-stitch sweater or cowl.
Original pattern: https://redagapeblog.com/free-elf-hat-crochet-pattern/
FAQ
Can I make this hat bigger for an older child?
Yes, the notes say to add or reduce body rows to adjust the fit. Add rows evenly through the ribbed post stitch section before starting the edging.
What yarn weight does this pattern actually need?
The pattern calls for milk cotton yarn in a soft, medium-light weight with a 4.0 mm hook. That combination gives the slight sheen and softness suited to baby and toddler sizes.
Why does the pattern mention UK terminology?
The source notes that double crochet in this pattern refers to UK terms, which lines up with US single crochet. Reading the abbreviation key before starting avoids stitch confusion.
Is the edging worked separately from the hat body?
No, it's worked directly onto the last body round as a continuous finishing row. It moves through single, half-double, and double crochet without a break.