
Free Pattern
Step-by-Step
Crochet
GarmentsTop-Down Cardigan With Front and Back Loop Texture
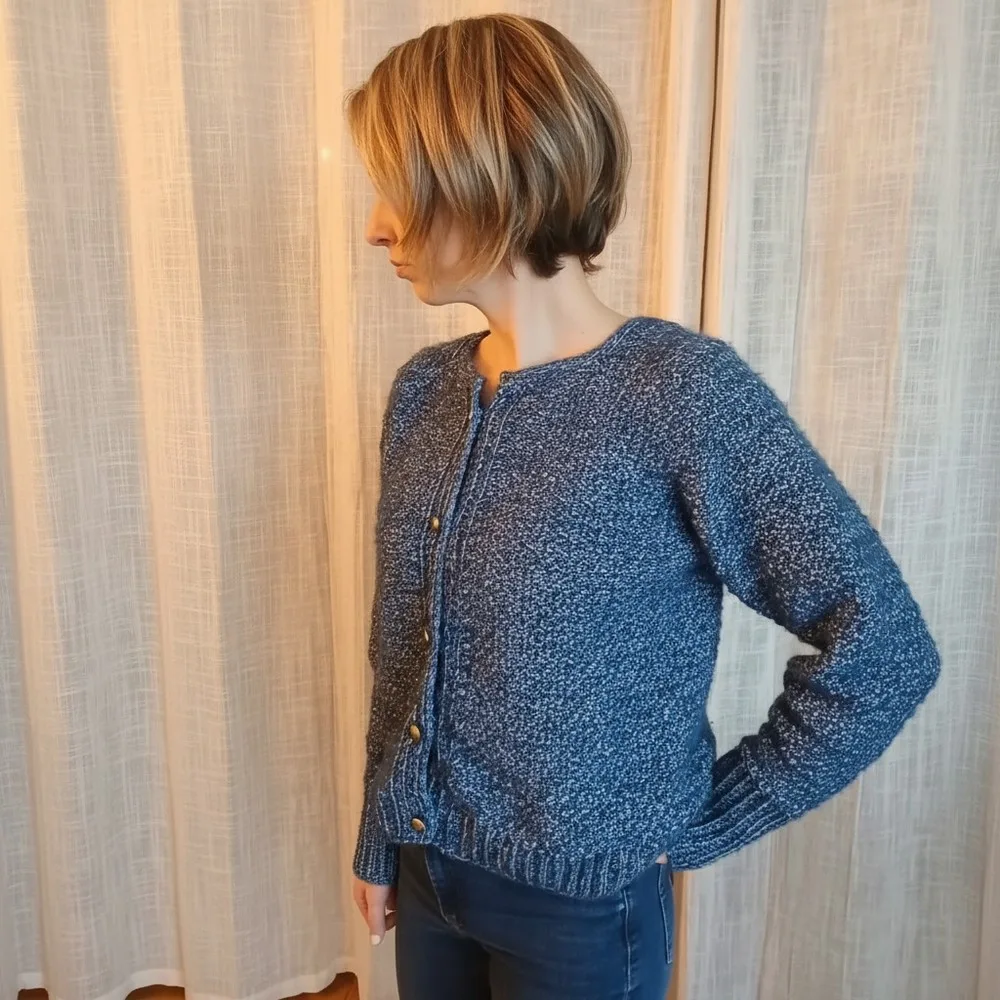
A seamless top-down cardigan with denim-look texture, button band, and ribbed cuffs.
- Level
- Intermediate
- Time
- 4-6 hours
- Hook
- 5 mm
- Yarn
- DK/Light Worsted
Pattern highlights
- Chain a long foundation row and work single crochet across it, marking four corner stitches for shaping.
- Increase at each marked corner over several rounds to grow the yoke evenly on all sides.
- Separate the body from the sleeves by joining the underarms and continuing in one piece.
- Work the main body in the alternating front and back loop stitch down to hem length.
- Pick up stitches along the front edges and work the button band and collar in short rows.
- Join yarn at each underarm and work the sleeves in the round, decreasing gradually for taper.
About This Pattern
In a notebook full of amigurumi and coasters, a garment entry stands out. This cardigan earns its page for construction alone: top-down, seamless, no piecing together panels at the end. It's the kind of project that makes you rethink what single crochet can do when it's just shaping and counting.
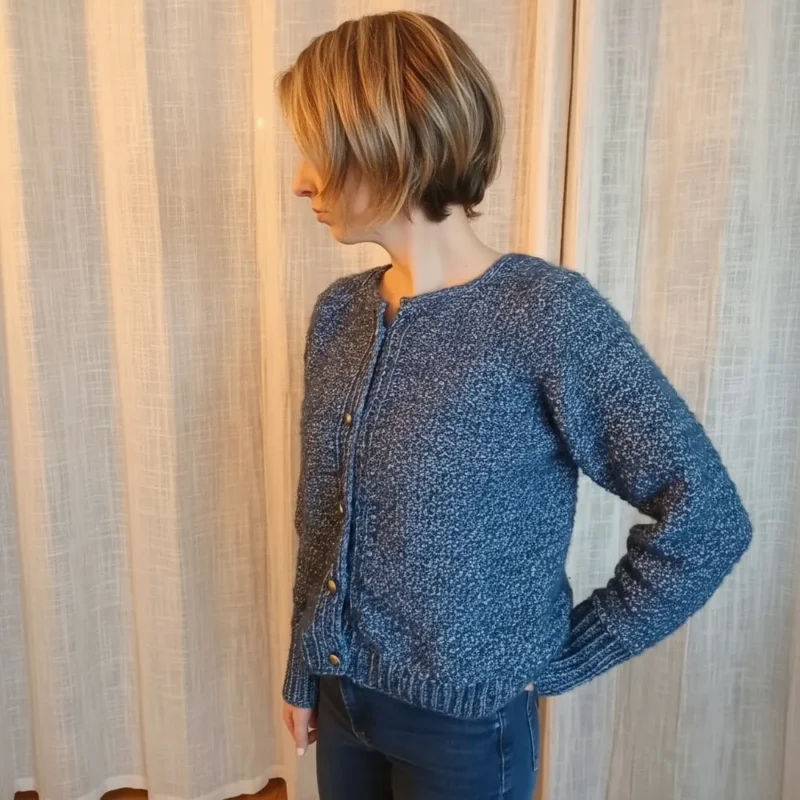
What comes out the other end is a wearable cardigan with a ribbed hem, ribbed cuffs, and a tidy button placket. It's shaped top-down so you can try it on mid-make. No seaming at the yoke, just ends to weave and buttons to sew.
Common mistakes
- Losing track of loop alternation Mark your last-worked loop with a scrap of yarn or a note after each round, especially after decreases.
- Uneven corner increases Recount stitches between markers every round so all four sections grow at the same rate.
- Mismatched sleeve decreases Write down where and how many times you decreased on the first sleeve before starting the second.
- Wrong hook left in for ribbing Swap down to the smaller hook size before starting the button band, collar, and ribbed edges.
- Skipping try-on checkpoints Pause at the underarm join and again before ribbing to try the piece on and adjust length.


Intermediate
Progress Tracker
0 of 0 rounds
Tap a round to tick it off — your place is saved on this device.
The kit
Yarn
- Ziman’s Tap Brush (100g/230m, 80% cotton, 15% acrylic, 5% wool) or similar DK/light worsted weight
Hooks
- Crochet hooks: 5 mm (main body), 4.5 mm (ribbing), 4 mm (button band, collar)
- Yarn/tapestry needle & scissors
- Lots of stitch markers
- Buttons (5–6, according to personal preference)
- Measuring tape
1.Yoke Foundation – Top Down
With 5 mm hook: Ch 90.
Row 1Sc in 2nd ch from hook and in next 9 ch (10 sc). 3 sc in next ch (mark center sc for corner) , Sc in next 20, 3 sc in next ch (mark center for corner), Sc in next 26, 3 sc in next ch (mark center for corner), Sc in next 20, 3 sc in next ch (mark center for corner), Sc in last 10. (Double-check sections: Front – 10, Side – 20, Back – 26, Side – 20, Front – 10)Ch 1, turn.
6.Front Bands and Button Bands
With 4 mm hook, join yarn at lower hem edge (RS facing).
Work 1 row sc up along the edge, picking up about 59 sc (count to match both sides).
Border rows:
Row 1Start with regular sc (both loops at start/end), then sc in front loop only for a purl ridge look.
Row 2On RS, sc in back loop only.
Row 3Repeat as established (front/back loop alternation).For button band: Sew buttons on one side, before placing button holes on the other.Buttonhole band: Place markers for buttonholes (determine locations to match buttons).In each buttonhole, work “sc, [ch 1 or 2 depending on button size], skip 1 or 2 sts, sc in next.” Next row: sc in each st and ch-sp (work across as plain sc).Finish both bands with a row of slip stitches (RS).
8.Sleeves
With 5 mm hook, join yarn at underarm, working into real stitch (not join).
Round 1Work in established pattern (front/back loop alternation) evenly around (aim for even number of stitches, e.g., 68). Join with slip st, ch 1, turn.
Round 2+Continue as established, alternating front/back loop sc, counting stitches every round for consistency (especially after decreases).
Shaping:
For a tapered look, decrease occasionally by sc3tog (3-st decrease) over three front-loop or back-loop sts, placing a marker for later reference.
Space decreases irregularly for natural shaping; write down each decrease/marker position for sleeve matching.
Continue sleeve to desired length, ending with a decrease round if needed for a snug cuff.
2.Yoke Shaping (Increase Rows)
Work in rows (not joined).
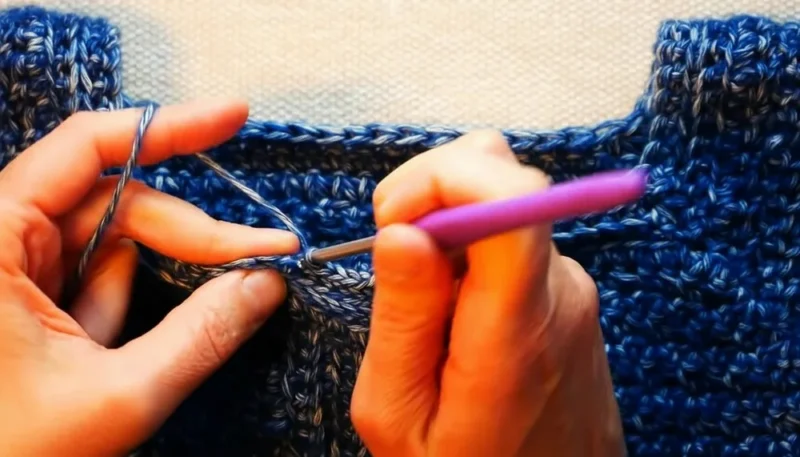
Work alternating single crochets: 1 in back loop, 1 in front loop.
(Tip: Start with back loop on each row.)
In each corner marked st: 3 sc (place marker in new center sc).
Repeat: Work each row, maintaining alternation, placing 3 sc at each marked corner every time. Move markers up to new center st.
Repeat until yoke depth fits from neckline to underarm (on average, around 18–22 rows, but try on; for most, a 20 cm armhole opening is sufficient).
End with a WS (wrong side) row.
3.Body Separation (Join Armholes)
On next RS row:
Continue until first corner marker, then sc together into both front and back body at underarm (joining front and back at armhole; see transcript for cheat/fix if stitch pattern doesn’t align perfectly).
Repeat for each armhole.
Continue to end of the row. Ch 1, turn.
Resume working in rows, following established pattern (front/back loop alternation).
4.Main Body
Continue pattern (alternating single crochet, no increases), making the vest as long as you wish (recommend 40–45 cm from join; try on or measure favorite garment).
You can work until just below the hip for a standard vest length, or adjust per your style.
5.Bottom Ribbing / Elastic Stitch
Switch to 4.5 mm hook.
Attach yarn to bottom corner.
Ch 10 (or to desired rib depth).
Foundation: Sc in 2nd ch from hook and across (10 sc).
Ribbing Row: Sl st in next 2 body sts, turn; Working back up the rib, sc in back loop only (except last st, both loops).
Ch 1, turn, sc in both loops of first st, then back loop only to end (10 sc).
Continue: Sl st in next 2 body sts, repeat ribbing row.
Continue along the bottom edge.
To finish: work last row, then sl st short ends together to join.
7.Collar
Place markers at all neckline corners.
With 4 mm hook, sc evenly around collar, working decreases at markers (sc3tog at each corner for shaping).
Work collar rows:
Continue in front/back loop sc for 3–4 rows (or to desired width), making decreases at markers as before.
Finish with a RS row of slip stitch in each st (both loops).
9.Sleeve Ribbing
With 4.5 mm hook, at sleeve edge: Ch 20 (or desired depth), sc in 2nd ch from hook and across.
Sl st in next 2 sleeve sts, turn, sc in back loop only to end, last st both loops.
Ch 1, turn, sc in both loops, rest in back loop only.
Continue till end; join ribbing into a ring at the cuff with slip/lined-up slip stitches.
Assembly
Step 1Sew buttons on marked side.
Step 2Weave in all ends.
Step 3Block delicately for best drape and edges.
From the collection
Finishing
- Weave in all ends left from joining yarn at underarms, hem, and button band.
- Sew buttons onto the marked side of the button band to match the buttonholes.
- Block the finished cardigan gently to even out the stitch texture and set the drape.
Why it works
The four corner markers in the foundation row correspond to the four raglan increase lines used to shape the yoke.
The front and button bands are worked flat in rows rather than in the round, since they run along a straight open edge.
The sleeves are joined at the underarm into a working stitch, not a chain join, so the round starts without a visible seam gap.
What it becomes
- A everyday layering piece over a plain tee, worn with jeans for casual errands.
- An office-friendly cardigan buttoned over a blouse for a polished, put-together look.
- A cool-weather layer for evening walks, paired with a scarf and simple flats.
Original pattern: https://redagapeblog.com/polished-crochet-top-down-pattern/
FAQ
Can I adjust the body length after the armhole join?
Yes, the pattern is built for it. Just keep working the main body in pattern until it reaches the length you want before starting the ribbing.
Do I need to count stitches carefully on the sleeves?
Yes, especially around decreases. Note your placement and count on the first sleeve so the second one matches exactly.
Why does the pattern call for three different hook sizes?
The main body uses a larger hook for drape, while the ribbing and button band use smaller hooks for a firmer, cleaner edge. It's a small swap but it changes the whole finish.
What if my stitch count doesn't match at the corners?
Stop and recount each of the four marked sections against the double-check numbers given in the foundation row. It's easier to fix a mismatch early than after several increase rounds.