Free Pattern
Step-by-Step
Crochet
Shawls & WrapsTriangular Lace Shoulder Wrap for Ren Faire Style
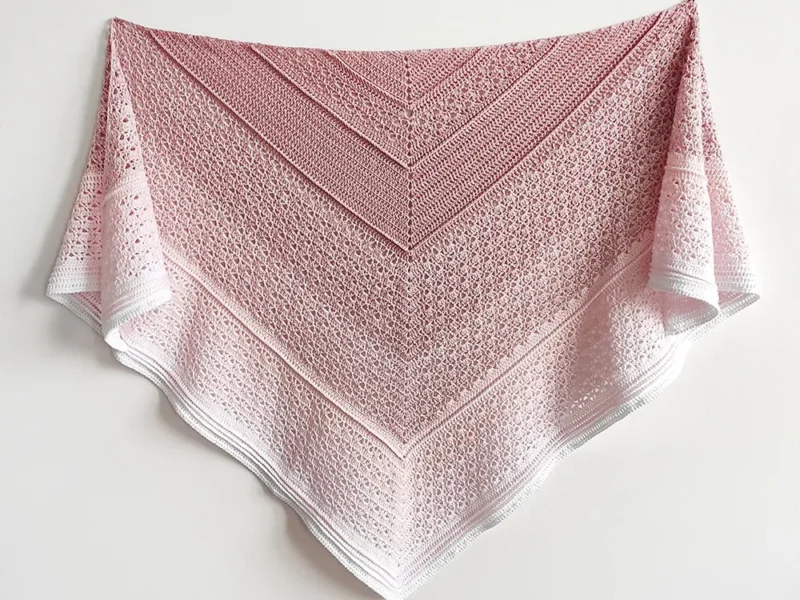
A top-down lace shoulder wrap with a scalloped edge, worked flat in double crochet.
- Level
- Intermediate
- Time
- 4-6 hours
- Hook
- 4.0 mm
- Yarn
- Worsted

Pattern highlights
- Start with a small chain and foundation cluster that becomes the top center point of the triangle.
- Work the lace shell stitch into the growing center space on every row to shape the sides.
- Keep both outer edges increasing while the ribbon of chain spaces builds the airy lace look.
- Repeat the lace shell rhythm until the triangle reaches the size you want.
- Add the scalloped round, placing clusters of double crochet into alternating stitches for the finished edge.
- Weave in ends, then wash and block the wrap so the triangle holds its shape.
About This Pattern
Every notebook needs a shawl that isn't trying too hard. This one sits in the triangular lace file, next to the other top-down wraps I keep coming back to. It's not fussy. It's the kind of piece I'd grab for a festival afternoon, not a special occasion that demands careful handling.
The construction is the quiet draw here. A lace shell worked into a growing center space does most of the shaping, so the triangle forms without separate panels. Double crochet groups give the body some loft, while open chain spaces keep the whole thing breathing. The decorative border is a second act, not an afterthought.
What comes off the hook is a long, airy triangle meant to drape, not cling. It layers over a tunic or dress the way a cloak might, minus the commitment. The scalloped edge gives it a finished, slightly rustic look, which is probably why it reads as Ren Faire at all.
Finished size is approximately 48 inches wide x 22 inches deep (122 cm x 56 cm). Gauge is approximately 18 dc stitches x 9 rows = 4 inches x 4 inches (10 cm x 10 cm), worked in US crochet terms, so swatch first if the drape needs to match.
This is a confident-beginner project built from chains, single crochet, double crochet, and simple increases; the lace shell rhythm becomes easy after a few repeats.
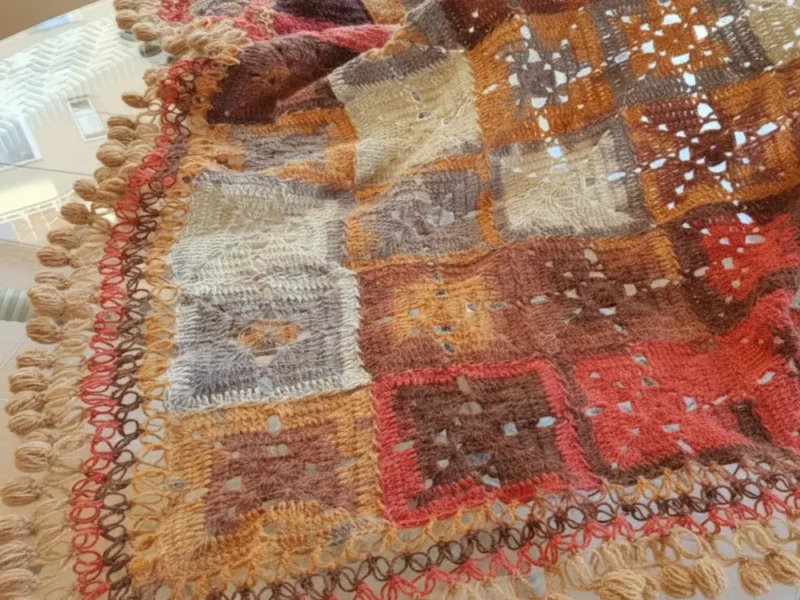
color, the earthy shades that read Ren Faire best are moss green, cream, rust, or brown — combine them for a more layered, woodland look.
Worth knowing
I like a shawl that teaches you its own rhythm. This one starts with a tiny cluster of stitches and grows by repeating one lace shell into the center space, row after row. Once that clicks, the increases stop feeling like math and start feeling like a pattern you already know. The decorative border adds a second skill: a round of single crochet to steady the edge, then a round of five-double-crochet fans for the scallop. It's satisfying to watch a plain triangle turn into something with a hem. And the open stitch work means it grows fast for how impressive it looks draped over a shoulder.
Common mistakes
- Uneven edges Count stitches at the end of every row and make sure increases are placed correctly.
- Tight fabric Try a larger hook size if the lace openings do not appear clearly.
- Lost center point Place a stitch marker in the center shell while working.
- Curled border Blocking usually helps open the lace and flatten the edges.
- Pro Tip Lace crochet often looks much more impressive after blocking. Do not judge the final shape before gently stretching and shaping the finished piece.

Intermediate
Progress Tracker
0 of 0 rounds
Tap a round to tick it off — your place is saved on this device.
The kit
DK weight yarn
- approximately 550 yards (503 meters)
- 4.0 mm crochet hook (US G/6)
- Yarn needle for weaving ends
- Blocking mat and pins
Optional
- small decorative beads for embellishment
Main Pattern
The wrap is worked from the center top downward. Each row increases at the center point and both outer edges. Turning chains count as the first double crochet unless stated otherwise.
Row 1Ch 5. Dc in 5th ch from hook. Ch 2, 2 dc in same space. Ch 3, turn. (5 dc)
Row 2Dc in first dc. Ch 2, sk 2 sts, dc in center space. Ch 2, dc in last dc. Ch 3, turn. (4 dc, 2 spaces)
Row 3Dc in first dc. Ch 2, work 3 dc in center space, ch 2, dc in last dc. Ch 3, turn. (6 dc)
Row 4Dc in first dc, ch 2, dc in next dc space, ch 2, 3 dc in center space, ch 2, dc in next space, ch 2, dc in last dc. Ch 3, turn.
Row 5Dc in first dc. Ch 2, repeat lace shell in center space, ch 2, dc in last dc. Ch 3, turn.Continue repeating the established lace growth pattern: Work dc at both outer edges. Add one lace shell in the center point each row. Add additional chain spaces between sections to increase width. Repeat the pattern until the shawl reaches approximately 22 inches (56 cm) deep or desired length.
Decorative Border
Round 1Attach yarn at any corner. Ch 1, sc evenly around all edges. Place 3 sc in each corner. Join with sl st.
Round 2Ch 3, skip 1 stitch, 5 dc in next stitch, skip 1 stitch, sl st in next stitch. Repeat around the edge.Fasten off and weave in all ends.
Special Stitch
Lace Shell: Work 3 dc, ch 2, 3 dc into the same stitch or space.
Assembly
Step 1After completing the wrap, gently wash or dampen the project according to the yarn instructions. Lay it flat on blocking mats, shape the triangle evenly, and secure the corners with pins. Allow it to dry completely before removing the pins.
Step 2Store the accessory folded in a cool, dry place. Handmade lace pieces benefit from careful handling because open stitches can stretch over time.
Finishing
- Weave in all ends from the main pattern and the border separately, since the border is a second yarn attachment.
- Wash or dampen the finished wrap according to the yarn's care instructions.
- Lay it flat on blocking mats, shape the triangle, pin the corners, and let it dry completely before unpinning.
- Optional embellishment: add small wooden beads, tassels, or embroidered accents after blocking, and keep any decorations lightweight so the lace fabric keeps its natural drape.
Why it works
The center space increases every row, which is what pushes the triangle wider at a steady rate.
The piece is worked flat in turned rows rather than in the round, since a top-down triangle needs two straight increasing edges, not a closed circle.
The border's join at the corner and its three-stitch corner increases let the single crochet round turn the edge without pulling it tight.
What it becomes
- A layering piece over a tunic or dress for a festival or costume day, paired with leather accents.
- A boho scarf-wrap for everyday outfits, worn open over a blouse with vintage-style jewelry.
- A handmade gift for someone who likes open, textured shawls over sleek finished ones.
Original pattern: https://duniarecipe.com/23-creative-crochet-ren-faire-accessories-ideas-for-fantasy-festival-style/
FAQ
Do I need stitch markers for this pattern?
I'd use one to flag the center space, since losing it mid-row is the easiest way to throw off the increases. It's optional, but it saves some frogging.
What's the decorative border actually doing?
Round 1 is a stabilizing single crochet pass around all edges, and round 2 builds the scallop with five-dc fans. Together they turn a plain lace edge into a finished one.
Are the beads mentioned in the materials required?
No, they're listed as embellishment, not part of the stitch pattern. Add them at the end if you want extra detail along the border.