
Free Pattern
Step-by-Step
Crochet
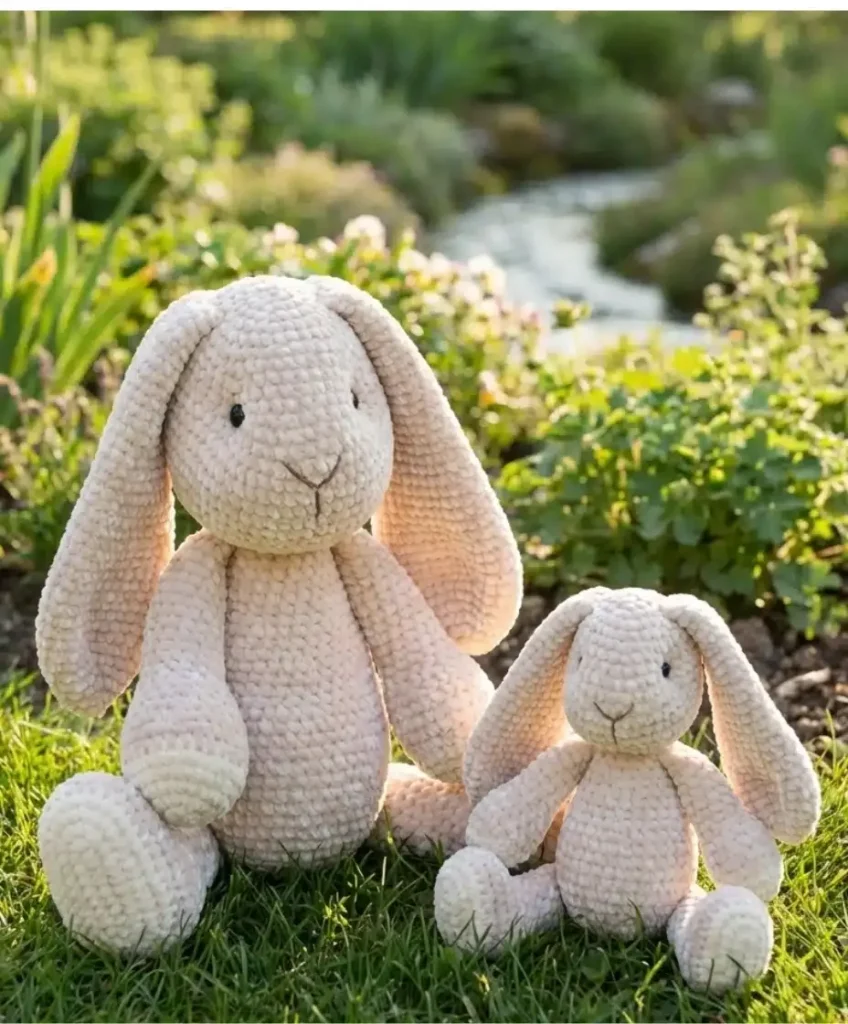
AmigurumiA velvet crochet bunny with shaped eye sockets
A crochet bunny built from a body, head, ears, and shaped eye sockets.
- Level
- Beginner
- Time
- 6-8 hours
- Hook
- 14 mm
- Yarn
- Worsted
Pattern highlights
- Work the head from a magic ring, building the paired increases that will later frame the eye sockets.
- Shape the eye sockets with placed decreases, then embroider the nose and mouth in black yarn.
- Crochet two ears with a single steady increase each round, giving them a natural curved edge.
- Make the arms in two colors, joining Colour B partway through for a small contrast detail.
- Stuff each piece firmly, then seat the safety eyes into the shaped sockets before closing the head.
- Sew the ears and arms onto the body, weaving in ends as each piece finishes.
About This Pattern
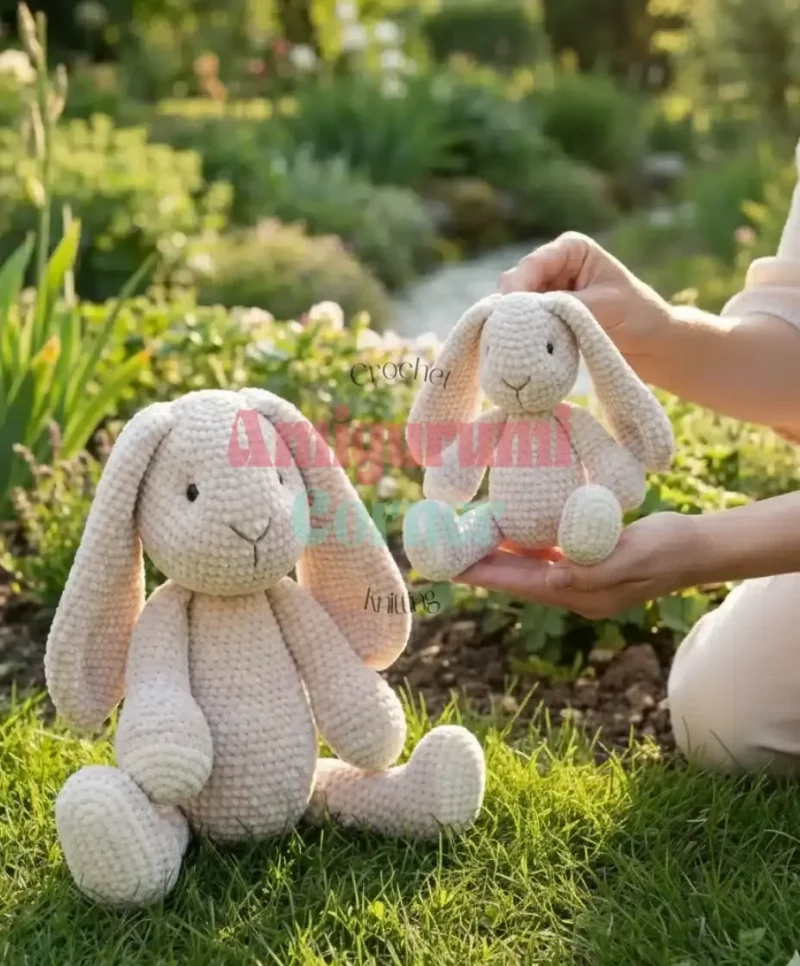
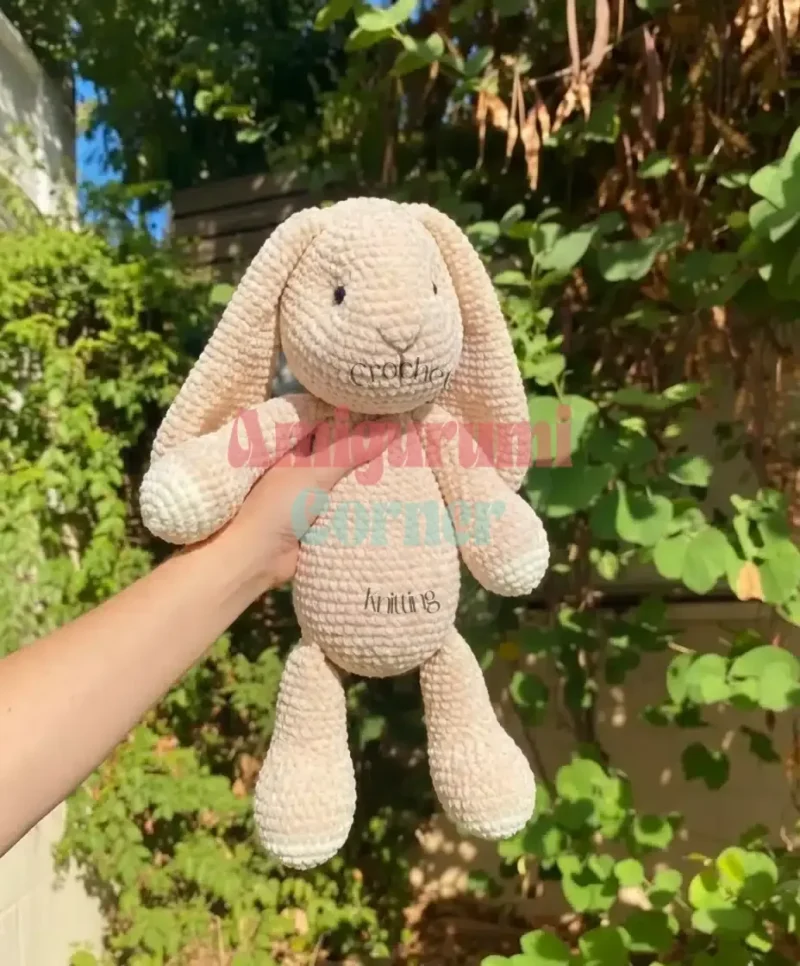
This velvet bunny fits into the softer end of my amigurumi shelf. Not every toy needs texture like this. The pattern gives two builds, a small bunny and a larger one, both from the same shaping logic. I like collections that let one pattern scale up without redrawing the whole thing. It sits next to other single-color animals, but the velvet fiber changes how the finished piece catches light. A collector's note: velvet yarn hides stitch definition, so this one photographs softer than it feels.
The build leans on a handful of moves I trust. Magic rings start the head, body, and ears. Increases stack in pairs early, then thin out as the shaping narrows toward the eye sockets. The head has paired decreases worked at specific points. That's how the eye sockets get their shape. Arms and legs pull in a second color, so you're joining yarn mid-piece more than once. None of it is hard. It just asks you to read the round, not just the count.
Once it's stuffed and the face is on, this bunny feels dense in a good way. Velvet fiber gives it a plush, almost stuffed-animal-store finish, not the usual amigurumi sheen. The small version comes in around 30 cm, sized for a lap or a shelf. Safety eyes sit in sockets that are actually shaped into the head, not just poked through flat fabric. The two-color arms add a small detail without much extra work. It's the kind of toy you'd hand to a child, then quietly worry about giving away.
Worth knowing
What I like here is the eye socket shaping. Most amigurumi just poke safety eyes through a flat round and call it a face. This pattern builds a socket first, with decreases placed at specific points, then seats the eyes into it. That one shift changes the whole expression. Magic rings start both the head and the body. Working them tight keeps the velvet from gapping at the center. The two-color arms are a small, satisfying detail, a quick color join instead of a whole extra piece. Working ears with a steady increase each round gives them a natural curl, not a flat disc. It's a compact project with a few real technique moments in it.
Common mistakes
- Losing count in the velvet pile Velvet yarn hides stitch definition, so mark the start of each round with a stitch marker.
- Mixing up the safety eye sizes The small bunny uses 14 mm eyes and the large bunny uses 16 mm; check the size before inserting them.
- Spacing the eye socket increases evenly Round five's increases fall at deliberately uneven points; follow the exact stitch counts between them rather than smoothing them out.
- Leaving the Colour B start loose Weave that first tail in tightly, since a loose end can work its way through the velvet fabric later.
- Overstuffing the ears Keep the fill light so the diagonal increase curve stays soft instead of going stiff and flat.


Beginner
Progress Tracker
0 of 0 rounds
Tap a round to tick it off — your place is saved on this device.
The kit
Colour A
- 150 g Bohème Velvet (100% Polyester, 50g/70m)
Colour B
- 50 g Bohème Velvet
- 50 cm black yarn for nose and mouth
- Safety eyes: 14 mm
- Polyester filling
Crochet hook
- 3.5-4.0 mm
Colour A
- 200 g Bohème Velvet
Colour B
- 50 g Bohème Velvet
- 50 cm black yarn for nose and mouth
- Safety eyes: 16 mm
- Polyester filling
Crochet hook
- 3.5-4.0 mm
Gauge
- 19 dc/10 cm (Small Bunny) or 17 dc/10 cm (Large Bunny)
Skill Level
- Beginner
- Here’s something wonderful to remember: every crocheter has their own unique style! Some makers achieve perfect gauge with a 2.0 mm hook while others need a 4.0 mm hook for the same result. This isn’t about right or wrong it’s about understanding your personal tension and finding what works for you.
- The recommended hook range (3.5-4.0 mm) gives you flexibility to experiment. Start with a gauge swatch to see how your stitches look with the velvet yarn. You’re aiming for a fabric tight enough that stuffing won’t show through, but not so tight that your hands tire quickly. Trust your hands and eyes they’ll guide you to the perfect hook size for your style.
Body (Colour A)
Step by step: Start with Colour B.
Step by step: 8 dc, 2 dc inc, 14 dc, 2 dc inc, 20 dc, 2 dc inc, 9 dc (57); 57 dc (57); 8 dc, dc 2 tog, 14 dc, dc 2 tog, 20 dc, dc 2 tog, 9 dc (54).
5 dc, dc 2 tog, 3 dc, dc 2 tog, 7 dc, dc 2 tog, 3 dc, dc 2 tog, 11 dc, dc 2 tog, 9 dc, dc 2 tog, 4 dc (48)
Step by step: Start with Colour B.
Round 1mr with 8 dc (8)
Round 22 dc inc (16)
Round 31 dc, 2 dc inc (24)
Step by step: Switch to Colour A.
Round 42 dc, 2 dc inc (32)
Round 53 dc, 2 dc inc (40)Step by step: Switch to Colour A; 4 dc, 2 dc inc (36); 36 dc (36).Step by step: 4 dc, 2 dc inc (36); 5 dc, 2 dc inc (42); 42 dc (42).
Round 64 dc, 2 dc inc (48)Step by step: 5 dc, 2 dc inc (56); 6 dc, 2 dc inc (64); 64 dc (64); 6 dc, dc 2 tog (56); 56 dc (56); 5 dc, dc 2 tog (48).
Rounds 7–1048 dc (48)Sew the ears onto the head as shown in the reference photos. Attach the completed head to the body.5 dc, 2 dc inc, 3 dc, 2 dc inc, 7 dc, 2 dc inc, 3 dc, 2 dc inc, 11 dc, 2 dc inc, 9 dc, 2 dc inc, 4 dc (54)
Round 114 dc, dc 2 tog (40)
Rounds 12–1440 dc (40)Step by step: 36 dc (36).
Round 153 dc, dc 2 tog (32)
Round 1632 dc (32)
Round 172 dc, dc 2 tog (24)
Rounds 18–2124 dc (24)
Round 221 dc, dc 2 tog (16)
Rounds 23–2516 dc (16)Step by step: Fill the arms and sew them onto the body.Fill the head firmly. Cut yarn, thread through remaining stitches, pull tight, and sew closed.
Shape the eye sockets using the same technique described for the small bunny. Embroider the Y-shaped nose with black yarn.
Head (Colour A)
Round 1mr with 6 dc (6)
Round 22 dc inc (12)
Round 32 dc inc (24)
Round 424 dc (24)
Round 53 dc, 2 dc inc, 1 dc, 2 dc inc, 9 dc, 2 dc inc, 1 dc, 2 dc inc, 6 dc (28)
Round 67 dc, 2 dc inc x 2, 12 dc, 2 dc inc x 2, 5 dc (32)
Round 76 dc, 2 dc inc, 2 dc, 2 dc inc, 2 dc, 2 dc inc, 9 dc, 2 dc inc, 2 dc, 2 dc inc, 2 dc, 2 dc inc, 3 dc (38)
Round 84 dc, 2 dc inc, 2 dc, 2 dc inc, 4 dc, 2 dc inc, 2 dc, 2 dc inc, 8 dc, 2 dc inc, 8 dc, 2 dc inc, 4 dc (44)
Round 97 dc, 2 dc inc, 3 dc, 2 dc inc, 5 dc, 2 dc inc, 3 dc, 2 dc inc, 22 dc (48)Position the safety eyes between rounds 9 and 10.
Rounds 10–1248 dc (48)
Round 137 dc, dc 2 tog, 2 dc, dc 2 tog, 3 dc, dc 2 tog, 2 dc, dc 2 tog, 11 dc, dc 2 tog, 7 dc, dc 2 tog, 4 dc (42)
Round 145 dc, dc 2 tog (36)
Round 154 dc, dc 2 tog (30)
Round 163 dc, dc 2 tog (24)
Round 17dc 2 tog (12)
Round 18dc 2 tog (6)Fill the head firmly. Cut yarn, thread through remaining stitches, pull tight, and sew closed.
Ears (Colour A, Make 2)
Round 1mr with 6 dc (6)
Round 22 dc inc (12)
Round 31 dc, 2 dc inc (18)
Round 42 dc, 2 dc inc (24)
Round 53 dc, 2 dc inc (30)
Rounds 6–1130 dc (30)
Round 123 dc, dc 2 tog (24)
Rounds 13–1724 dc (24)
Round 182 dc, dc 2 tog (18)
Rounds 19–2218 dc (18)
Round 231 dc, dc 2 tog (12)
Rounds 24–2712 dc (12)
Round 281 dc, dc 2 tog (8)
Rounds 29–328 dc (8)Sew the ears onto the head, positioning them as shown in the reference photos. Then attach the completed head to the body.
Legs (Colours A & B, Make 2)
Start with Colour B.
Round 15 ch, 2 dc in 2nd ch from the hook, 2 dc, 3 dc in the last ch, 2 dc on the opposite side, 1 dc in the last ch (10)
Round 22 dc inc, 3 dc, 2 dc inc x 3, 2 dc, 2 dc inc (15)
Round 32 dc inc x 2, 4 dc, 2 dc inc x 5, 3 dc, 2 dc inc (23)Switch to Colour A.
Rounds 4–523 dc (23)
Round 61 dc in the back loop (23)
Round 710 dc, dc 2 tog x 4, 5 dc (19)
Round 8dc 2 tog x 2, 5 dc, dc 2 tog x 3, 4 dc (14)
Round 96 dc, dc 2 tog x 2, 4 dc (12)
Rounds 10–2212 dc (12)
Round 23dc 2 tog (6)Fill the legs and attach them to the body, positioning for a sweet sitting pose.
Legs (Colours A & B, Make 2)
Start with Colour B.
Round 1Chain 8, 2 dc in 2nd ch from hook, 5 dc, 5 dc in the final ch, 5 dc in ch on the opposite side, 2 dc in the final ch (19)
Round 22 dc inc, 7 dc, 2 dc inc x 3, 7 dc, 2 dc inc (24)
Round 32 dc inc x 2, 8 dc, 2 dc inc x 5, 8 dc, 2 dc inc (32)
Round 42 dc inc x 3, 11 dc, 2 dc inc x 5, 12 dc, 2 dc inc (41)Switch to Colour A.
Rounds 5–641 dc (41)
Round 71 dc in the back loop (41)
Round 818 dc, dc 2 tog x 4, 15 dc (37)
Round 9dc 2 tog x 2, 13 dc, dc 2 tog x 3, 14 dc (32)
Round 1014 dc, dc 2 tog, 1 dc, dc 2 tog, 13 dc (30)
Round 11dc 2 tog, 10 dc, dc 2 tog x 3, 10 dc, dc 2 tog (25)
Round 129 dc, dc 2 tog, 3 dc, dc 2 tog, 9 dc (23)
Rounds 13–1723 dc (23)
Round 186 dc, dc 2 tog, 4 dc, dc 2 tog, 5 dc, dc 2 tog, 2 dc (20)
Rounds 19–2320 dc (20)
Round 247 dc, dc 2 tog, 7 dc, dc 2 tog, 2 dc (18)
Rounds 25–2718 dc (18)
Round 283 dc, dc 2 tog, 8 dc, dc 2 tog, 3 dc (16)
Round 291 dc, dc 2 tog x 5, finish with 1 dc (11)
Round 30dc 2 tog x 5, 1 dc (6)Fill the legs and attach them to the body.
From the collection
Finishing
- Insert the safety eyes into the shaped sockets before you stuff and close the head.
- Stuff the body, head, ears, and arms firmly so the velvet pile stays smooth.
- Sew the ears and arms onto the body, then weave in the Colour A and B joins.
Why it works
The body opens with a round or two in Colour B before the pattern settles into Colour A for the remaining shaping.
The head's round five increases fall at uneven intervals rather than spaced evenly, clustering stitches where the eye sockets need extra width.
Each ear round adds one increase set one stitch further along than the last, which curves the edge instead of growing it as a flat disc.
What it becomes
- A nursery shelf piece that sits well beside other single-color amigurumi animals.
- A first soft toy for a crib, since the velvet pile feels gentle against skin.
- A handmade baby shower gift, paired with a small crocheted blanket in the same Colour A.
FAQ
What sizes does this pattern include?
The pattern gives instructions for a small bunny and a larger version, using the same construction logic throughout. The leg pieces are written separately for each size.
What hook size should I use for this bunny?
The recommended range is 3.5 to 4.0 mm, though gauge with velvet varies more than with regular yarn. Swatch first and adjust until the fabric holds stuffing without gaps.
Is this pattern safe for a young child?
The source flags safety eyes as something to think through around small children, so check that yours lock securely before gifting the toy. For an infant, embroidering the eyes instead of using hardware is worth considering.
How much yarn does the small bunny use compared to the large one?
The small bunny calls for 150 g of the main color plus 50 g of the second color. The large bunny steps up to 200 g plus 50 g, with the same amount of black yarn for the face on both.