
Free Pattern
Step-by-Step
Crochet
AmigurumiVelvet yarn crochet bunny amigurumi pattern
A plush velvet yarn bunny worked in one piece, with notes on building it well.
- Level
- Intermediate
- Time
- 4-6 hours
- Hook
- 3.5 mm
- Yarn
- Worsted
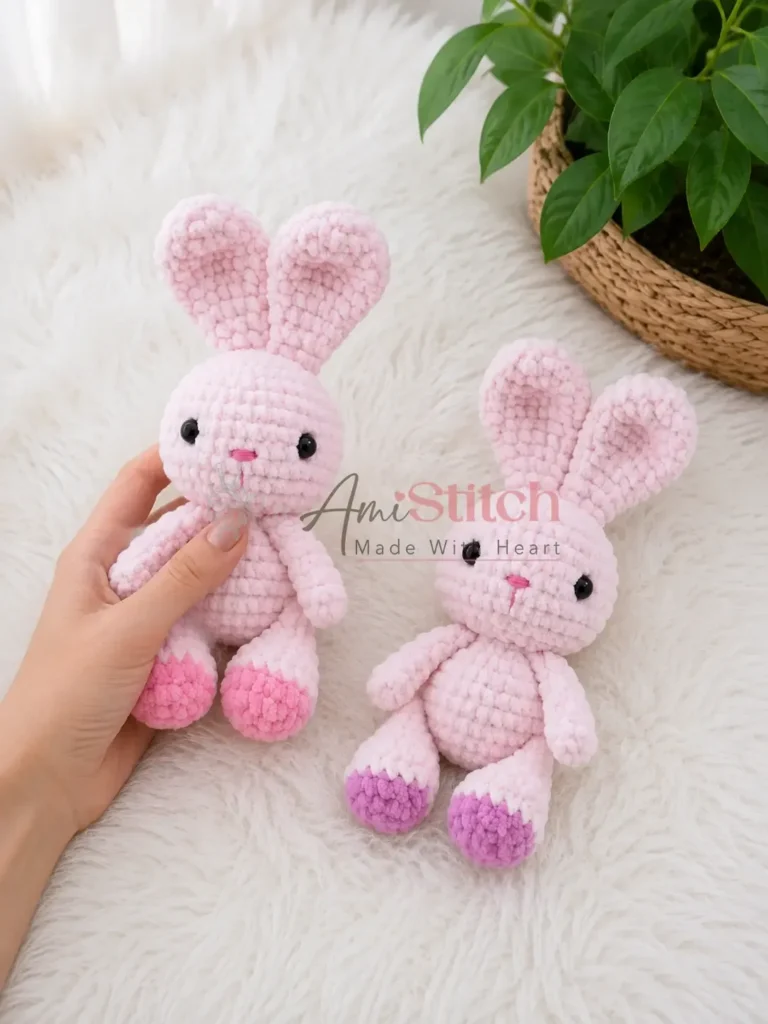
Pattern highlights
- Start the head and body as one continuous piece, stuffing firmly as the rounds build.
- Work the arms flat, then fold and seam them closed through both layers.
- Make the ears and tail as their own small pieces to attach later.
- Position the safety eyes and embroider the nose using the round numbers as placement guides.
- Sew the ears, arms, legs, and tail onto the finished body with strong thread.
- Weave in any remaining ends and give the velvet pile a last fluff.
About This Pattern
I keep a shelf of amigurumi that are really studies in fiber, and this bunny belongs there. It is less about a clever new stitch and more about what velvet yarn does to a familiar shape. The plush body reads soft before anyone even touches it. That alone earns it a spot next to my other textured experiments.
The technique list is short but deliberate: single crochet in a continuous spiral, increases building a rounded head and body from one piece, and a flat panel folded and seamed for the arms. Safety eyes and embroidered nose details go in after the fact, between specific rounds rather than by guesswork. Nothing exotic, just careful sequencing.
What comes out the other end is a soft-bodied bunny with a one-piece head and body, two legs that shift color partway up, floppy ears, and a small tail. It sits rather than stands. It is built for holding, not for display on a shelf out of reach.
This pattern is written in US crochet terminology and worked in a continuous spiral — do not join at the end of each round. Use a stitch marker to track the beginning of each round; stitch counts are given at the end of each round in parentheses.
Gauge is not critical for this project; however, your fabric should be firm enough that stuffing does not show through. If your stitches feel too loose, move down a hook size.
The accent color is used for the legs (Rounds 1–3), the tail (entire piece), and can also be used for ear inner lining if desired. Sew-on eyes are placed between Rounds 8–9, spaced 10 stitches apart, and the nose is embroidered between Rounds 9–10 using the cotton contrast yarn.
Common mistakes
- Stuffing only at the end Add fiberfill as each round closes, not after the whole piece is done. Velvet yarn hides lumps less forgivingly than it looks.
- Losing track of the spiral Keep the stitch marker in place at the start of every round. It is easy to lose your spot in plush yarn where stitches blend together.
- Seaming the arm unevenly Flatten the arm so the opening folds in half before crocheting through both layers. A crooked fold shows once the arm is stuffed.
- Guessing eye and nose placement Use the round numbers given for eyes and nose rather than eyeballing the spacing. Pin both in place before sewing or embroidering.


Intermediate
Progress Tracker
0 of 0 rounds
Tap a round to tick it off — your place is saved on this device.
The kit
Main yarn
- Velvet/plush yarn (e.g., Himalaya Dolphin Baby, YarnArt Dolce, or Himalaya Velvet) — 100 g / 120 m in main color, plus a small amount in accent color
Contrast yarn
- Cotton-blend yarn (e.g., YarnArt Jeans, 60% cotton / 40% acrylic, 50 g / 160 m) in a nose color
Hook
- E-4 / 3.5 mm
Buttons
- 12 mm, qty 2 (for leg attachment)
- Strong sewing thread (for attaching parts)
- Stitch marker
- Yarn needle / tapestry needle
- Scissors
- Sewing pins
Tools
- Safety eyes (sew-on style): 8–10 mm, qty 2
- Fiberfill / stuffing
Head & Body (make 1 — worked as one piece)
Stuff as you go throughout this entire piece.
Round 16 sc in MR. (6)
Round 2inc in each st around. (12)
Round 3inc in each st around. (24)
Round 43 sc, inc repeat 6 times around. (30)
Round 55 sc, inc repeat 5 times around. (35)
Round 66 sc, inc repeat 5 times around. (40)
Rounds 7–11sc in each st around. (40) (5 rounds)(40)
Round 122 sc, dec repeat 10 times around. (30)
Round 131 sc, dec repeat 10 times around. (20)
Round 142 sc, dec repeat 5 times around. (15)
The head is now complete. The next round begins the body.
Round 15inc in each st around. (30)
Rounds 16–20sc in each st around. (30) (5 rounds)(30)
Round 213 sc, dec repeat 6 times around. (24)
Round 222 sc, dec repeat 6 times around. (18)
Round 231 sc, dec repeat 6 times around. (12)
Round 24dec 6 times around. (6)Finish stuffing the body firmly. Pull the remaining 6 stitches closed, fasten off, and weave in the end.
Arms (make 2)
Round 16 sc in MR. (6)
Rounds 2–6sc in each st around. (6) (5 rounds)Flatten the arm so the opening folds in half. Crochet through both layers to close the opening, fastening off and leaving a yarn tail for sewing.(6)
Legs (make 2)
Begin with accent color yarn.
Round 16 sc in MR. (6)
Round 2inc in each st around. (12)
Round 31 sc, inc repeat 6 times around. (18)
Round 4sc in each st around. (18) At the end of this round, switch to main color yarn.
Round 5sc in each st around. (18)
Round 63 sc, 1 sc, dec repeat 4 times, 3 sc. (14)
Round 73 sc, dec 4 times, 3 sc. (10)
Round 83 sc, dec 2 times, 3 sc. (8)
Rounds 9–10sc in each st around. (8) (2 rounds)Stuff only the foot/base portion of the leg lightly. Flatten the leg opening and crochet through both layers to close. Fasten off and leave a long yarn tail for attachment.(8)
Ears (make 2)
Round 16 sc in MR. (6)
Round 2inc in each st around. (12)
Round 31 sc, inc repeat 6 times around. (18)
Rounds 4–7sc in each st around. (18) (4 rounds)(18)
Round 81 sc, dec repeat 6 times around. (12)
Rounds 9–10sc in each st around. (12) (2 rounds)(12)
Round 111 sc, dec repeat 3 times around. (9)
Round 12sc in each st around. (9)Do not stuff. Fasten off and leave a long yarn tail for sewing.
Tail (make 1)
Worked entirely in accent color yarn.
Round 16 sc in MR. (6)
Round 2inc in each st around. (12)
Round 31 sc, inc repeat 6 times around. (18)
Round 4sc in each st around. (18)
Round 51 sc, dec repeat 6 times around. (12)
Round 61 sc, dec repeat 3 times around. (9)Stuff lightly. Fasten off and leave a long yarn tail for sewing.
Assembly
Step 1Ears: Using strong sewing thread and sewing pins to position first, sew the ears firmly to the top of the head. Space them evenly across the crown.
Step 2Eyes: Attach the sew-on eyes between Rounds 8 and 9, spacing them 10 stitches apart. Secure tightly with strong thread so they cannot be pulled loose.
Step 3Nose: Using the cotton contrast yarn and a yarn needle, embroider the nose between Rounds 9 and 10, centered below the eyes.
Step 4Arms: Sew the arms to the body between Rounds 14 and 15, spacing them 3 stitches apart (measured at Round 14, one arm on each side).
Step 5Legs: Attach the legs using 12 mm buttons or a thread joint between Rounds 19 and 20, spacing them 14 stitches apart. A button or thread joint allows the legs to swing naturally and gives the bunny its seated pose.
Step 6Tail: Position the tail so that the bunny sits upright resting on it — approximately between Rounds 19 and 21 on the back of the body. Sew securely in place.
Step 7Weave in all remaining yarn ends.
From the collection
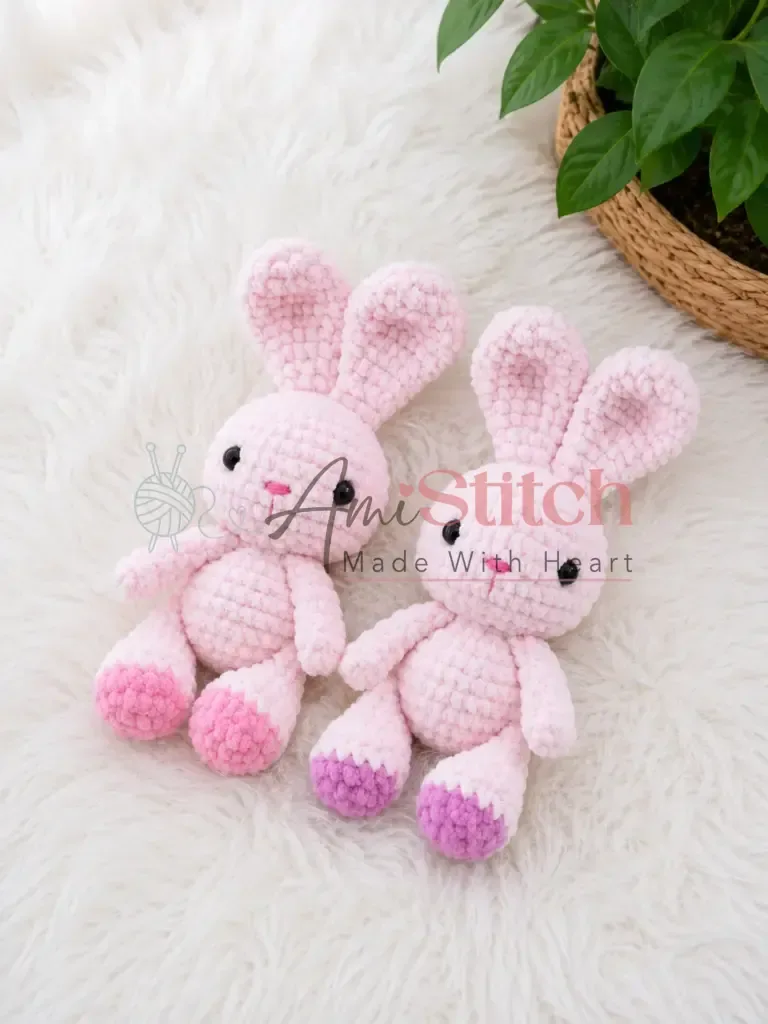
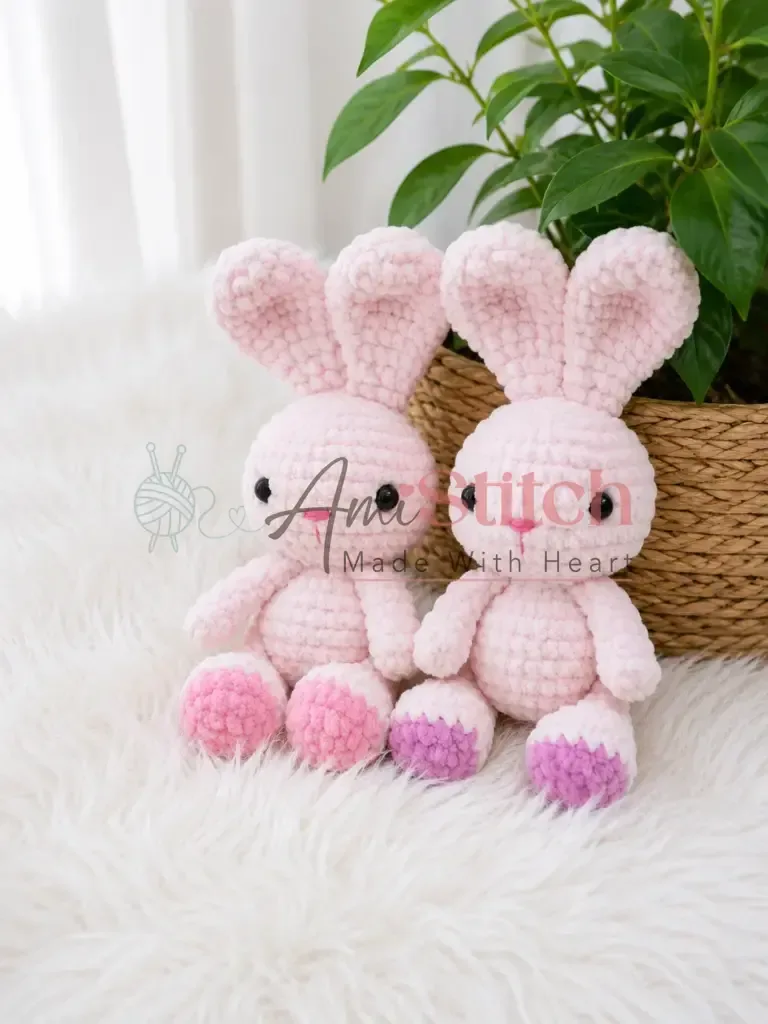
Finishing
- Stuff the head and body firmly as you go, not after the fact, so the velvet pile stays even.
- Fold each arm flat and crochet through both layers to close the opening, leaving a tail for sewing.
- Sew ears, arms, legs, and tail to the body with strong thread, then weave in the last loose ends.
Why it works
The head and body are worked as a single continuous piece, so there is no seam between neck and shoulders.
The arms are made flat rather than in the round, which is why they need folding and seaming through both layers to close.
What it becomes
- A nursery shelf companion, paired with other soft amigurumi in the same main color.
- A handmade gift for a baby shower, alongside a knitted blanket or plain onesie.
- A take-along toy for a toddler's bag, sized for small hands to grip.
Original pattern: https://amistitch.com/velvet-yarn-crochet-bunny-free-amigurumi-pattern/
FAQ
Can I use a different brand of velvet yarn for this bunny?
Yes — any velvet or plush yarn in the 100 g / 120 m weight range will work well here. Look for yarns labeled as 'velvet,' 'chenille,' or 'plush' in a bulky or super bulky weight. Avoid anything with a very long pile, as it will obscure your stitch count even more than standard velvet yarn does.
What size does the finished bunny come out to?
a 3.5 mm hook and standard velvet yarn in the 100 g / 120 m weight range, the finished bunny is typically around 25–30 cm (10–12 inches) tall when seated. Using a heavier yarn or a larger hook will produce a bigger bunny; a finer yarn will give you a smaller one.
Is this bunny safe for babies and young children?
The pattern uses sew-on eyes rather than safety eyes with plastic backing, so extra care should be taken for toys intended for children under three.