
Free Pattern
Step-by-Step
Crochet
AmigurumiZippered bear pencil case crochet pattern notes
A collector's notes on a crocheted bear pencil case worked in rows and spiral rounds.
- Level
- Intermediate
- Time
- 4-6 hours
- Hook
- 2.25 mm
- Yarn
- Worsted
Pattern highlights
- Chain a long base and work increases at both ends to shape a flat oval for the pouch front and back.
- Build the muzzle separately in spiral rounds, increasing steadily until it reaches its final width.
- Work the smaller nose, ear, and eye pieces the same way, each starting from a magic ring.
- Lightly stuff the muzzle only, then pin and whipstitch it to the front of the base.
- Attach the nose, ears, and eyes on top of the muzzle, then embroider the smile by hand.
- Add a zipper along the open edge of the base to finish the pouch.
About This Pattern
This one lands in the useful-object corner of my notebook, not the shelf-sitter corner. I file toys under 'look at me,' but a pencil case has a job to do. The bear face dresses up a flat rectangle of fabric that would otherwise just be a pouch, which is its own small trick.
Two techniques share the page here. The base starts as a worked-flat oval, joined into rounds, then flips to back-and-forth rows once the shape is set. The muzzle, nose, ear, and eye pieces work in continuous spiral rounds with no joining at all — the usual amigurumi shorthand.
What comes out the other end is a soft tan pouch with a bear's face stitched to the front, sized to hold pencils and whatever else fits a worsted-weight zip case. The fiberfill goes only in the muzzle, so the body stays flat enough to zip.
Worth knowing
I like a pattern that mixes its methods instead of picking one and sticking with it. You get the oval-base math of a flat piece — chain, work up one side, flare out at the end, come back down the other — then you get the easy rhythm of spiral rounds for the face pieces, no stitch markers fussing with joins. The muzzle's increase pattern shifts partway through, which keeps your eyes on the stitch count instead of letting you zone out. And because only the muzzle gets stuffed, you're not fighting fiberfill through a tight seam on the whole body. It's a small, contained project that still touches most of the core amigurumi moves in one sitting.
Common mistakes
- Losing track of the base's two increase ends Mark both ends of the foundation chain before you start increasing, so the oval grows evenly on each side.
- Overstuffing the muzzle Use a small amount of fiberfill and check that the base still lies flat enough to zip closed.
- Skipping the stitch marker on spiral rounds Mark the start of each round on the muzzle and other face pieces, since there's no join to show you where a round ends.
- Whipstitching too loosely around curved pieces Keep stitches small and close together when sewing the muzzle and eyes on, so the seam blends into the surrounding fabric.


Intermediate
Progress Tracker
0 of 0 rounds
Tap a round to tick it off — your place is saved on this device.
The kit
Yarn
- Worsted weight (Aran/CYCA #4) acrylic-cotton blend yarn in tan/beige (approx. 1 skein), plus small amounts of black and white yarn for the eyes
Hook
- Size B-1 (2.0-2.25 mm)
Zipper
- 1 zipper, sized to fit a finished pouch approximately 9-10 inches wide
Stuffing
- Small amount of fiberfill (for the muzzle only)
- Yarn needle for sewing pieces together
- Stitch marker
- Scissors
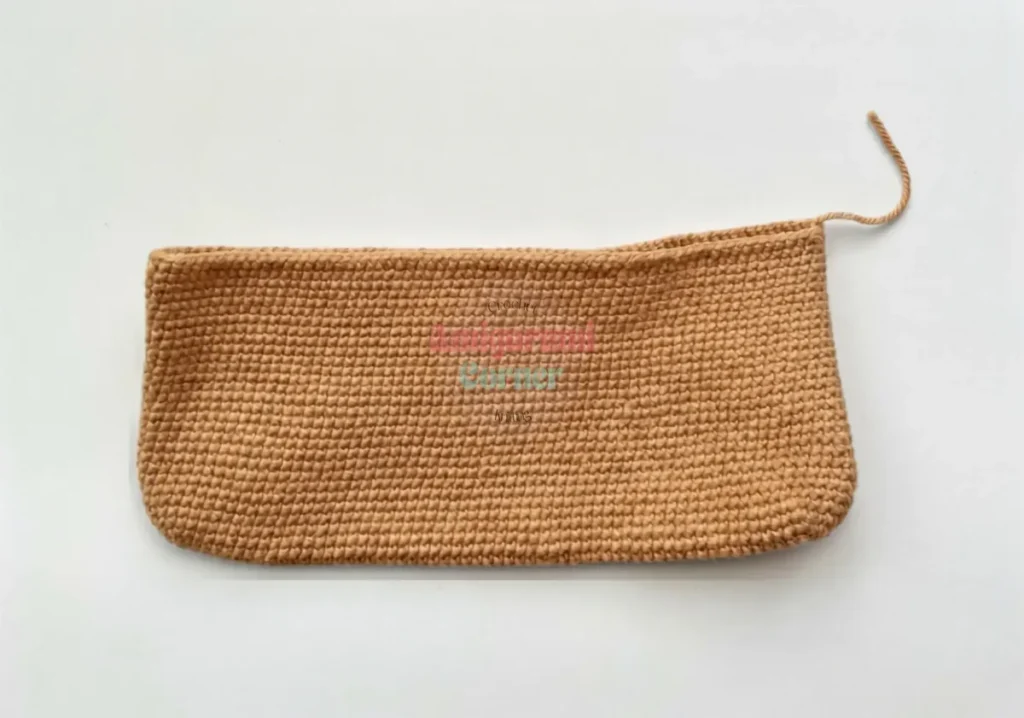
Base (Pencil Case Body)
Round 1Ch 60. Working into 2nd ch from hook, inc, sc 57, 4 sc in last st, continue along the opposite side of the foundation chain: sc 57, inc in first st. (122)
Round 22 inc, sc 57, 4 inc, sc 57, 2 inc. (130)
Round 3sc, inc repeat twice, sc 57, sc, inc repeat 4 times, sc 57, sc, inc repeat twice. (138)
Rows 4–30sc in each st around. (138) Work 27 rows total at this stitch count.Fasten off, leaving a yarn tail for weaving in.(138)
Muzzle
Round 16 sc in MR. (6)
Round 2inc in each st around. (12)
Round 3sc, inc repeat around. (18)
Round 4sc, inc, 2 sc, inc repeat 5 times, sc. (24)
Round 53 sc, inc repeat around. (30)
Round 62 sc, inc, 4 sc, inc repeat 5 times, 2 sc. (36)
Round 75 sc, inc repeat around. (42)
Round 83 sc, inc, 6 sc, inc repeat 5 times, 3 sc. (48)
Rounds 9–11sc in each st around. (48) Work 3 rounds total at this stitch count. Stuff lightly before closing.Fasten off, leaving a yarn tail for sewing.
Nose
Round 1Ch 6. Working into 2nd ch from hook, inc, sc 3, 4 sc in last st, sc 3, inc in first st. (14)
Round 2sc, inc, sc 3, sc, inc repeat twice, sc 3, sc, inc. (18)Fasten off, leaving a yarn tail for sewing.
Ear (make 2)
Round 16 sc in MR. (6)
Round 2inc in each st around. (12)
Round 3sc, inc repeat around. (18)
Round 4sc, inc, 2 sc, inc repeat 5 times, sc. (24)
Round 53 sc, inc repeat around. (30)
Rounds 6–11sc in each st around. (30) Work 6 rounds total at this stitch count.Step by step: Closing round: Fold the piece flat in half and, working through both layers together, sc 14 across to close.Fasten off, leaving a yarn tail for sewing.(30)
Eye (make 2)
Worked in black, then switched to white for the final round.
Round 1Black 6 sc in MR. (6)
Round 2Black inc in each st around. (12)
Round 3Black sc, inc repeat around. (18)
Round 4Black sc, inc, 2 sc, inc repeat 5 times, sc. (24)
Round 5White 3 sc, inc repeat around. (30)Fasten off, leaving a yarn tail for sewing.
Assembly
Step 1Lightly stuff the Muzzle piece and pin it to the center front of the Base, positioning it a few rows up from the zipper edge so it reads as the bear’s snout.
Step 2Whipstitch the Muzzle in place around its entire edge, keeping your stitches small and even so the seam disappears into the surrounding stitches.
Step 3Sew the Nose onto the top center of the Muzzle using the same whipstitch technique, then use a length of black yarn to embroider a simple smile beneath it in a straight or curved stitch.
Step 4Position the two Eye pieces above the Muzzle, spaced evenly apart, and sew each one in place using the yarn tail left from that piece.
Step 5Flip the Base over and sew the two Ear pieces to the top edge of the back side, spacing them to mirror where ears would naturally sit on a bear’s head.
Step 6Pin the zipper along the top opening of the Base and hand-sew it in place using a whipstitch or backstitch, keeping tension even so the pouch lies flat when closed.
Step 7If desired, cut and sew in a fabric lining to finish the interior and give the pouch extra structure.
Step 8Weave in all remaining yarn ends securely before trimming.
Finishing
- Weave in the yarn tails left from fastening off the muzzle, nose, ears, and eyes before assembly.
- Stuff the muzzle lightly with fiberfill, since it's the only piece in the whole pattern that takes stuffing.
- Whipstitch the muzzle, nose, ears, and eyes onto the base front, then sew in the zipper to close the pouch.
Why it works
The base starts with increases concentrated at both short ends of the foundation chain, which is what turns a straight strip into an oval instead of a tube.
The face pieces stay in continuous spiral rounds with no join, which avoids a visible seam line on parts that sit front and center on the finished bear.
This pattern is written in US crochet terminology.
Gauge is not critical for this project — a slightly tighter or looser tension simply changes the finished size of the pouch.
What it becomes
- A pencil case for a desk or backpack, paired with a small zip bag of highlighters.
- A travel pouch for crochet notions — stitch markers, a yarn needle, spare hooks.
- A gift alongside a sketchbook or a set of colored pencils for someone who likes amigurumi-adjacent objects.
Original pattern: https://amigurumicorner.com/bear-pencil-case-crochet-pattern/
FAQ
What size zipper do I need for this pencil case?
You'll want a zipper close to 9 to 10 inches long to match the width of the finished Base piece. If your zipper runs a bit shorter or longer, you can adjust by sewing it slightly gathered or trimming the excess and stitching over the cut end to prevent fraying.
Why is my Base piece curling instead of lying flat?
Curling usually means your single crochet stitches are a little tight, which pulls the fabric inward. Try loosening your tension slightly or going up half a hook size, and block the finished piece by lightly steaming it flat before assembly.
Do I need to line the pencil case?
A lining is optional but recommended if you plan to store pens or pencils with sharp tips, since it adds durability and prevents items from poking through the crochet fabric. A simple cotton fabric lining sewn to match the Base shape works well.