
Free Pattern
Step-by-Step
Crochet
AmigurumiLittle amigurumi frog keychain crochet pattern
A small crochet frog keychain worked in rounds with simple increases and safety eyes.
- Level
- Intermediate
- Time
- 2-3 hours
- Hook
- 4.5 mm
- Yarn
- Baby/Fingering
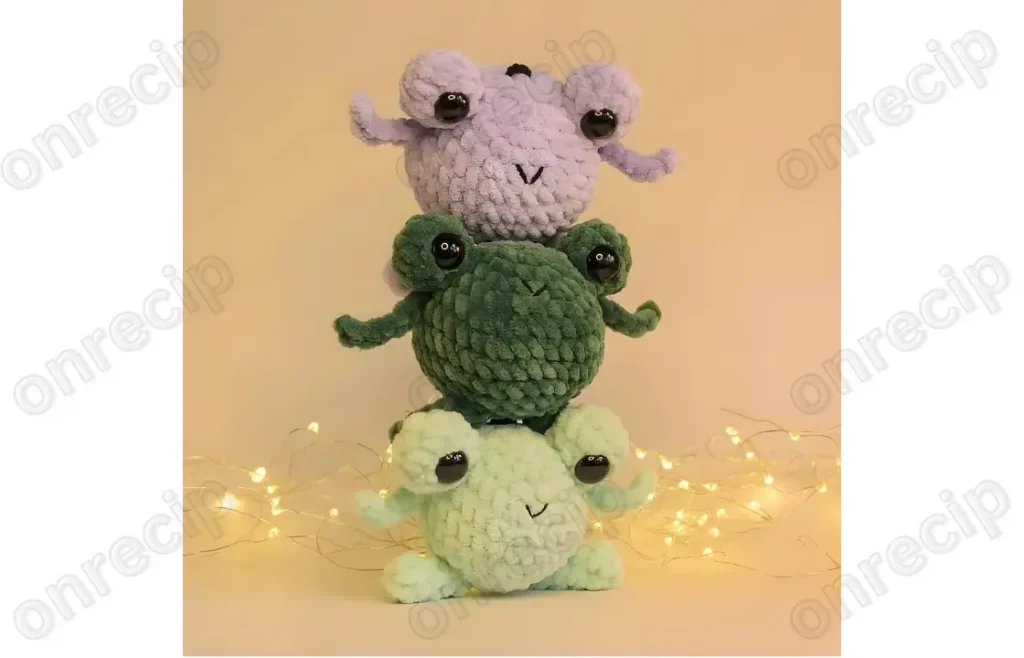
Pattern highlights
- Start the head-body from a short chain instead of the usual magic ring.
- Work the first round of single crochet into that chain to set the base count.
- Increase in every stitch on the next round to widen the shape quickly.
- Space increases with plain stitches on the following round to round the curve.
- Stuff the head-body as you go rather than waiting until it closes.
- Continue with the remaining rounds and finishing details from the fuller pattern.
About This Pattern
This frog keychain belongs in the small-object drawer of a collection, the one reserved for pieces that fit in a palm. It is not a display amigurumi. It is the kind you clip on a bag and forget about until someone asks who made it. I like that a pattern this size still has a proper build to it.
The technique here is plain single crochet worked in rounds, with increases doing all the shaping. Round one opens from a short chain instead of a magic ring, which is worth noting if you are used to the usual loop start. From there the increases stack evenly, then space out, and the head-body starts to curve.
What comes out the other end is a rounded little frog head-body, dense enough to hold its shape once stuffed. It is small, quick relative to a full amigurumi, and built to survive being handled, dropped, and clipped onto a zipper daily.
Worth knowing
There is something satisfying about a piece this small still following real amigurumi logic. Round one starts from a chain rather than a magic ring, so you get to see that alternate opening in action. Round two is a full increase round, doubling the stitch count evenly around, which teaches the rhythm without much room to lose count. Round three eases off, alternating a plain stitch with an increase, and the shape rounds out instead of flaring. Stuffing as you go means the piece firms up before it gets hard to reach inside, which matters more on something keychain-sized than on a bigger doll. It is a good small project for practicing increase placement without committing hours to it.
Common mistakes
- Treating the chain start like a magic ring Work the 6 sc directly into the 2nd chain from the hook as written. Do not substitute a magic ring or the stitch count will shift.
- Losing count during the all-increase round Use a stitch marker every few stitches while working the increase in every stitch. Recount before moving to round three.
- Skipping the plain stitch between increases Round three alternates one sc with one increase. Missing the plain stitch flattens the curve instead of rounding it.
- Waiting until the end to stuff Stuff as you go, a little each round, since the opening narrows fast on a small head-body. Reaching inside later gets harder, not easier.
- Pulling the yarn tail too tight at the start A chain start can gap if the first round is loose. Snug the working yarn after the first few stitches instead of yanking the tail alone.


Intermediate
Progress Tracker
0 of 0 rounds
Tap a round to tick it off — your place is saved on this device.
The kit
- for Amigurumi Frog Keychain
- Hiamalaya Dolphin Baby yarn (less than half a skein)
- YarnArt Jeans yarn or embroidery floss (black)
- 4.5 mm crochet hook
- 14 mm safety eyes
- Sewing needle and scissors
- Stitch markers and pins
- Fiberfill
- Keychain ring
Height
- 8-10 cm (3-4″)
Head-body
Stuff as you go.
Round 12 ch, 6 sc in 2nd ch from hook [6](6)
Round 2(inc) repeat 6 times [12](12)
Round 3(1 sc, inc) repeat 6 times [18](18)
Finishing
- Keep stuffing steadily as each round closes, since a keychain piece has little room to adjust later.
- Weave in the starting and any color-change tails flat against the inside before adding features.
- Set the safety eyes and attach the keychain ring once the head-body reaches its final shape.
Why it works
Round one opens from a two-chain start rather than a magic ring, so the very center sits slightly differently than in ring-based amigurumi.
Round two places an increase in every single stitch, doubling the count evenly and pushing the shape outward fast.
Round three alternates one plain stitch with one increase, which slows the growth and starts curving the head-body into a dome.
What it becomes
- Clip it to a bag or backpack zipper as a small everyday accent.
- Attach it to a keyring and pair it with a lanyard or wristlet for daily carry.
- Give it as a small handmade token alongside a card, no wrapping paper required.
Original pattern: https://onrecip.com/free-amigurumi-frog-keychain-pattern/
FAQ
Why does round one start with a chain instead of a magic ring?
This pattern opens with a short two-chain base rather than the usual adjustable ring. It gives the same six starting stitches, just anchored differently at the center.
How much yarn do I actually need?
The materials list calls for less than half a skein of the baby yarn used here. A keychain-sized piece uses very little, so leftover scraps work fine.
Should I stuff before or after each round?
Stuff as you go, adding fiberfill a little at a time as the rounds close in. Waiting until the opening is small makes it harder to fill evenly.
Is this the complete frog pattern?
The rounds shown here cover the head-body through round three, and the source notes it continues further. Treat this portion as the opening shaping, with remaining rounds and assembly following after.