
Free Pattern
Step-by-Step
Crochet
AmigurumiAmigurumi Jellyfish Keychain Crochet Pattern
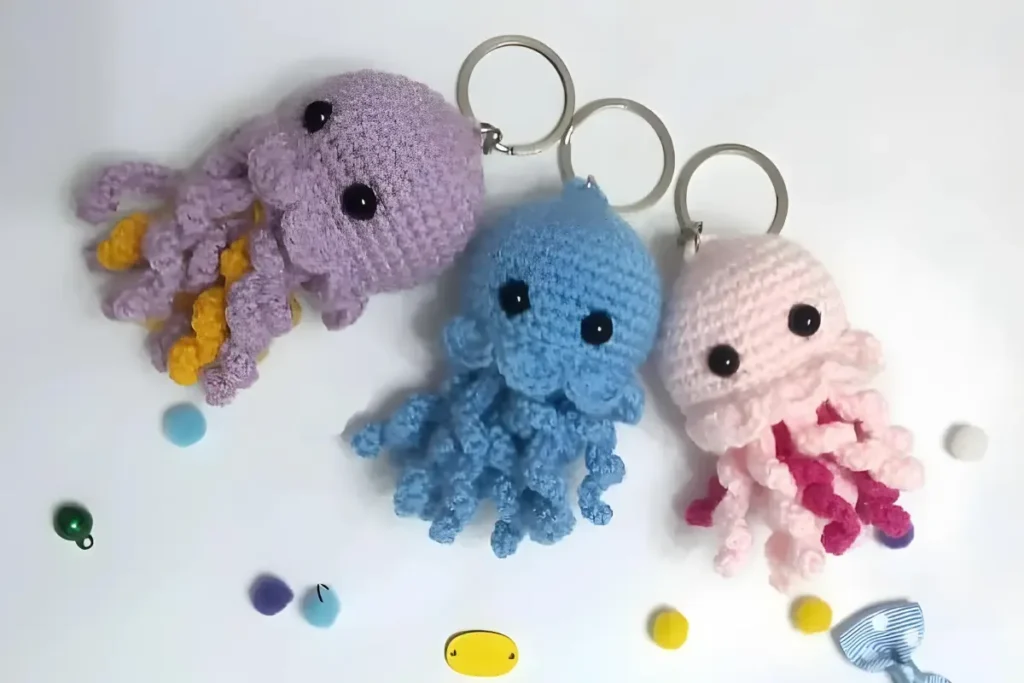
Make an adorable amigurumi jellyfish keychain with this free crochet pattern using worsted yarn, safety eyes, and simple rounds—perfect for gifting.
Level IntermediateTime 4-6 HoursHook 6 mmYarn Worsted
Pattern highlights
- Begin the dome of the jellyfish with a magic ring, working single crochets to form the very top.
- Increase steadily over the following rounds so the dome rounds out into its classic jellyfish shape.
- Add stuffing gradually as the dome closes in, shaping it evenly with your fingers as you go.
- Work the final rounds to taper and close the bottom edge, securing your stuffing inside.
- Attach the 6mm safety eyes to the front of the dome before fully closing the last round.
- Embroider a simple smiling mouth using embroidery thread once the face placement looks balanced.
- Weave in all yarn tails securely, then attach a keychain clip to the top of the finished jellyfish.
About This Pattern
This little amigurumi jellyfish keychain is proof that big charm can come from a tiny project. Worked up in just 20g of worsted weight yarn, this squishy sea creature has a rounded dome body and dangling tentacles that make it instantly recognizable and endlessly huggable. It's the kind of pattern that's perfect for crocheters who want a fast, satisfying finish—whether you're stocking a craft fair table, building a bag charm collection, or just want a fun ocean-themed project to break up your usual makes.
The main pattern comes together in just 6 rounds, using a main color and an accent color to bring the jellyfish's classic silhouette to life. You'll work with a 3.25mm hook, place 6mm safety eyes for that irresistible amigurumi expression, and use embroidery thread to stitch a simple smiling mouth. This is a great project for confident beginners ready to level up, or intermediate crocheters looking for a quick, low-commitment make—expect to spend somewhere between 4 to 6 relaxed hours from first stitch to finished keychain.
When it's all stuffed, shaped, and finished, you're left with a compact, pocket-sized jellyfish with a rounded huggable body and a playful dangling silhouette. It's soft, lightweight, and just the right size to clip onto a backpack, bag, or keyring. Because it stitches up so quickly and uses so little yarn, it's a wonderful last-minute handmade gift—easy to whip up for a birthday, a beach-lover friend, or a stocking filler that feels far more special than store-bought.
Common mistakes
- Starting the magic ring too loosely, leaving a visible hole at the top of the jellyfish dome.
- Pull the tail yarn firmly after your first round of single crochets and give it an extra tug before weaving in the end to fully close the ring.
- Losing track of stitch placement during the increase rounds that shape the dome.
- Use a stitch marker in the first stitch of each round and move it up every round so you always know where the round begins and ends.
- Overstuffing or understuffing the dome, leading to a lumpy or floppy shape.
- Add polyfil gradually in small pieces, checking the shape against a round object for reference, and stop stuffing just before the final closing round.
- Placing the 6mm safety eyes too close together or uneven, giving the jellyfish an odd expression.
- Insert the eye posts loosely first, then step back and compare spacing before pushing the backings on permanently.
- Tentacle ends fraying or unraveling because the yarn tail wasn't secured well.
- Weave each tentacle's tail end back through several stitches in different directions and trim only after gently tugging to confirm it's secure.


Intermediate
Progress Tracker
0 of 0 rounds
Tap a round to tick it off — your place is saved on this device.
Materials
- Approx 20g of worsted (aran) weight yarn in a main color and accent color
- Crochet Hook in Size 3.25
- Tapestry Needle
- Polyfil or preferred stuffing
- 6mm safety eyes
- stitch marker
- Embroidery thread for mouth
Main Pattern
- Round 1Leave a long tail (you will use this to sew on the keychain), then 6 SC in a magic circle.
- Round 2SC INC in each around. (12)
- Round 3SC in first, SC INC in next. Repeat around. (18)
- Round 4SC in first 2, SC INC in next. Repeat around. (24)
- Round 5SC in first 3, SC INC in next. Repeat around. (30)
- Round 6-11SC in each around. (30)
Ready to Learn More? Open the next page for Further Guidance!
Pages: 1 2
Important notes
💡 Keep a 3.25mm hook on hand and check your gauge on the first round or two—amigurumi worked too loosely can show stuffing through the stitches.
💡 Place your stitch marker in the very first stitch of each round and relocate it every round so you never lose your place across all 6 rounds.
💡 Stuff firmly but in small amounts at a time, checking the shape as you go so the dome stays round rather than lumpy or lopsided.
💡 Test the placement of your 6mm safety eyes before locking the backs on—hold the piece at arm's length to make sure the expression looks centered and even.
💡 Save your embroidery thread mouth for last, once stuffing and eyes are secure, so you can adjust the expression based on how the face is sitting.
Original pattern: https://onrecip.com/crochet-pattern-tutorial-amigurumi-jellyfish-keychain-free-crochet-pattern/
FAQ
How much yarn do I actually need for one jellyfish keychain?
You'll only need about 20g total of worsted weight yarn split between your main color and accent color. This makes it a great scrap-yarn project if you already have leftover worsted weight in your stash.
Can I use a different hook size than 3.25mm?
Yes, sizing up to a 4.0mm hook will create a slightly larger, looser jellyfish, while sizing down to 2.5mm will make a smaller, denser one. Just keep in mind the stitch count stays the same, so the finished size will shift with your hook choice.
Do I have to use safety eyes, or can I embroider the eyes instead?
Safety eyes give the cleanest, most secure amigurumi look and are recommended for a finished, professional appearance. If the keychain is for a very young child, you can embroider the eyes with thread instead for a safer no-choking-hazard option.
What's the best way to attach the finished jellyfish to a keychain clip?
Use your tapestry needle to sew a small loop of yarn or a metal jump ring securely into the top of the dome before attaching your keychain hardware. Reinforce the loop with a few extra stitches since this point will get the most everyday wear and tug.
My jellyfish tentacles are curling instead of hanging straight—what's happening?
This is normal for crocheted strands and usually relaxes after a light steam or gentle stretch once the piece is finished. If they're still curly, try gently pulling and holding each tentacle taut for a few seconds to help train the fibers.