
Free Pattern
Step-by-Step
Crochet
AmigurumiAmigurumi Plush Bunny Crochet Pattern
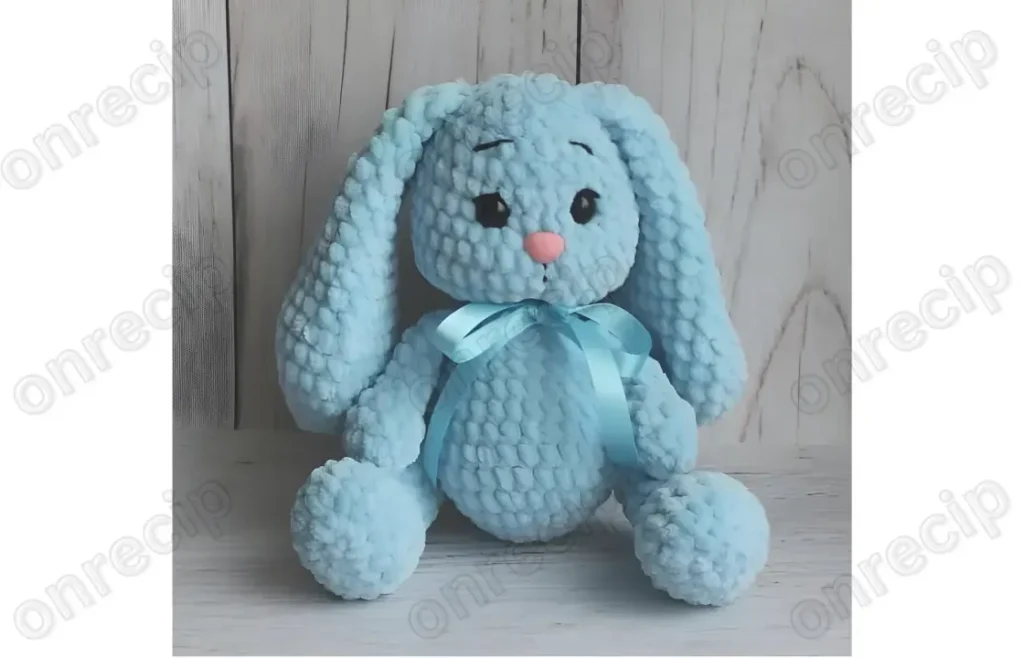
Make an adorable amigurumi plush bunny with this crochet pattern using soft baby yarn, safety eyes, and a satin bow — a sweet handmade gift idea.
Level IntermediateTime 4-6 HoursHook 3.5 mmYarn DK
Pattern highlights
- Begin the head with a magic ring and work through the early rounds to build up a rounded shape.
- Continue shaping the head with a mix of increase and even rounds until it reaches its full width.
- Shape the body separately, working rounds that widen and then taper to form the plush torso.
- Crochet the ears and limbs as smaller separate pieces, leaving long tails for sewing later.
- Stuff each piece firmly with fiberfill as you close up the final rounds of each part.
- Attach the 10mm safety eyes and 12x14mm nose to the head before sewing it closed.
- Embroider a simple mouth with black floss for the finishing facial detail.
- Sew the ears, arms, and legs onto the body, then tie on a satin ribbon bow to complete the bunny.
About This Pattern
This amigurumi plush bunny is the kind of pattern that turns a simple ball of soft baby yarn into a face you can't stop smiling at. Worked up in plush YarnArt Dolce or Himalaya Dolphin Baby yarn, it has that irresistible squishy, huggable quality that makes amigurumi bunnies so beloved. It's perfect for anyone who wants to stitch a sweet keepsake for a nursery, a baby shower gift, or simply to add a fluffy little friend to their own shelf.
The pattern builds the bunny piece by piece through a series of shaping rounds that grow and shrink the stitch count to form a rounded head, tummy, ears, and limbs. You'll want some prior amigurumi experience since the rounds move through increases and decreases fairly quickly without much hand-holding, but there's nothing here a confident beginner-plus stitcher can't handle. Expect to spend a relaxed evening or two, roughly 4 to 6 hours total, working through all the pieces and assembling them together.
The finished bunny comes together as a small, plump plush with a rounded body, floppy ears, and a face brought to life with 10mm safety eyes and a 12x14mm safety nose. Its soft baby yarn construction gives it a gentle, tactile feel that's ideal for little hands, while the satin ribbon bow adds a charming finishing touch. Whether tucked into a crib or wrapped up as a gift, this bunny is guaranteed to become someone's favorite handmade treasure.
Variations
There's something so satisfying about watching this bunny take shape round by round — you start with a tiny magic ring and before long you've got a plump little head and body ready to be joined. I love how the pattern uses simple increase and decrease rounds to sculpt those soft, rounded curves that make amigurumi bunnies so squeezable, especially when worked in a plush baby yarn like YarnArt Dolce. Setting the 10mm safety eyes and that sweet 12x14mm nose is my favorite moment in any amigurumi project — it's the instant the piece stops being a pile of parts and becomes a little personality. Embroidering the mouth with black floss adds so much charm for such a small step. And tying on that satin ribbon bow at the end feels like the perfect bow (pun intended) on a project that's equal parts technical practice and pure cuteness. If you love amigurumi for the way it turns basic stitches into something alive, this bunny will absolutely scratch that itch.
Common mistakes
- Losing track of stitch count during the increase and decrease rounds (like R5 and R11), which throws off the bunny's shape.
- Use a stitch marker at the start of every round and count your stitches after each increase/decrease round before moving on — it only takes a few seconds and saves you from unraveling later.
- Starting the magic ring too loosely, leaving a visible hole at the top of the head or body.
- Pull the magic ring's tail yarn firmly closed and give it an extra tug after the first round is complete; weave the tail through a couple of extra stitches for insurance.
- Placing the 10mm safety eyes and 12x14mm nose without first test-fitting their position on the head piece before stuffing.
- Insert the eye and nose posts (without locking the washers) and step back to check spacing and symmetry before you commit — amigurumi faces are all about proportion, and it's much easier to adjust before the piece is stuffed and closed.
- Under-stuffing the rounded body and head sections, leaving the plush looking floppy or misshapen instead of firm and huggable.
- Stuff in small pinches as you go rather than one big handful at the end, pushing fiberfill into the curves near increase rounds so the shape stays smooth and rounded.
- Working the ears or limbs too loosely, resulting in visible gaps between stitches that show the fiberfill through the fabric.
- Drop down half a hook size if your tension runs loose, and consider working small pieces like ears with a slightly tighter grip on the yarn to keep stitches snug.
- Forgetting to leave a long enough yarn tail when finishing pieces meant for sewing together, like the ears and limbs.
- Leave at least a 10-12 inch tail on every piece that needs to be attached later — it gives you plenty of length for sewing securely without having to add new yarn mid-seam.


Intermediate
Progress Tracker
0 of 0 rounds
Tap a round to tick it off — your place is saved on this device.
Materials
- YarnArt Dolce or Himalaya Dolphin Baby yarn
- 3.5 mm or 4.0 mm crochet hook
- 10 mm safety eyes
- 12х14 mm safety nose
- Black embroidery floss or cotton yarn
- Tapestry needle and scissors
- Satin ribbon for a bow
- Fiberfill
R 2
- Round 1(1 sc, inc) repeat 3 times [9](9)
R 2
- Round 1(inc) repeat 6 times [12](12)
- Round 3(2 hdc in one st) repeat 3 times, 3 sc, (2 hdc in one st) repeat 3 times, 3 sc [18](18)
R 11
- Round 1(3 sc, dec) repeat 2 times [8](8)
- Round 122 sc only Stuff with fiberfill. Fold the top opening flat and 4 sc through both sides.Fasten off.
R 3
- Round 1(1 sc, inc) repeat 6 times [18](18)
R 4
- Round 1(2 sc, inc) repeat 6 times [24](24)
R 5
- Round 1(3 sc, inc) repeat 6 times [30](30)
- Round 6Attach legs: 5 sc, 4 sc together with sc of the 1st leg, 11 sc, 4 sc together with sc of the 2nd leg, 6 sc [30](30)
R 10
- Round 1(8 sc, dec) repeat 3 times [27](27)
R 11
- Round 1(7 sc, dec) repeat 3 times [24](24)
R 12
- Round 1(6 sc, dec) repeat 3 times [21](21)
- Round 13Attach arms on the sides of the body (crochet sc of the body together with sc of the arm): (5 sc, dec) repeat 3 times [18](18)
Ready to Learn More? Open the next page for Further Guidance!
Pages: 1 2
R 5
- Round 6-96 sc (4 rows) Stuff 1/2 full. Fold the top opening flat and 3 sc through both sides.Fasten off.
R 1
6 sc in magic ring [6]
R 1
6 sc in magic ring [6]
R 6
4 dec, 8 sc, dec [13]
R 1
6 sc in magic ring [6]
Important notes
💡 Keep a stitch marker on hand at all times; amigurumi is worked in continuous spiral rounds, so it's easy to lose your round marker without one, especially during the increase-heavy rounds.
💡 Stuff firmly but in stages — add fiberfill a little at a time as you close up each piece rather than jamming it all in at once, which helps avoid lumps and keeps the rounded shape smooth.
💡 Position the 10mm safety eyes and 12x14mm nose before locking the backing washers in place, and try holding the head up to check symmetry in a mirror or from a few feet away.
💡 Use black embroidery floss (rather than yarn) for the mouth detail if you want crisp, fine lines — split the floss into two strands for a delicate, precise stitch.
💡 Save your yarn tails from each piece (ears, arms, legs) rather than weaving them in immediately — you'll use them to sew the pieces onto the body during assembly, saving you from adding extra yarn later.
Original pattern: https://onrecip.com/amigurumi-plush-bunny-crochet-pattern/
FAQ
What yarn weight works best for this amigurumi bunny?
The pattern calls for YarnArt Dolce or Himalaya Dolphin Baby yarn, both soft baby-weight yarns similar to DK or light worsted. Any comparable soft, worsted-weight yarn will work as long as you adjust your hook size to match your gauge.
Can I make this bunny without safety eyes?
Yes, you can embroider the eyes with black yarn or floss instead of using 10mm safety eyes, which is a great option if the toy is for a very young child. Just be sure to secure your stitches well on the inside so they don't pull loose with handling.
How much fiberfill will I need for this pattern?
The amount depends on the size of your finished bunny, but a small to medium bag of polyester fiberfill is typically enough for a plush of this scale. Stuff firmly in small amounts as you go to keep the shape smooth and rounded.
Is this pattern good for a beginner amigurumi maker?
This pattern is best suited for someone with some amigurumi experience, since it moves through shaping rounds with increases and decreases without extensive step-by-step guidance. If you've completed a simple amigurumi ball or basic animal before, you should be able to follow along comfortably.
What size hook should I use for a tighter stitch?
Try the 3.5mm hook if you want a denser fabric that better hides the fiberfill stuffing inside. The 4.0mm hook will work up slightly faster but produces a marginally looser stitch, so choose based on your personal tension and how tightly you crochet.