
Free Pattern
Step-by-Step
Crochet
Doll ClothingBeaded pearl sleeve for a doll gown, crocheted round by round
A beaded doll sleeve worked in fine cotton, one wire-set pearl at a time.
- Level
- Intermediate
- Time
- 4-6 hours
- Hook
- 3 mm
- Yarn
- 5 ply cotton
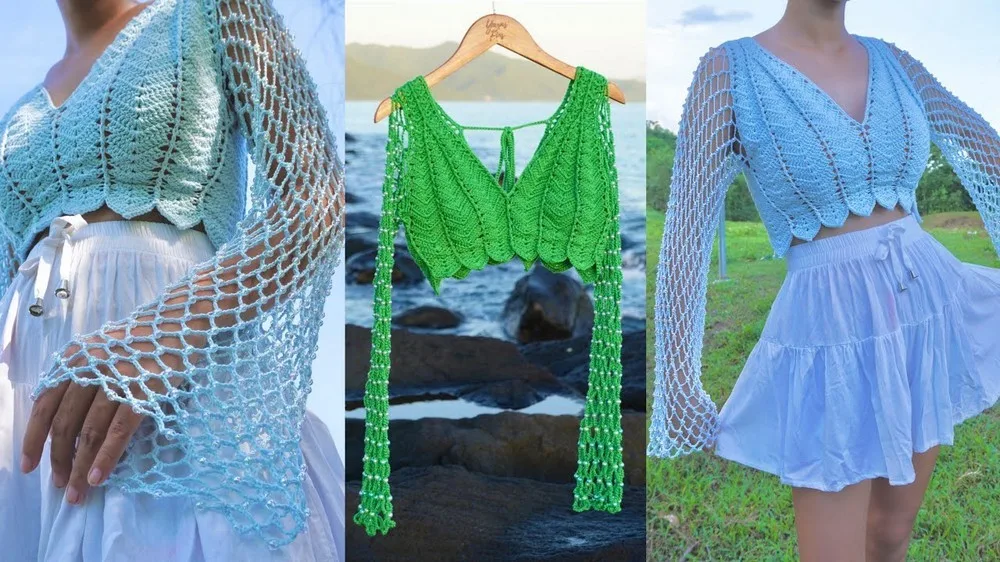
Pattern highlights
- Attach yarn at the armhole and start the first round with a simple chain-and-single-crochet lattice.
- round two onward, feed a bead onto the floral wire and drop it into each chain space before closing the loop.
- Repeat the same bead-insertion round over and over, letting the sleeve grow one loop at a time.
- Check the sleeve against your desired length before deciding you have reached the finishing round.
- Close the round with a slip stitch and trim your working yarn.
About This Pattern
Every notebook needs a page for the fussy pieces, the ones you make once and then admire from across the room. This sleeve belongs there. It is not a garment for a person. It is a garment for a doll, which somehow makes the beading more forgivable and more addictive.
The technique here is really a chain-space lattice built to carry beads, one wire-fed pearl per loop. Fine cotton, worked double-strand for the body and single for the sleeve itself, keeps the fabric light enough to hold that weight without sagging. A 3 mm hook and a scrap of floral wire do the quiet mechanical work.
What comes off the hook is a tube of open chain loops strung with roughly 1,200 beads, tapered at the finishing round into a neat scalloped edge. It reads more like jewelry than knitwear. I like that it insists on being looked at closely.
Worth knowing
The satisfaction is in the repetition with a twist: every chain-7 space gets its own bead, inserted with wire, not threaded in advance. That single habit changes the whole rhythm of the round. There is also something pleasing about how the finishing round shifts the pattern, swapping the long chain spaces for a tighter chain-3 scallop studded with single beads. It reads like a hem finding its edge. And because the sleeve is worked in rounds from the armhole down, there is no seaming to dread later, just yarn, wire, and beads until the length looks right. It rewards patience over speed.
Common mistakes
- Forcing the hook back in too fast Let the bead settle in the loop before reinserting your hook, or you'll split the strand. Slow down on this step more than any other.
- Losing count on repeated bead rounds Mark every fifth round with a scrap of thread since rounds 3 through 31 all look identical. It saves you from re-measuring constantly.
- Cutting floral wire too short Keep at least 12 cm of wire so you have enough length to guide the bead in and pull back out cleanly.
- Skipping the wire-cut tip for the finishing round Cut the floral wire unevenly before the finishing round, as the pattern suggests, so it slides free of the bead more easily.

Intermediate
Progress Tracker
0 of 0 rounds
Tap a round to tick it off — your place is saved on this device.
The kit
- 5 ply combed cotton yarn (Double strand for the body, single strand for the sleeves).
- 3 mm crochet hook.
- 6 mm beads, around 1,200 pieces or more depending on the desired width and length of your sleeves. In this tutorial, exactly 1,200 pieces were used.
- Floral wire at least 12 cm long or a 0.75 mm crochet hook for inserting the beads.
Sleeve
Attach your yarn at the connecting part of the armhole to begin.
This pattern creates embellished sleeves with beads for the Marabella doll.
The tutorial will use a series of chain stitches and single crochets to add beads to the sleeves.
Round 1Chain 7; skip the next 4th stitch, and single crochet in the next stitch; if you don't have 9 stitches left, just do the single crochet at the center; finish the round with a single crochet on the first stitch; then, slip stitch the first three chains and work one single crochet in the same space.
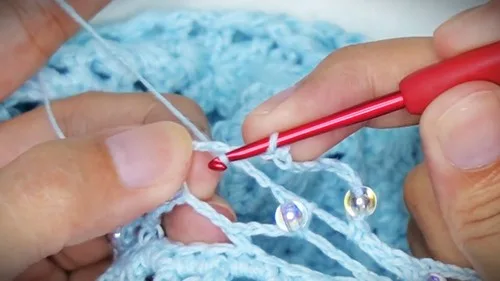
Round 2Bead Insertion Remove your hook, and using your floral wire, insert your first bead; insert back your hook and chain 7; on the next chain-7 space, insert your hook, yarn over, and pull up a loop; in this loop, remove your hook, and, holding it in place, insert your second bead; insert back your hook on the same loop, tighten, then yarn over and pull through two loops (this is the method for attaching all the beads); chain 7 again and repeat the bead insertion method on the next chain-7 space; continue this pattern for the entire round; work a single crochet on the loop on top of your first bead to finish the round; to proceed to the next round, slip stitch on the first three chains and work a single crochet in the same space.
Rounds 3–31Repeat the steps from round 2 until you reach your desired sleeve length. (For this tutorial, a total of 31 rounds were completed, with round 32 as the finishing round.)
Round 32Finishing Round After achieving a sleeve length of 60 cm, as an example, slip stitch on the first three chains after your last single crochet; chain 3, remove your hook, and insert your bead (tip: it's easier to insert the floral wire if it is cut unevenly); remove your floral wire, reinsert your hook, chain another 3, then on the next chain-7 space, work a single crochet, chain 3, and insert your second bead; again, chain 3 and single crochet on the next chain-7 space; repeat these steps for the entire round; finish the round with a slip stitch on the first stitch.
From the collection
Finishing
- Weave in the starting and ending yarn tails at the armhole join and the final slip stitch.
- Check each bead sits snugly in its loop and re-seat any that slipped during the finishing round.
- Attach the finished sleeve to the doll's armhole using the same join point where you first attached yarn.
Why it works
The sleeve starts at the armhole and builds downward in continuous rounds, so there is no side seam to sew.
Rounds 2 through 31 repeat the same chain-7 bead-insertion method, which is what lets the maker set the sleeve's finished length by eye.
The finishing round shortens every chain from 7 to 3, which pulls the last row of loops in and creates the tapered scalloped edge.
What it becomes
- A statement sleeve for a doll gown that already has a plain bodice needing a focal point.
- A display piece on its own, pinned flat, for a collector who likes beadwork more than garments.
- A practice project for anyone wanting to try wire-fed bead crochet before committing to a larger piece.
Original pattern: https://crocheteverything.com/make-chic-unique-crochet-meribella-pearl-sleeve-top-tutorial-great-for-all-body-types-size/
FAQ
Can I use fewer than 1,200 beads?
Yes, the pattern notes that count depends on your desired sleeve width and length. Fewer rounds or a narrower sleeve simply means fewer beads.
Why do I need floral wire instead of pre-stringing the beads?
The wire lets you insert one bead at a time into each loop as you crochet, rather than sliding a whole strand's worth on beforehand. A 0.75 mm hook is offered as an alternative if you'd rather skip the wire.
How do I know when to stop repeating the bead rounds?
The pattern ties this to your desired sleeve length, using 60 cm and 31 rounds as its own example. Measure your work against the length you want before moving to the finishing round.
Does the sleeve get sewn together afterward?
No, it's worked in continuous rounds from the armhole down, so there's no seam to close. You attach it directly at the armhole where you began.