Free Pattern
Step-by-Step
Crochet
Bags & AccessoriesOmbre seashell clutch bag crochet pattern
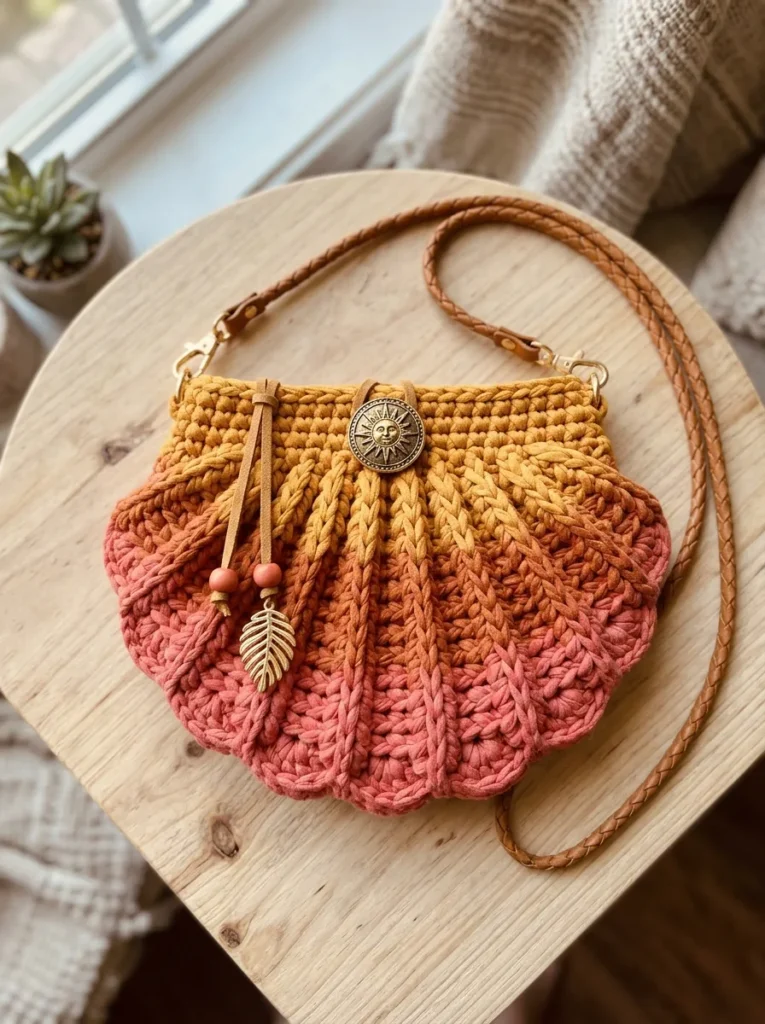
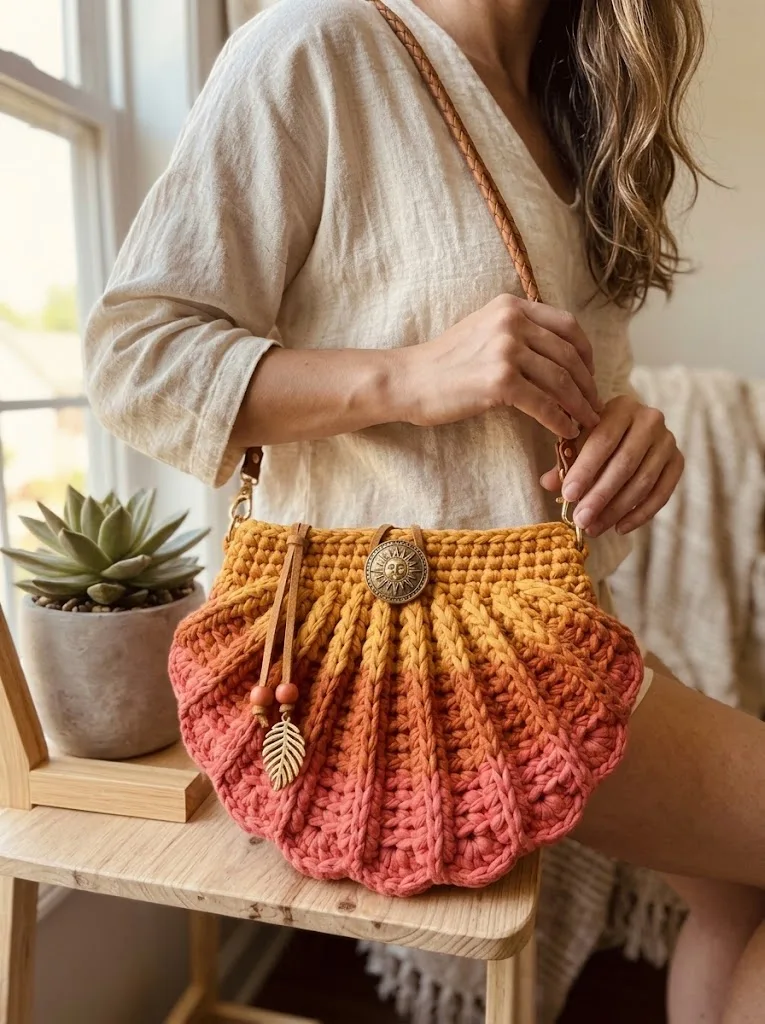
A fan-shaped seashell clutch worked in ombre T-shirt yarn with raised front post texture.
- Level
- Intermediate
- Time
- 4-6 hours
- Hook
- 8 mm
- Yarn
- Super Bulky
Pattern highlights
- Start each panel with a short foundation chain and increase one stitch at both ends every row.
- Keep working flat, color by color, until the fan shape reaches its full width.
- Make a second panel to match, then seam the two together along the curved edges.
- Join the top edge into a round and work three rounds of single crochet for a clean band.
- Attach D-rings or clasps at the top corners so the bag can take a crossbody strap.
- Finish with a decorative button or a leather tie, whichever closure you prefer.
About This Pattern
A seashell clutch earns its place next to the amigurumi and the afghans. It's a bag, not a toy, but it still has that fan-shaped charm I collect for. I keep seeing shell motifs pop up in crochet archives, usually as appliqués. This one scales the shape up into a full panel you can actually carry. I like that it's wearable proof of an old stitch idea, not a swatch pinned to a board.
The build leans on skills I already trust. Single crochet increases worked flat, a joined round for the top band, plus front post double crochet. The increases happen at both ends of each row, so the panel widens evenly into a fan. FPdc is the one new trick here, raising ridges without stiffening the fabric. Nothing exotic, just familiar stitches stacked in a smart order.
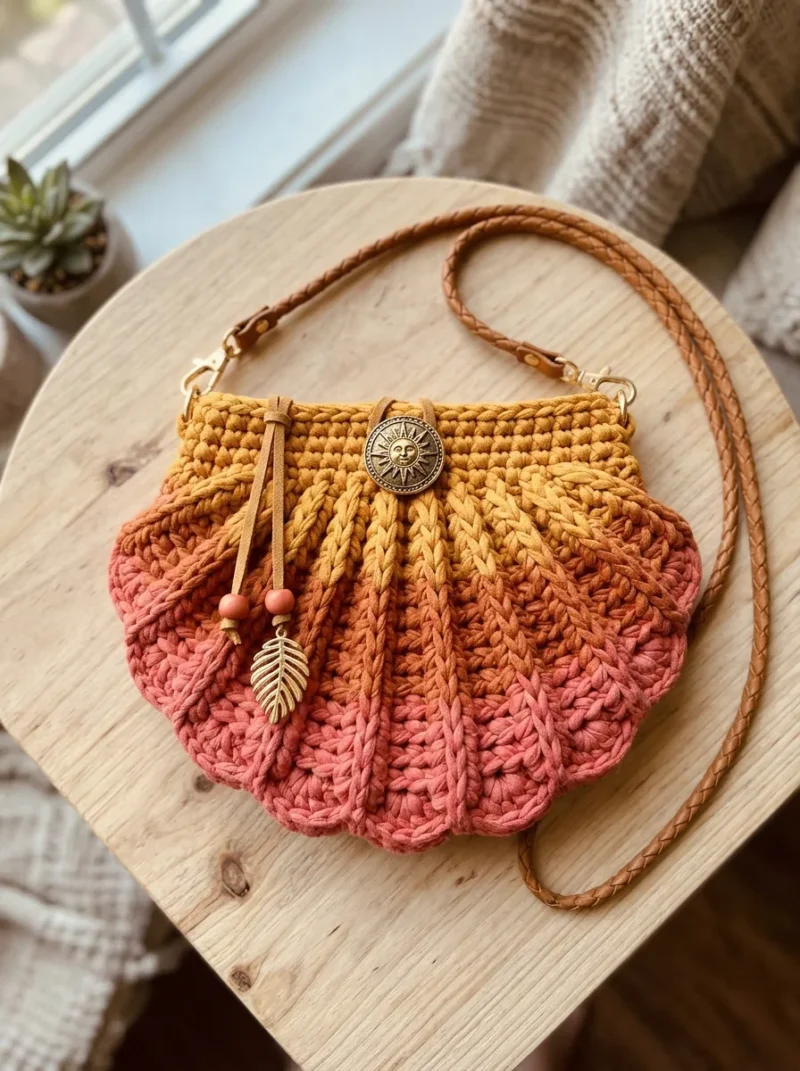
What comes off the hook is two seashell-shaped panels joined into a structured little clutch. It's finished with a sturdy top band. It is roughly 9 inches wide and 7 inches tall. D-ring hardware sits at the corners, with a button or leather tie for the closure. Ombre dusty rose to mustard gold moves across it without any fuss on my part. The gradient yarn does that work for me.
Common mistakes
- Skipping the double increase Each row needs an increase at both ends, not just one. Miscounting here throws off the fan curve, so recount before turning.
- Working post stitches into the wrong loop FPdc goes around the post of the stitch below, not into the top loops. Pulling into the wrong spot flattens the ridge texture.
- Using a needle too fine for T-shirt yarn A standard tapestry needle can struggle with bulky cotton tape. Split the yarn or use a larger-eyed needle to weave ends flat.
- Loose or crooked hardware tabs D-ring tabs stitched off-seam pull the bag out of shape under strap weight. Line them up at the actual side seam before stitching.

Intermediate
Progress Tracker
0 of 0 rounds
Tap a round to tick it off — your place is saved on this device.
The kit
Yarn
- Approximately 150g of T-shirt yarn or super bulky cotton tape yarn
For the ombre effect
- one skein each in dusty rose, burnt orange or terracotta, and mustard gold (roughly 50g each)
- Alternatively, one skein of gradient T-shirt yarn in sunset tones
Hook
- 8mm or 9mm crochet hook (this depends on your tension with T-shirt yarn, so swatch first if you are unsure)
Notions
- 2 D-ring bag hardware pieces or swivel lobster clasps
- 1 decorative button or medallion (approximately 25mm diameter)
- Leather cord or suede lace (about 12 inches for decorative ties)
- Braided leather crossbody strap with lobster clasp ends
- Tapestry needle
- Scissors
- Stitch markers
Finished Dimensions
- Approximately 9 inches wide at the widest point
- Approximately 7 inches tall (not including strap)
Panel One (Make Two)
Starting with Dusty Rose (Color A)
Foundation Row: Ch 6.
Round 1Sc in 2nd ch from hook and in each ch across. Turn. (5 sts)
Round 2Ch 1, 2 sc in first st (increase made), sc in next 3 sts, 2 sc in last st. Turn. (7 sts)
Round 3Ch 1, 2 sc in first st, sc in next 5 sts, 2 sc in last st. Turn. (9 sts)
Round 4Ch 1, 2 sc in first st, sc in next 7 sts, 2 sc in last st. Turn. (11 sts)
Round 5Ch 1, 2 sc in first st, sc in next 9 sts, 2 sc in last st. Turn. (13 sts)
Round 6Ch 1, 2 sc in first st, sc in next 11 sts, 2 sc in last st. Turn. (15 sts)
Round 7Ch 1, 2 sc in first st, sc in next 13 sts, 2 sc in last st. Turn. (17 sts) You should now have a gentle curved triangle shape forming. This is the scalloped bottom curve of your shell.
Round 8Ch 1, 2 sc in first st, sc in next 15 sts, 2 sc in last st. Turn. (19 sts)
Round 9Ridge Setup Row Ch 1, sc in first st, *dc in next st, sc in next st* repeat from * to * across. Turn. (19 sts: alternating sc and dc)
This row sets up the posts that you will work around to create the raised ridges.
Change to Burnt Orange (Color B) at the end of Row 9. To change colors cleanly, complete your last stitch until you have the final yarn over remaining, then yarn over with the new color and pull through. Snip your old color leaving a 4 inch tail to weave in later.
Round 10First Ridge Row Ch 1, sc in first sc, *fpdc around the dc from the row below, sc in next sc* repeat from * to * across. Turn. (19 sts)
This is where the magic happens. The front post double crochet wraps around the tall stitch from the previous row and pulls it forward, creating that beautiful raised vertical line.
Round 11Ch 1, sc in first st, *dc in next st (the fpdc from below), sc in next st* repeat across. Turn. (19 sts)Row 12: Repeat Row 10. (19 sts)Row 13: Repeat Row 11. (19 sts) Change to Mustard Gold (Color C) at the end of Row 13.Row 14: Repeat Row 10. (19 sts)Row 15: Repeat Row 11. (19 sts)Row 16: Repeat Row 10. (19 sts)Row 17: Repeat Row 11. (19 sts)
Round 18Top Edge Ch 1, sc in each st across. (19 sts) Fasten off and weave in ends. Make a second panel identical to the first.
Top Band
With the bag joined and mustard gold still attached:
Round 1Ch 1, sc evenly around the entire top opening, working approximately 38 to 42 sts total (19 to 21 across each side of the opening). Join with sl st to first sc. (approx 40 sts)
Round 2Ch 1, sc in each st around. Join. (40 sts)
Round 3Ch 1, sc in each st around. Join. (40 sts) Fasten off. Weave in ends. This creates a clean, slightly sturdier edge at the top of your clutch.
Attaching Hardware
On each side seam at the top corners, you will attach your D-rings or swivel clips. Here is how:
Cut two small rectangles of leather or use ribbon (approximately 1 inch by 3 inches). Fold each piece through the hardware ring, then stitch or glue securely to the inside of the bag at the side seams.
Alternatively, crochet two small tabs: Ch 8, sl st to join into a loop, sc 12 sts around the loop, fasten off. Thread through your hardware and stitch to the bag.
Clip your braided leather strap to the hardware and you are ready to wear it crossbody.
Adding the Decorative Button Closure
Center your sun medallion or decorative button on the front panel, about 1 inch down from the top edge. Using a needle and thread or yarn, stitch securely in place.
Cut two pieces of leather cord approximately 6 inches each. Fold them in half and attach to the back panel at the top edge, centered above the button. Thread beads and charms onto the cord ends if desired, then knot to secure.
To close the bag, wrap the leather cords around the button in a figure eight pattern.
Assembly
Step 1Before you call this crochet project complete, take a few minutes to tidy everything up:
Step 2Weave in all yarn tails securely with your tapestry needle. T-shirt yarn can be bulky, so split the yarn if needed to reduce lumps.
Step 3Block lightly if your panels are curling. Wet blocking or steam blocking both work with cotton T-shirt yarn.
Step 4Check all hardware is secure before using.
From the collection
Finishing
- Weave in every yarn tail with the tapestry needle, splitting the yarn first to cut bulk.
- Wet block or steam block the panels if the curved edges are curling before you seam them.
- Attach the D-ring hardware at the side seams. Then sew on the button or thread the leather tie for the closure.
Why it works
Each row increases at both the first and last stitch, widening the fan evenly from the six-chain start.
The panels are worked flat, not in rounds, so the fan shape keeps two straight edges for seaming.
The top band starts with a joined round worked around the entire opening. Its stitch count depends on the seamed panels, not a fixed number.
What it becomes
- Carry it as a crossbody for an afternoon out when you want one hand free.
- Use it as a clutch for an evening when a structured, textured bag beats a flat one.
- Pair it with the braided leather strap and simple outfits, since the ombre does the visual work.
FAQ
Can I use regular yarn instead of T-shirt yarn?
You would lose the plush, chunky texture that defines this bag. If you try worsted-weight cotton held multiple strands, expect a smaller finished size and adjust your hook.
Why does the panel start with a chain of only six?
That short foundation chain keeps the narrow point of the shell tight. Every row after that increases outward, so starting wide would throw off the fan shape.
What if I can't find D-ring hardware?
The pattern gives you a crochet alternative: small tabs made from a short chain joined into a loop. Thread your clasp or swivel clip through that instead.