Free Pattern
Step-by-Step
Crochet
Bags & AccessoriesDusty rose tassel crossbody bag crochet pattern
A structured crossbody bag with a textured flap, nine tassels, and a chain strap.
- Level
- Intermediate
- Time
- 6-10 hours
- Hook
- 4.0 mm
- Yarn
- Worsted
Pattern highlights
- Crochet two identical rectangular panels in plain single crochet for the front and back.
- Seam the panels along the bottom and sides, then turn the bag right side out.
- Work a single crochet edging around the top opening and sew on two small D-ring tabs.
- Crochet the curved flap separately, alternating puff stitches with single crochet to build the texture.
- Sew the finished flap onto the back panel so it folds down over the front.
- Wrap yarn around cardboard to make tassels, then attach them along the flap's curved edge.
- Clip a chain strap with lobster clasps onto the D-rings to finish the bag.
About This Pattern
I keep a corner of my collection for pieces that hold their own shape. This crossbody belongs there, not draped but structured. It's built from two flat panels and a separate flap. That makes it feel more like a small structured object than a typical crochet accessory. Cotton bags sit at an odd angle in my notebook, closer to craft than garment. The dusty rose keeps it from reading as a swatch experiment. It reads as something I'd actually carry out the door.
The body itself is plain single crochet, worked flat in two rectangles. The flap carries the real technique: a puff stitch alternating with single crochet across each row. That repeat is what raises the little bumps on the surface. Then come the finishing skills — chain loops for the D-ring tabs, a whip-stitch seam, nine wrapped tassels. None of it is hard, but none of it is filler either.
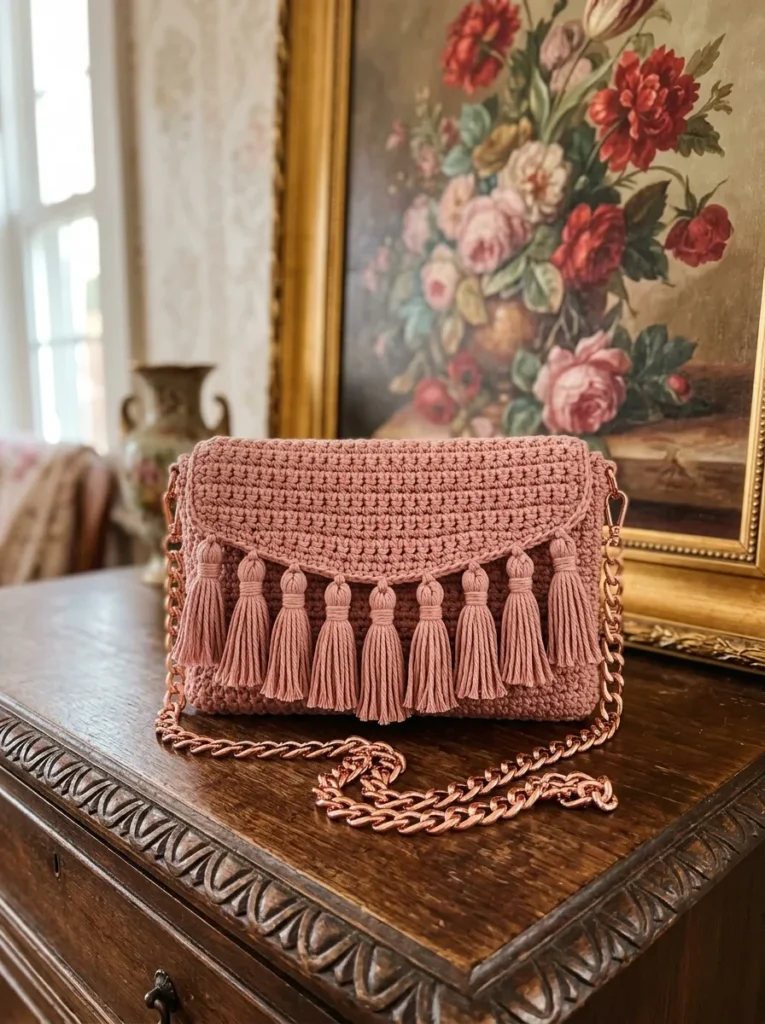
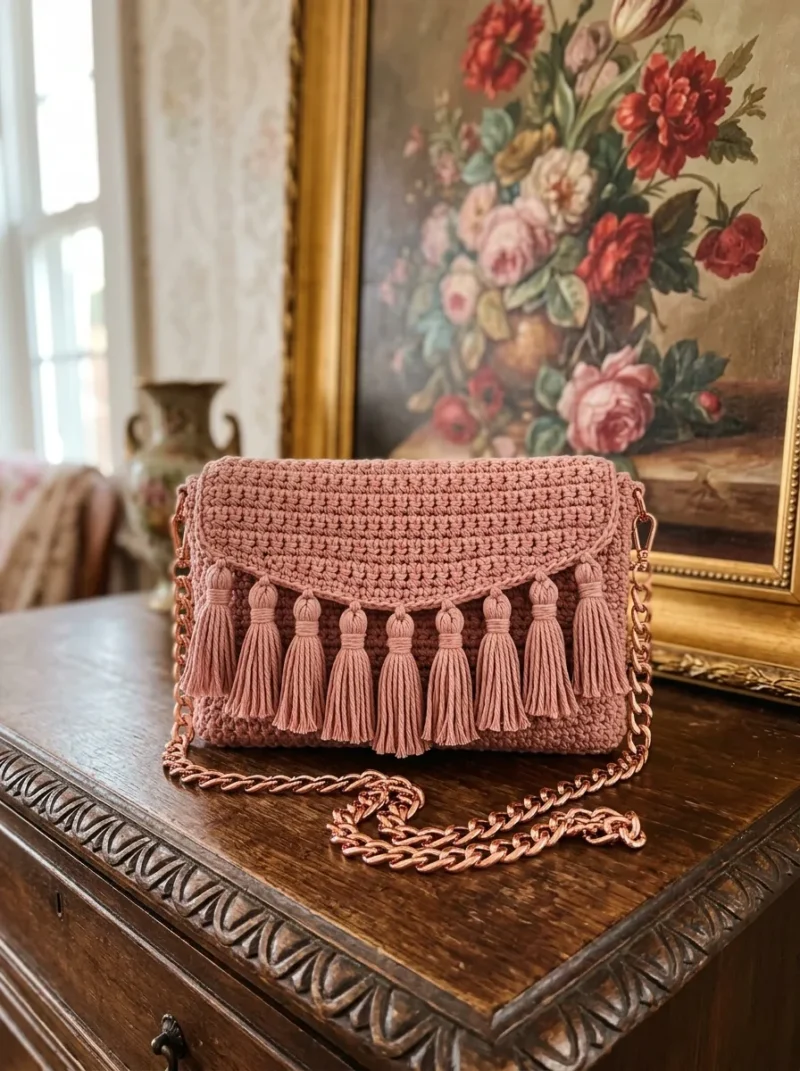
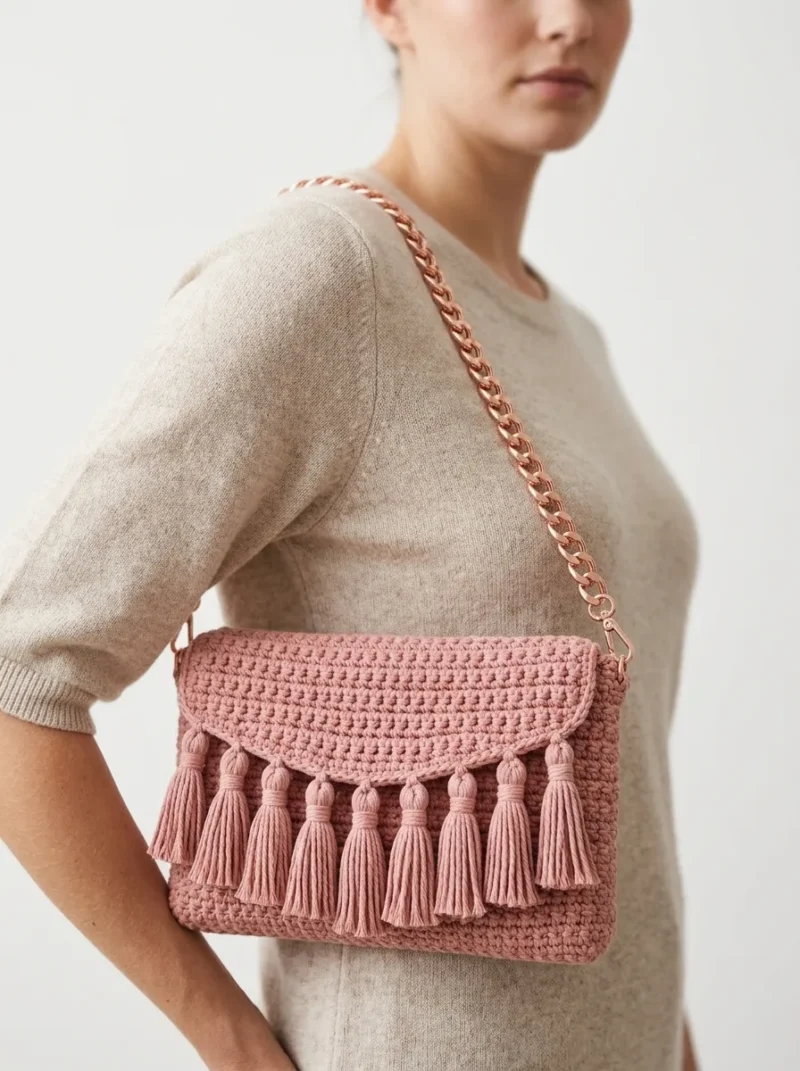
Finished, this is a small structured crossbody with a curved, textured flap. Nine tassels hang off that curve, evenly spaced, each about the length of a finger. The dusty rose pink is quiet enough to go with most things in a closet. A rose gold chain strap clips to D-rings at the sides, and that's the whole hardware list. It's a bag, not a puzzle — but it photographs like one.
Gauge: 18 stitches and 20 rows = 4 inches in single crochet with a 4.0mm hook. Work a swatch first — you should not be able to see through the fabric. Finished size: the bag body is approximately 8 inches wide by 5.5 inches tall (not including the flap), the flap adds about 3.5 inches at its deepest curved point, and each tassel finishes around 2.5 inches long.
Common mistakes
- Puff stitches worked too loose Keep tension tight on the puff stitch loops, or the bumps flatten into the row above. Snug stitches hold the texture visible in the photos.
- Gauge swatch skipped If your fabric is loose enough to see through, the bag will sag under its own weight. Work a swatch first and check it meets gauge: 18 stitches and 20 rows = 4 inches in single crochet with a 4.0mm hook, and feels as firm as the pattern says.
- Whip stitch seam pulled uneven An uneven whip stitch along the bottom and sides shows once you turn the bag right side out. Keep your stitches small and evenly spaced as you go.
- D-ring tabs placed wrong The tabs need to sit on the inside of the side seams, not the outer edge. Stitch them down securely, since they carry the full weight of the strap.
- Tassels trimmed too early Trim the tassel ends after they're tied onto the flap, not before, so lengths match evenly. Uneven tassels are the first thing anyone notices on this bag.

Intermediate
Progress Tracker
0 of 0 rounds
Tap a round to tick it off — your place is saved on this device.
The kit
Yarn
- Approximately 200 to 250 yards of worsted weight cotton yarn or cotton blend in dusty rose pink
- Cotton works best for bags because it holds structure and does not stretch
- Recommended yarns: Drops Paris, Lion Brand 24/7 Cotton, or similar worsted cotton
Hook
- 4.0mm (G/6) crochet hook
- You may need to go down to a 3.5mm hook if your stitches are loose; bags need tight, firm fabric
Notions
- Tapestry needle for weaving ends and seaming
- Scissors
- Stitch markers (optional but helpful)
- Two D-rings or grommets, approximately 10mm to 12mm
- Small piece of cardboard (about 3 inches wide) for making tassels
- Chain strap with lobster clasps, approximately 45 to 50 inches for crossbody length
Part One: The Bag Body (Front and Back Panels)
You will make two identical rectangles and seam them together.
Row 1Ch 37. Sc in 2nd ch from hook and in each ch across. (36 sts)
Row 2Ch 1, turn. Sc in each st across. (36 sts)
Rows 3–28Repeat Row 2. (36 sts)At the end of Row 28, fasten off and weave in ends. Your panel should measure approximately 8 inches wide by 5.5 inches tall.Make two of these panels.
Part Three: The Top Edging with D-Ring Tabs
Now you will work a simple edging around the top opening and create small tabs on each side to hold your D-rings.
Round 1Join yarn at one side seam. Ch 1, sc evenly around the top opening, working approximately 36 sc across the front, 3 sc in the corner, 3 sc down the side seam allowance, 3 sc in the corner, 36 sc across the back, and repeat for the other side. Adjust your count to keep the fabric flat. Sl st to first sc to join.
D-Ring Tab (make 2):
Ch 7. Sl st to join into a small loop. Sc 10 times around the chain loop to reinforce it. Fasten off, leaving a long tail.
Thread a D-ring onto each tab. Stitch the tabs securely to the inside of each side seam at the top of the bag.
Part Four: The Curved Flap
The flap is worked separately and sewn onto the back panel. It features a textured stitch pattern that creates those lovely little bumps visible in the image.
Row 1Ch 37. Sc in 2nd ch from hook and in each ch across. (36 sts)
Row 2Ch 1, turn. Sc in each st across. (36 sts)
Row 3Ch 1, turn. Sc in first st, *puff st in next st, sc in next st.* Repeat from * to * across, ending with sc in last st. (36 sts, counting each puff as one st)
Row 4Ch 1, turn. Sc in each st across, working into the top of each puff. (36 sts)
Row 5Ch 1, turn. Sc in first 2 sts, *puff st in next st, sc in next st.* Repeat from * to * across, ending with sc in last 2 sts. (36 sts)
Row 6Repeat Row 4. (36 sts)
Rows 7–12Repeat Rows 3 through 6 once more, then repeat Rows 3 and 4.
Now you will shape the curve at the bottom of the flap.
Row 13Decrease row Ch 1, turn. Sc dec over first 2 sts, sc in each st across to last 2 sts, sc dec over last 2 sts. (34 sts)
Row 14Ch 1, turn. Sc in each st across. (34 sts)
Row 15Ch 1, turn. Sc dec over first 2 sts, sc in each st across to last 2 sts, sc dec over last 2 sts. (32 sts)
Row 16Ch 1, turn. Sc in each st across. (32 sts)Continue this decrease pattern (decrease at each end every other row) until you have approximately 20 sts remaining.
Final RowCh 1, turn. Sc in each st across. Fasten off.
Part Five: Attaching the Flap
Position the straight edge of the flap along the top back edge of the bag (on the outside). Whip stitch securely using your tapestry needle and matching yarn. The flap should fold over the front of the bag with the curved, tassel edge facing outward.
Part Six: Making the Tassels
You will make 9 tassels and attach them evenly along the curved edge of the flap.
To make one tassel: 1. Cut a piece of cardboard approximately 3 inches tall.
2. Wrap yarn around the cardboard 20 to 25 times.
3. Cut a 10-inch piece of yarn. Slide it under the wrapped yarn at the top of the cardboard and tie tightly.
4. Cut the yarn at the bottom of the cardboard.
5. Cut another 10-inch piece of yarn. Wrap it around the tassel about half an inch below the top knot, wrapping several times, and tie securely to create the tassel head.
6. Trim the bottom of the tassel evenly.
Repeat to make 9 tassels.
Part Seven: Attaching the Tassels
Space the tassels evenly along the curved edge of the flap. I recommend marking your placement with stitch markers first. Use the long ties at the top of each tassel to stitch them securely to the wrong side of the flap edge.
Part Eight: Adding the Chain Strap
Clip your chain strap onto the D-rings at each side of the bag. Adjust the length as needed for crossbody or shoulder wear.
Assembly
Step 1Place both panels together with wrong sides facing out (so the seam will be hidden when you turn the bag right side out).
Step 2Using a tapestry needle and matching yarn, whip stitch along the bottom edge and both side edges. Leave the top edge open.
Step 3Turn the bag right side out. The seams should now be on the inside.
From the collection
Finishing
- Weave in all loose ends from the panels and the flap before assembling anything.
- Whip stitch the two panels together along the bottom and sides, then turn right side out.
- Sew the finished flap to the back panel, then attach the tassels and clip on the chain strap.
Why it works
The two body panels are worked flat in rows, not in the round. That's why they need a whip-stitch seam along the bottom and sides, with the top left open.
The flap is worked as its own flat piece, separate from the body panels. Its texture comes from alternating a plain single crochet row with a puff-stitch row. That puff stitch lands in every other stitch, repeated across nine rows.
The top edging is worked in the round and joined with a slip stitch. That join is why it lies flat and even all the way around. The D-ring tabs are small reinforced chain loops. They're stitched to the inside of the side seams, not worked into the edging itself.
What it becomes
- This crossbody works well as a daytime bag for running errands, since cotton holds its shape through light wear.
- Pair it with a plain dress or jeans and a simple top; dusty rose goes with most neutrals.
- It's sized for the basics — phone, cards, keys — so it works as a lightweight everyday bag.
FAQ
Can I use a different yarn weight for this bag?
Stick with worsted weight cotton or a cotton blend; it's what gives the body its structure. A lighter or fuzzier fiber will let the bag stretch and lose its shape.
What if I can't find D-rings or grommets in that size?
Anything close to the size listed should work, as long as the chain strap's clasp fits through it. A slightly larger ring is easier to work with than one that's too small.
Why does my flap look flat instead of bumpy?
That texture comes from the puff stitch rows; if your puffs are too loose, they sink flat. Try tightening your tension on just those stitches and see if the bumps show up.
Can I skip the chain strap and crochet one instead?
You could, but the chain strap is what gives this bag its polished look. A crocheted strap would also need to be sturdy enough to hold the loaded weight of a filled bag.