Free Pattern
Step-by-Step
Crochet
Bags & AccessoriesA textured crochet waist bag with a curved flap
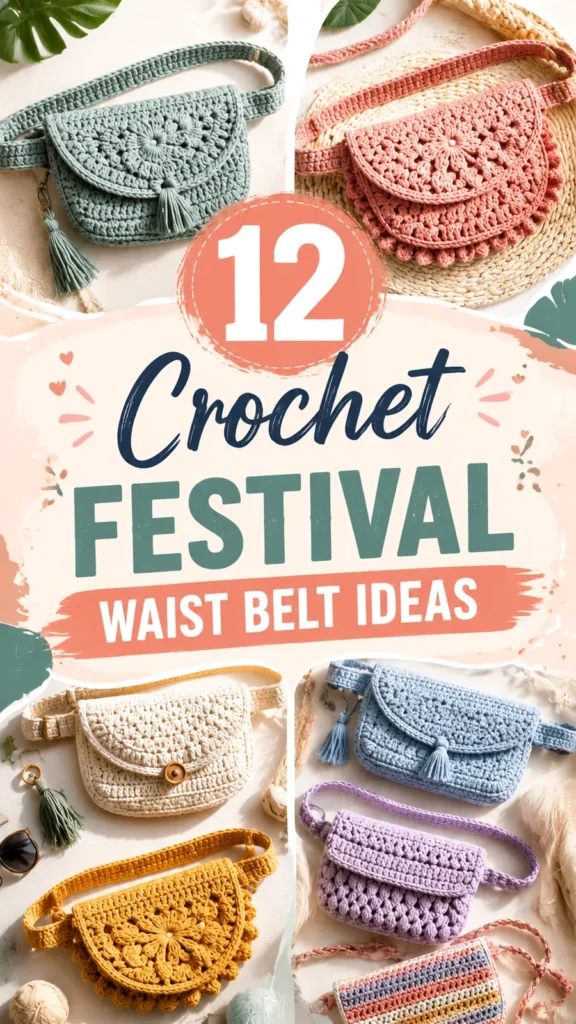
A compact crochet waist bag with a textured flap panel, sized for keys, cards, and small essentials.
- Level
- Confident beginner
- Time
- 4-6 hours
- Hook
- 3.75 mm
- Yarn
- Worsted (Medium)
Pattern highlights
- Start by making two matching body panels in the main color, worked flat in plain single crochet rows.
- Add the contrast-color texture panel to the front piece, building up single crochet, half double crochet, and the cluster stitch.
- Shape the flap separately using the main pattern, decreasing steadily until it narrows into a rounded point.
- Join the front and back panels along the sides and bottom, leaving the top open for the flap.
- Attach the finished flap to the back edge of the pouch, then add the closure.
- Crochet a long strap and sew it to both sides so the bag sits at the waist or crosses the body.
- Finish with optional embroidery or a tassel, then block the whole piece to set its shape.
About This Pattern
This waist bag sits in the small-accessory drawer of my pattern collection, next to pouches and pencil cases. It is not a weekend-sweater project. It is the kind of make I reach for when I want speed. A finished object by evening's end, not a month of commitment. Festival-style bags like this one borrow their palette from outdoor events. The construction underneath is pure practicality: flat panels, a flap, a strap. I keep returning to pieces this size because they teach construction lessons without demanding a sweater's patience.
The body panels are worked flat in single crochet rows, nothing fancy there. The front gets a contrast-color panel built from single crochet, half double crochet, and a repeated cluster stitch. That cluster is the only stitch here I had to look up twice. The flap uses the same cluster idea but shapes itself through decreases, so it narrows as you work. Two colors of cotton meet at that flap — main and contrast — doing color and texture work.
What comes off the hook is a compact pouch, about 8 inches wide and 5.5 inches tall. It is small enough to sit at the waist without pulling, big enough for keys, cards, a phone. The curved flap closes over the top with a button or a crochet loop. A long strap lets you wear it around the waist or across the body like a sling. The pastel palette in the original is festival-bright, but this shape works in one solid color too. Either way, the cotton keeps its edges crisp after blocking.
Worth knowing
What I like here is the texture panel. Working single crochet into half double crochet into a cluster stitch happens across five rows. It teaches a hand how different stitch heights behave side by side. The flap decreases are satisfying in a different way. Each repeat of sc2tog pulls the shape in evenly, so you watch it narrow row by row. I also like that this is a two-color project without stranding or carrying yarn. The contrast color only shows up where it is attached and cut. It is a small, contained lesson in combining stitches. It finishes fast enough that you actually see the lesson land.
Common mistakes
- Losing the 36-stitch count Rows of plain single crochet can creep wider or narrower without a stitch marker. Place one at the start of each row and recount before turning.
- Rushing the cluster stitch row The special stitch sequence changes the row's rhythm from the two rows before it. Work the first repeat slowly and check it matches the pattern's stitch count before continuing.
- Mismatched decrease pace on the flap Skipping the plain row between decrease rows pulls the point in too fast. Keep alternating decrease and plain rows exactly as written so both sides taper evenly.
- Carrying contrast yarn across the back Since the contrast color only appears on the front panel, there's no need to carry it. Fasten off cleanly instead of floating it behind the main-color rows.
- Over-blocking the cotton panels Wet cotton stretches more than it looks like it will. Block lightly and let the panels dry flat rather than pinning them taut.
Confident beginner
Progress Tracker
0 of 0 rounds
Tap a round to tick it off — your place is saved on this device.
The kit
- Medium-weight cotton yarn in main color (MC): approximately 170 yards (155 meters)
- Contrast color yarn (CC) for flap detail: approximately 50 yards (45 meters)
- 3.75 mm crochet hook (US F-5)
- Yarn needle
- Stitch markers
- Small button or crochet loop closure
- Scissors
Optional
- embroidery thread for decorative details
Bag Body Panels
Make 2 panels with MC.
Ch 37.
Round 1Sc in 2nd ch from hook and across. Turn. (36 sts)
Round 2Ch 1, sc across. Turn. (36 sts)Rows 3-18: Repeat Row 2. Fasten off after Row 18. Make a second identical panel.
Front Texture Panel
Using CC yarn, work across one front panel.
Attach yarn at the top edge.
Round 1Ch 1, sc across. Turn. (36 sts)
Round 2Ch 2, hdc across. Turn. (36 sts)
Round 3Ch 1, work textured cluster stitch across the row by repeating the special stitch sequence 12 times. Turn. (36 sts)
Round 4Ch 1, sc across. Turn. (36 sts)
Round 5Ch 2, hdc across. Turn. (36 sts) Fasten off.
Main Pattern
Round 1Sc in 2nd ch from hook and across. Turn. (26 sts)
Round 2Ch 1, sc across. Turn. (26 sts)
Round 3Ch 1, sc2tog, sc across until last 2 sts, sc2tog. Turn. (24 sts)
Round 4Ch 1, sc across. Turn. (24 sts) Repeat Rows 3 and 4 three more times. You should have 18 sts.Next row: Ch 1, sc across. Turn. (18 sts)Next row: Ch 1, sc2tog, sc across until last 2 sts, sc2tog. (16 sts)Fasten off.
Main Pattern
Round 1Hdc in 2nd ch from hook and across. Turn. (120 sts)
Round 2Ch 1, sc across. Fasten off. The strap measures approximately 34 inches (86 cm). Add or remove chains before starting to customize the length.
Special Stitch
Textured Cluster Stitch: Work 1 hdc, skip 1 stitch, work 1 dc into next stitch, then work 1 hdc into the same stitch space. This creates a small raised texture similar to the decorative crochet details visible on festival-style bags.
Optional Tassel Decoration
Wrap yarn around a small piece of cardboard 25 times.
Tie one end tightly and cut the opposite loops.
Attach the tassel to the side or flap using a yarn needle.
Assembly
Step 1After completing the crochet work, lightly steam block or wet block the panels to improve the shape. Avoid stretching the fabric aggressively because the goal is to smooth the stitches rather than enlarge the bag.
Step 2For long-lasting use, hand wash the bag in cool water with mild soap. Reshape while damp and allow it to dry flat. Cotton yarn may soften slightly over time while maintaining its beautiful stitch texture.
Finishing
- Weave in every end from the color changes between the main and contrast panels before assembly.
- Sew the button or crochet loop closure onto the flap and body so the bag closes securely.
- Steam or wet block the finished panels lightly, smoothing the stitches without stretching the fabric out of shape.
Why it works
The two body panels start as a chain of 37 and settle into 36 stitches. They then run eighteen rows without any increase or decrease.
The front texture panel changes stitch height every row. It moves from single crochet, to half double crochet, to the cluster sequence.
The flap narrows through paired decrease and plain rows, repeated three more times. The point tapers gradually from 26 down to 18 stitches.
What it becomes
- Wear it at an outdoor market or walking tour, holding just a phone, cash, and keys.
- Use it as a cross-body bag over a plain t-shirt and jeans when you want your hands free.
- Keep it by the door as a grab-bag for a dog walk or quick errand, paired with sneakers.
Original pattern: https://duniarecipe.com/12-crochet-festival-waist-belt-bag-patterns-diy-accessories-ideas/
FAQ
Can I make this bag in one solid color instead of two?
Yes. The contrast color on the front panel is a design choice, not a structural one. Work the whole piece in main color and the panel will still hold its texture.
Why does the pattern use rows instead of working in the round?
Flat panels are easier to shape and seam for a rectangular bag with a separate flap. Working in rows also makes the texture panel's stitch pattern simpler to track.
What yarn weight works best if I don't have cotton?
The pattern calls for medium-weight cotton because it holds its shape and shows the cluster stitch clearly. A sturdy acrylic or cotton-blend in the same weight should work, though the fabric may be softer.
How do I keep the special stitch cluster even across the row?
Count your repeats as you go rather than at the end of the row. The sequence repeats twelve times, so a stitch marker every few repeats helps catch mistakes early.