Free Pattern
Step-by-Step
Crochet
Bags & AccessoriesBlush pink granny square backpack crochet pattern
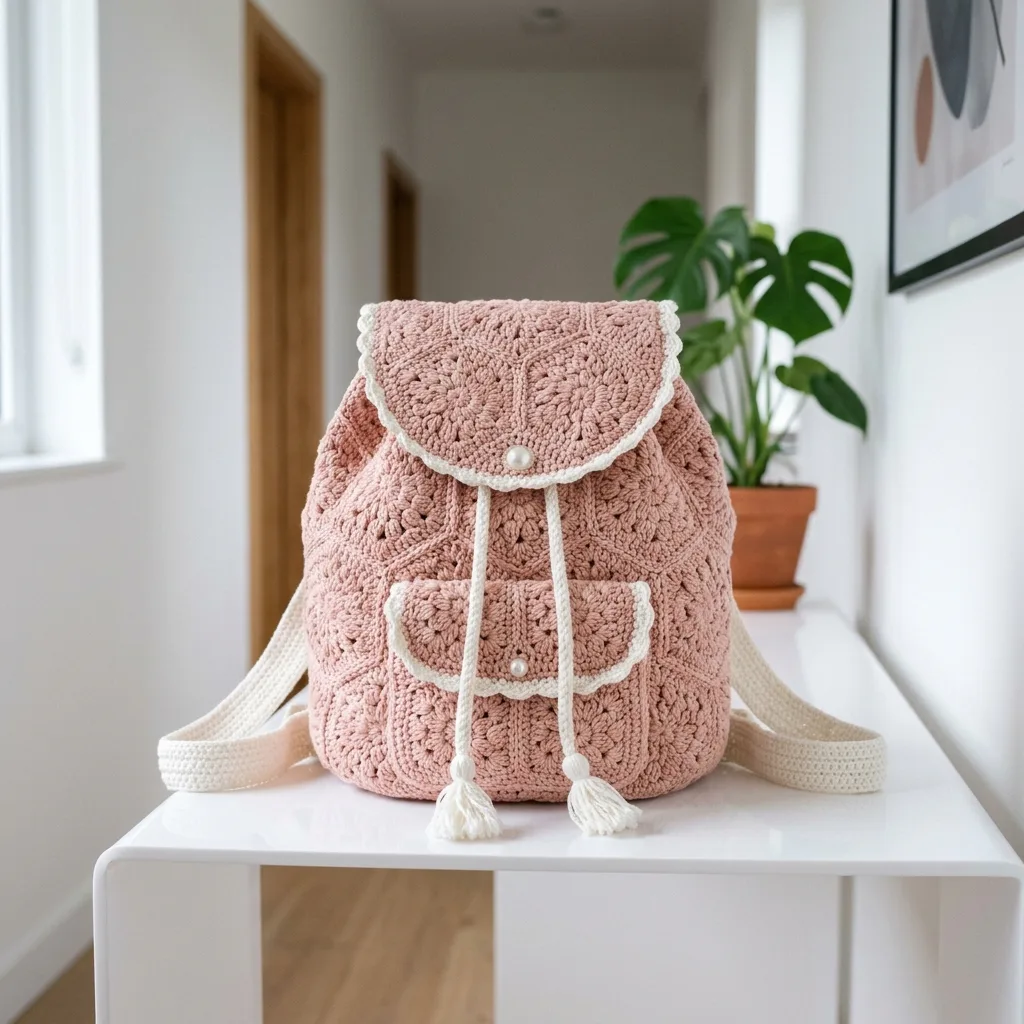
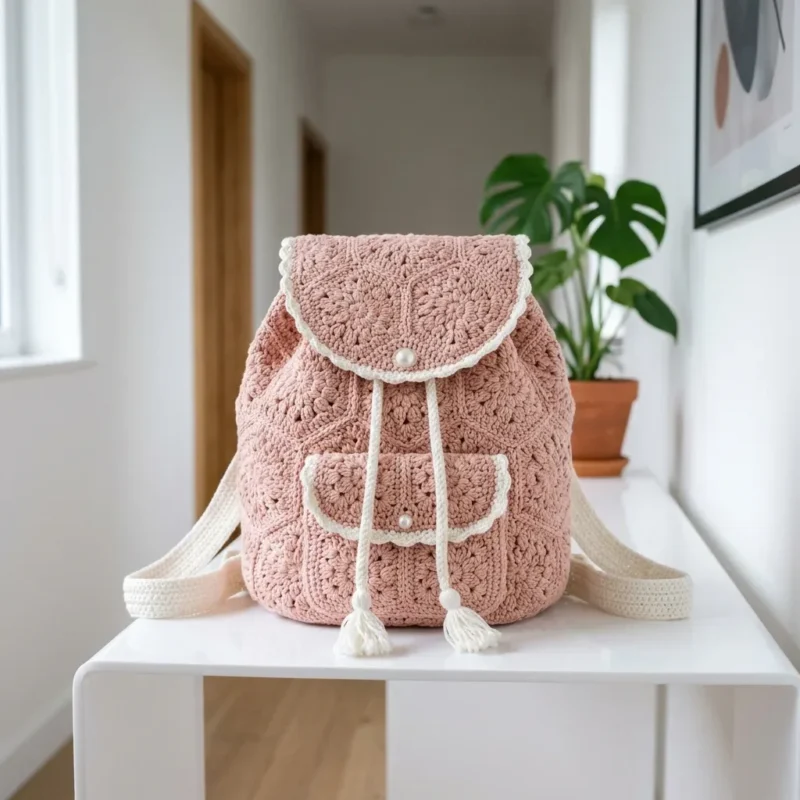
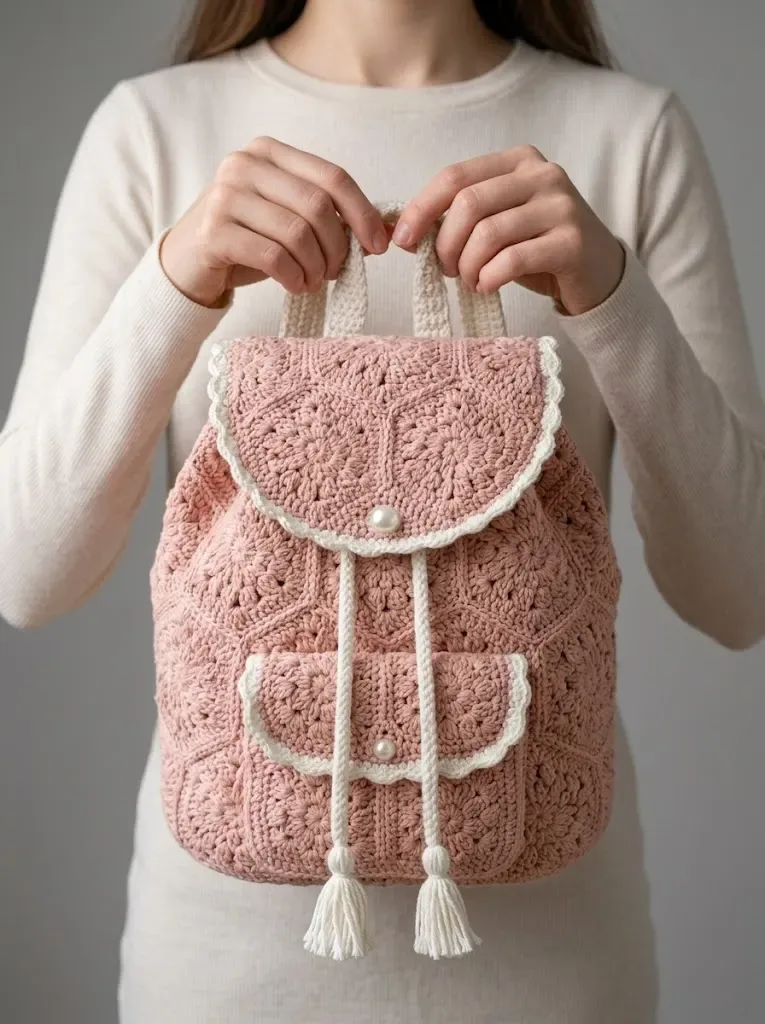
A blush pink granny square backpack with a drawstring top and a buttoned pocket flap.
- Level
- Intermediate
- Time
- 4-6 hours
- Hook
- 5.0 mm
- Yarn
- Worsted
Pattern highlights
- I crochet and block the granny square motifs first, since their finished size anchors how the panels fit together.
- The Foundation panel is worked flat in rows, shaped at the end with sc2tog decreases on both edges.
- The Pocket Flap is a separate small panel, worked the same way, then edged in cream with a sc border.
- Once the bag opening is seamed, I work the Channel Round to turn the top edge into eyelets for the drawstring.
- A Scalloped Edge finishes any remaining raw seams in the contrast cream yarn.
- Last, I thread the drawstring through the channel and sew on the buttons or snaps to close the flap.
About This Pattern
I keep a running list of granny square projects, mostly blankets and totes that lie flat on a table. This backpack earns its place because it has to hold its shape on someone's back, not just drape nicely. It sits where my decorative motifs collection meets my bag-making shelf. Blush pink with a cream contrast keeps the mood soft, not precious, and reads as wearable rather than purely decorative.
The build leans on flat panels worked in rows, not the usual join-as-you-go granny square method I expect from this fiber. Decreases (sc2tog) at each end of a row shape the Foundation and the Pocket Flap into gentle curves. A Channel Round of chained spaces, made by skipping stitches and working dc plus ch-1, forms the eyelets for a drawstring. A Scalloped Edge finishes the raw edges in contrast cream.
What comes off the hook is a soft cotton backpack with a flapped front pocket, a drawstring closure threaded through chained eyelets, and a scalloped cream border framing the whole shape. Two small buttons or snaps hold the flap down over whatever is tucked underneath. It reads romantic rather than rugged, built for errands and library trips, not hiking trails.
Worth knowing
What I like here is the shaping. The sc2tog decreases on the Foundation and Pocket Flap rows pull straight panels into curves without a single increase round. The Channel Round is the clever bit: skip a stitch, chain one, dc in the next, and a row of eyelets appears, sized for a drawstring with no grommets needed. The Scalloped Edge in cream contrast turns a plain seam into trim, a detail that photographs well. Working the Pocket Flap as its own small panel, bordered before attaching, lets me practice the whole technique in miniature first. It is a backpack that teaches shaping through subtraction, not addition.
Common mistakes
- Odd stitch count before Channel Round Count your stitches after Round 1 of the Channel Round and adjust before starting Round 2, or the dc-and-ch-1 pattern won't land evenly.
- Losing the sc2tog edges Mark the first and last two stitches of each row before decreasing, so Foundation and Pocket Flap curves stay symmetrical.
- Skipping the gauge check Check your granny square size against the 4-inch measurement before assembling; a size off by a hook size throws off the whole bag.
- Thin corners on Pocket Flap border Work the full 3 sc into each corner stitch on the CC border round, not just one, or the flap edge will pucker.
- Drawstring holes too tight or missing Keep the skip-one, ch-1 rhythm consistent around the Channel Round, or some eyelets will close up and the drawstring won't pull through.
Intermediate
Progress Tracker
0 of 0 rounds
Tap a round to tick it off — your place is saved on this device.
The kit
Yarn
- Main Color (MC): Approximately 400g worsted weight cotton or cotton blend yarn in blush pink
- Contrast Color (CC): Approximately 100g worsted weight cotton or cotton blend yarn in cream/off-white
Hook
- 5.0mm (H/8) crochet hook
Notions
- Yarn needle for weaving ends and seaming
- 2 decorative buttons or snap closures (approximately 15mm)
- Stitch markers
- Scissors
Gauge
- One complete granny square motif measures approximately 4 inches (10cm) square after blocking.
- Always, always check your gauge! If your squares are too big, go down a hook size. Too small? Go up a hook size. This matters for bags because you want everything to fit together properly.
Foundation
Round 1Sc in 2nd ch from hook and each ch across, turn. (21 sc)
Round 2through 16: Ch 1, sc in each st across, turn. (21 sc)
Round 17Ch 1, sc2tog, sc across to last 2 sts, sc2tog, turn. (19 sc)
Round 18Repeat Row 17. (17 sc) Fasten off.
Pocket Flap
Round 1Sc in 2nd ch from hook and each ch across, turn. (17 sc)
Round 2through 6: Ch 1, sc in each st across, turn. (17 sc)
Round 7Ch 1, sc2tog, sc across to last 2 sts, sc2tog, turn. (15 sc)
Round 8Repeat Row 7. (13 sc)
Round 9Repeat Row 7. (11 sc) Fasten off. Border for Pocket and Flap: Using CC, join yarn at any corner. Work 1 round of sc evenly around entire edge, working 3 sc in each corner. Sl st to join. Fasten off.Attach pocket to front panel, centered horizontally and positioned in the lower third of the bag front. Sew flap to bag above pocket opening. Add button or snap closure.
Channel Round
Round 1Ch 1, sc evenly around entire top opening. Count your stitches and adjust to ensure you have an even number. Sl st to join.
Round 2Ch 4 (counts as dc plus ch-1), skip 1 st, *dc in next st, ch 1, skip 1 st* repeat around. Sl st to 3rd ch of beginning ch-4. (This creates the holes for your drawstring)
Round 3Ch 1, sc in each dc and ch-1 space around. Sl st to join. Fasten off.
Foundation
Round 1Sc in 2nd ch from hook and each ch across, turn. (7 sc)
Round 2through 120: Ch 1, sc in each st across, turn. (7 sc) Adjust length as needed. Each strap should measure approximately 28 to 30 inches for comfortable wear.Fasten off, leaving long tail for attachment.Attach straps to back panel, positioning at top corners and bottom corners of the back. Secure firmly with several passes of yarn through the strap and bag body.
Shaping the Curve
Round 13Ch 3, dc2tog, dc across to last 3 sts, dc2tog, dc in last st, turn. (28 dc)
Round 14Repeat Row 13. (26 dc)
Round 15Repeat Row 13. (24 dc)
Round 16Repeat Row 13. (22 dc)
Round 17Repeat Row 13. (20 dc)
Round 18Repeat Row 13. (18 dc) Fasten off.
Hook
5.0mm (H/8) crochet hook
Notions
Yarn needle for weaving ends and seaming 2 decorative buttons or snap closures (approximately 15mm)
Stitch markers Scissors
Gauge
One complete granny square motif measures approximately 4 inches (10cm) square after blocking.
Always, always check your gauge! If your squares are too big, go down a hook size. Too small? Go up a hook size. This matters for bags because you want everything to fit together properly.
Scalloped Edge
*Sc, skip 1 st, 5 dc in next st, skip 1 st* repeat around curved portion only. Fasten off.
Attach flap to back panel of bag at top edge. Add button closure that aligns with front of bag.
Drawstring
Thread drawstring through ch-1 spaces in Round 2. Add small tassels to each end.
From the collection
Finishing
- I block each granny square motif flat before seaming, since the pattern measures them after blocking.
- I weave in every end from the Foundation, Pocket Flap, and border rounds before assembling the bag.
- I sew the Pocket Flap in place, attach the buttons or snaps, then thread the drawstring through the Channel Round eyelets.
Why it works
Decreases land at both ends of each row, in Foundation rows 17-18 and Pocket Flap rows 7-9, so the panels curve inward from their outer edges rather than the center.
The Pocket Flap is worked as its own flat panel, bordered with a full round of CC single crochet, before it ever meets the Foundation, which reinforces the edge ahead of attaching.
The Channel Round's second round skips a stitch before each dc and chains one in the gap, so the eyelets line up evenly only if the stitch count from Round 1 is even, which is why that round calls for a count check.
What it becomes
- I'd reach for this as a day bag for errands, since cotton holds its shape under the weight of keys and a water bottle.
- It works as a project bag for a portable crochet or knitting project, with the Pocket Flap holding a stitch marker tin.
- Blush pink and cream pair naturally with denim or a cream sweater, so it reads as an everyday accessory rather than a special piece.
Original pattern: https://bunnypatterns.com/blush-pink-romantic-granny-backpack-free-crochet-pattern/
FAQ
Can I use acrylic instead of cotton?
Yes, the pattern allows it, but expect more slouch over time since acrylic doesn't hold its shape the way cotton does. Cotton or a cotton blend is the better choice if you want the bag to stay structured when loaded.
Why does the Channel Round need an even stitch count?
Round 2 alternates a dc with a ch-1 space all the way around, and that pattern only closes evenly if the starting count is even. The pattern has you count and adjust before moving on for exactly this reason.
Do I need to block the granny squares?
Yes, the finished size of about 4 inches square is measured after blocking, not off the hook. Skipping this step can leave your squares a different size than the pattern expects.
Can I leave off the Pocket Flap?
Since it's worked as its own panel with its own border, you could skip it for a plainer backpack. You'd lose the button or snap closure detail, but the Foundation and Channel Round would still work on their own.