Free Pattern
Step-by-Step
Crochet
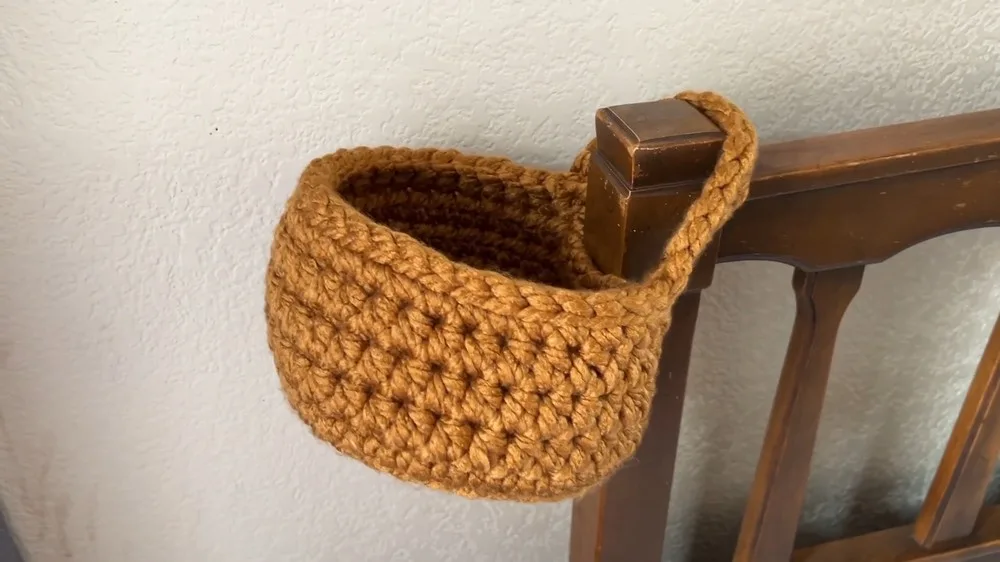
Home DecorChunky crochet basket with handle for beginners
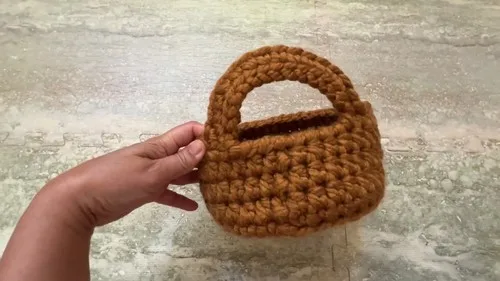
A super bulky crochet basket with handle, worked in 10 rounds, ready for gifting.
- Level
- Beginner
- Time
- 2-3 hours
- Hook
- 12 mm
- Yarn
- Super Bulky
Pattern highlights
- Start with a magic ring and build the first small circle of single crochets.
- Increase steadily over the next couple of rounds so the flat base widens evenly.
- Space out the increases in a later round so growth slows without stopping.
- Work a round that skips the last stitch before joining, to keep the edge from bulging.
- Continue with even rounds to build the straight walls of the basket.
- Cut the yarn with a long tail left over for sewing the handle.
- Weave in the remaining ends with a blunt needle for a clean, finished piece.
About This Pattern
Every collection needs one fast, forgiving project. This basket is mine. It sits between the fussy amigurumi and the plain dishcloths, proof that a hook and one skein can still surprise me. I keep coming back to super bulky projects when I want to see progress in an evening, not a week.
The technique load here is light on purpose. A magic ring start, a run of increases, then a stretch of even rounds worked in single crochet and half double crochet. Nothing exotic, just stitches doing their job at a bigger scale than usual, which changes how they behave.
What comes out the other end is a squat, sturdy basket with a handle sized for a hand, not a doll. Tobacco-colored, dense, the kind of object that looks intentional on a shelf. I made it to gift, but I would keep it too.
Common mistakes
- Losing the round marker Bulky stitches look similar at a glance, so keep a stitch marker in the first stitch of every round. It saves a recount later.
- Miscounting the spaced increases Round 4's increase repeat is easy to drift on. Count the plain stitches between increases each time, not just the total at the end.
- Forgetting the skipped stitch It is tempting to join Round 5 normally. Skip that last stitch first, or the rim will bulge instead of sitting flat.
- Cutting the tail too short The handle is sewn from the finishing tail, so leave it generously long before you cut, as the assembly steps call for.
Beginner
Progress Tracker
0 of 0 rounds
Tap a round to tick it off — your place is saved on this device.
The kit
Yarn
- Super bulky ("Yarn Bee" brand mentioned, in tobacco color, about 70 yards).
Crochet Hook
- 12 mm size, though a 9 mm (size M) hook is used for tighter tension.
Tools
- Scissors
- Blunt Needle
- Stitch Markers
- Tape Measure
Main Pattern
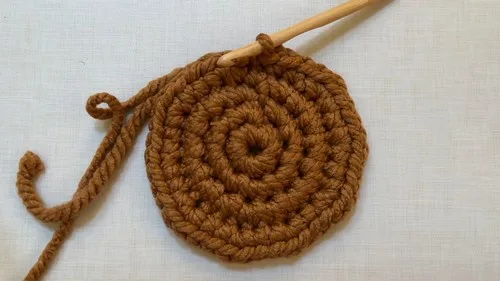
Round 1Make a magic ring; Chain 1, then make 8 single crochets (sc) into the ring; Pull the tail to tighten the ring; Join with a slip stitch to the first sc. (8 sc)
Round 2Make 2 sc in each stitch around; Join with a slip stitch to the first sc. (16 sc)
Round 3Repeat the pattern from Round 2 to make 2 sc in each stitch around; Join with a slip stitch to the first sc. (30 sc)Round 4's exact stitch count can vary from 38 sc.
Round 4Single crochet in the next two stitches, then increase by making 2 sc in the following stitch; Repeat around, making sure the piece remains flat; Join with a slip stitch to the first sc. (38 sc)Round 5 prevents bulging by skipping the last stitch before joining.
Round 5Make 1 sc in each stitch around; Skip the very last stitch before joining with a slip stitch to the first sc.
Round 6Chain 1, then work single crochet back loop only (sc BLO) in each stitch around to create a flat edge; Join with a slip stitch to the first sc.
Round 7Chain 1, then work half double crochet (hdc) in each stitch around; Join with a slip stitch to the first hdc.
Rounds 8–9Continue with hdc in each stitch around; Join with a slip stitch to end each round.
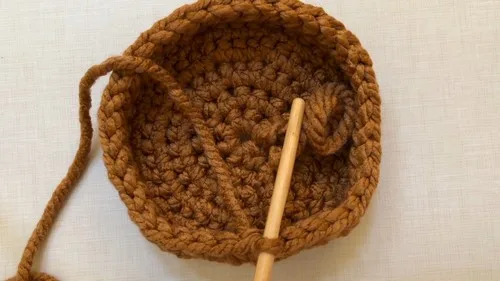
Round 10Creating the Handle Slip stitch up to the first marker; Chain 15 (or desired handle length), then join with a slip stitch to the chain one of Round 10.
Round 11Slip stitch in each stitch around the rim; For the handle, opt for either slip stitch or single crochet in each of the 15 chain stitches; Join with a slip stitch to the first sc.
Assembly
Step 1Cut the yarn, leaving enough to sew the handle for a clean finish.
Step 2Use a blunt needle to weave in ends and any necessary adjustments to ensure strong and clean edges.
Step 3Finally, weave in all ends for a neat finish.
From the collection
Finishing
- Weave in every loose end with the blunt needle, working them into the dense stitches so they disappear.
- Sew the handle into place using the long tail left from the final cut.
- Check the edges are strong and clean, tightening any loose stitches before the last weave-in.
Why it works
The base grows through doubled and spaced increases across Rounds 1 to 4, which is what keeps a circle flat instead of cupping.
Round 5 skips the final stitch before its join, a small offset that stops the visible seam from bulging outward.
The join with a slip stitch at the end of every round marks a clean boundary, letting each round's count be checked before moving on.
What it becomes
- A catchall for keys and mail by the door, paired with a small tray for loose change.
- Yarn storage for a single project in progress, sized to sit next to a favorite chair.
- A gift basket base, filled with something small and given as is, handle and all.
Original pattern: https://crocheteverything.com/crochet-cute-basket-tutorial-for-beginners-perfect-gift-idea/
FAQ
Can I use a different yarn weight?
This pattern is written for super bulky yarn, and the stitch counts assume that bulk. A thinner yarn would shrink the finished basket well below the noted 7-inch opening.
Why does the pattern mention two hook sizes?
The 12 mm hook keeps things fast, but bulky yarn can slouch at that size. The 9 mm hook is there for anyone who wants a tighter, sturdier tension.
Why does Round 4's count vary?
The pattern notes that Round 4's exact stitch count can shift from piece to piece. Bulky yarn and hand tension both nudge it slightly, so don't chase an exact number.
Does the basket hold its shape without stiffening?
The dense single crochet base and even walls give it real structure on their own. I haven't needed stiffener or a liner to keep mine standing.