Free Pattern
Step-by-Step
Crochet
Home DecorTextured crochet jar cover for cozy fall lantern decor
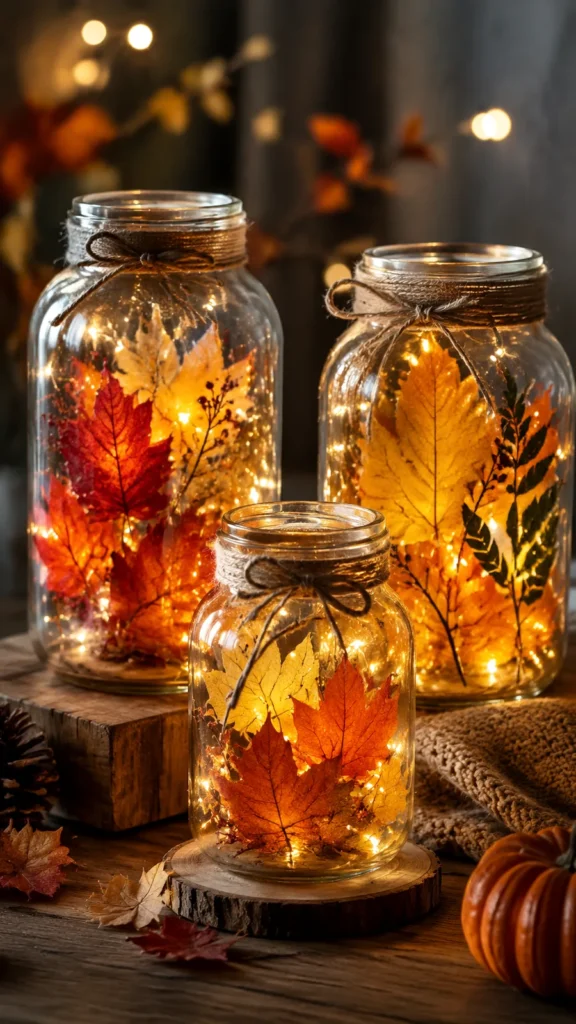
A crochet jar cover with front post texture and a leaf-inspired color change for fall decor.
- Level
- Confident Beginner
- Time
- 4-6 hours
- Hook
- 4.0 mm
- Yarn
- Worsted
Pattern highlights
- Start by chaining and joining a ring, then build the base in solid single crochet rounds with one increase round.
- Move into the textured body, where front post double crochet stitches raise a ridge against plain single crochet rounds.
- Alternate front post double crochet with single crochet again higher up for a second band of texture.
- Finish the top edge in cream, then work a round of reverse single crochet for a corded border.
- Weave in the ends, block the tube over a jar or similar container, then slide it over the glass.
About This Pattern
I keep a running list of projects that dress up something already useful, and jar covers sit near the top of it. This one joins my small shelf of lantern sleeves, pieces built to wrap around glass rather than stand alone. It's a quieter kind of make. No shaping drama, no counted decreases past the base. Just a steady tube that earns its interest from texture and color instead of silhouette.
Finished, the cover fits around a jar sized for the materials list, snug enough to stay put without sliding. Slide a battery-operated LED inside and the single crochet rounds let soft light through without looking gappy. The reverse single crochet top edge gives it a clean, corded finish instead of a plain hem. It reads as farmhouse decor, not costume.
Worth knowing
The front post double crochet in Round 5 works twice into one stitch. It's a small trick. It changes how light catches the fabric. Round 11 repeats that idea, alternating fpdc with single crochet further up the body. So the texture isn't a one-time event. Three color changes, cream to golden yellow to burnt orange, do the seasonal work. No colorwork charts needed. The reverse single crochet edge at the top is a small finishing move. It makes a plain tube look deliberate. This is a forgiving make. No decreases, no shaping, just rounds that build on each other.
Common mistakes
- Cover feels too loose Reduce your hook size or remove a few starting chains.
- Cover feels too tight Increase the starting chain count using the stitch multiple.
- Rounds become uneven Check that every round is joined in the same location.
- Texture looks different Make sure front post stitches are worked around the stitch post rather than through the top loops.

Confident Beginner
Progress Tracker
0 of 0 rounds
Tap a round to tick it off — your place is saved on this device.
The kit
- 180 yards (165 meters) medium weight #4 cotton yarn
Main color
- warm cream or natural beige
Accent colors
- burnt orange, golden yellow, and rust
- 4.0 mm US G-6 crochet hook
- Yarn needle
- Scissors
- Glass jar approximately 3 inches (7.5 cm) wide
Optional
- battery-operated LED light
Base Section
The cover is worked bottom-up in joined rounds. Turning chains do not count as stitches. Join each round with a slip stitch to the first stitch unless otherwise stated.
Round 1Ch 36. Join with a sl st to the first ch to form a circle. Ch 1, sc in each chain around. Join. (36 sts)
Round 2Ch 1, sc in each stitch around. Join. (36 sts)
Round 3Ch 1, *sc in next 5 sts, 2 sc in next st*. Repeat from * around. Join. (42 sts)
Round 4Ch 1, sc in each stitch around. Join. (42 sts)
Textured Body
Round 5Ch 1, *dc in next stitch, fpdc around the same stitch post*. Repeat around. Join. (42 sts)
Round 6Ch 1, sc in each stitch around. Join. (42 sts)
Round 7Change to golden yellow yarn. Ch 1, sc in each stitch around. Join. (42 sts)
Rounds 8–10Ch 1, sc in each stitch around. Join after each round. (42 sts)
Round 11Change to burnt orange yarn. Ch 1, *fpdc around next stitch, sc in next stitch*. Repeat around. Join. (42 sts)
Rounds 12–16Ch 1, sc in each stitch around. Join after each round. (42 sts)
Top Edge
Round 17Change to cream yarn. Ch 1, sc in each stitch around. Join. (42 sts)
Round 18Ch 1, reverse single crochet in each stitch around. Join and fasten off. (42 sts)Weave in all ends securely.
Assembly
Step 1Slide the finished crochet sleeve over a clean glass jar. The base should sit firmly while still allowing the cover to be removed for washing.
Step 2Optional decorations can be added by crocheting small leaf appliques and attaching them with yarn. For a simple leaf applique, create a chain of 8 stitches, work single crochet stitches back along the chain, then add a few slip stitches around the edges to create a pointed leaf shape.
Finishing
- Weave in all ends securely.
- Light blocking can help the crochet stitches relax and create a cleaner shape. Place the cover over a similarly sized container or gently steam it while shaping by hand.
- care, remove the crochet cover before cleaning the glass jar. Hand wash the crochet piece in cool water with mild detergent, reshape gently, and allow it to air dry flat.
Why it works
The base section holds the only increase round, keeping the stitch count steady from there up.
Each round joins with a slip stitch to the first stitch, which marks where color changes begin.
Front post double crochet worked twice into one stitch, as in Round 5, raises texture without adding stitches.
What it becomes
- Set it over a candle jar on a farmhouse-style console table, paired with dried wheat or pinecones.
- Use it as a table centerpiece for a dinner gathering, grouped with a few plain glass jars for contrast.
- Give it as a handmade gift alongside a jar of local honey or homemade jam.
Original pattern: https://duniarecipe.com/diy-fall-leaf-mason-jar-lanterns-for-cozy-autumn-home-decor-ideas-3/
FAQ
Can I use a different jar size than the one listed?
Yes. Measure the circumference of your jar first and adjust the starting chain in multiples of 2 so it wraps comfortably without stretching. For a taller cover, add extra single crochet rounds before the top border; for a wider jar, increase the starting chain and adjust the first rounds evenly.
What happens if I skip the front post stitches?
The piece would still work as a plain single crochet tube, but you'd lose the raised ridges that make the textured body interesting. The front post rounds are what give this cover its character.
What if my finished cover feels too loose or too tight?
If it feels too loose, reduce your hook size or remove a few starting chains. If it feels too tight, increase the starting chain count using the stitch multiple.
Why does the pattern call for cotton yarn instead of wool or acrylic?
The recommended yarn is a medium-weight cotton or cotton blend because it holds its shape well around a jar and provides clean stitch definition.