
Free Pattern
Step-by-Step
Crochet
AmigurumiCrochet an axolotl amigurumi with velvet gills
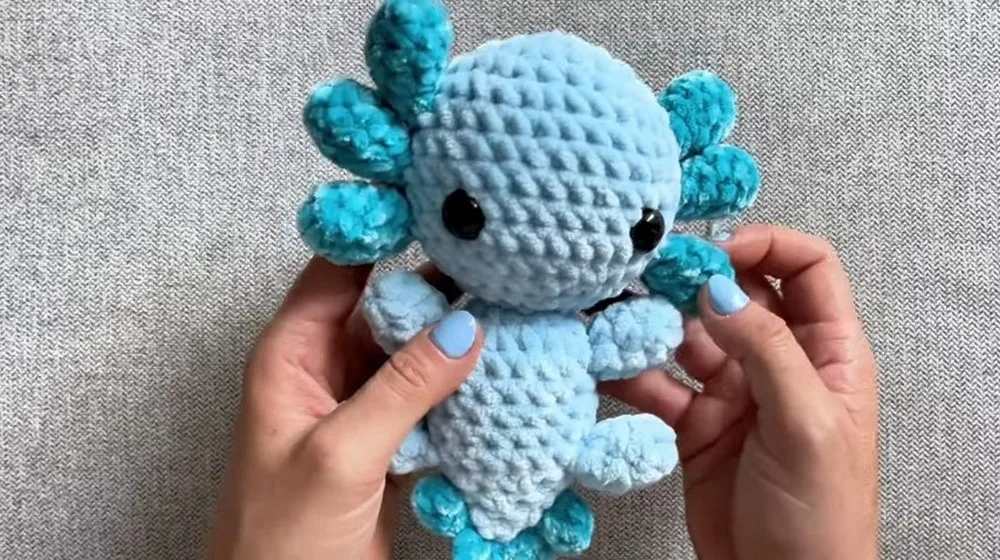
A crochet axolotl amigurumi with velvet gill accents and 16 mm safety eyes.
- Level
- Intermediate
- Time
- 4-6 hours
- Hook
- 6 mm
- Yarn
- Worsted
Pattern highlights
- Start the gills first, working six small velvet spirals with increases then decreases to taper each one.
- Crochet four identical limbs in the thicker yarn, each a short flat-topped tube.
- Build the head and body as one continuous piece, increasing steadily from the magic circle outward.
- Pause partway through the body to place the safety eyes between two specific rounds, spaced evenly apart.
- Stuff the body as you close it, since the pattern continues past the main increase rounds.
- Attach the limbs and gills once every piece is stuffed and fastened off.
About This Pattern
Every collector's basket needs an odd little amphibian in it, and this axolotl earns its spot. It sits somewhere between the round-bodied bears and the flatter, novelty keychains I've logged elsewhere. Nothing about it is fussy, but the gills give it a personality most amigurumi lack. I like patterns that solve a shape problem without extra seams, and this one mostly does.
The technique list is short but purposeful: magic circles, single crochet increases and decreases, and a plastic-washer eye placement that has to happen mid-body, not after. The gills are worked as tiny separate spirals in velvet yarn, which is a texture choice, not just a color one. Nothing here is exotic, but the sequencing rewards attention.
Finished, it's a soft, six-limbed creature with a wide head and a body built in one continuous piece. The velvet gills catch light differently than the body yarn, which is the whole point of mixing fibers. It reads as a plush toy first and a technical exercise second, which is exactly how I like my amigurumi.
Worth knowing
What I like here is the contrast between two yarns doing two different jobs. The Loops and Threads body yarn is soft and forgiving with the 6 mm hook, while the thinner velvet gills on the 4.25 mm hook force tighter, more careful stitches. Placing the safety eyes between rows 9 and 10 rather than at a single round is a small but specific instruction, and it changes how the face reads once stuffed. The gill rounds are short, only five rounds each, so you get six quick wins before returning to the body. It's a good project for practicing decrease placement without committing to a huge piece.
Common mistakes
- Losing count on velvet gill rounds Velvet yarn hides stitch definition, so use a stitch marker at the start of each gill round to avoid drifting off the 9-stitch count.
- Placing eyes at one single round The pattern calls for spacing eyes between rows 9 and 10, not centered on either row. Mark both rows before inserting the posts.
- Understuffing before closing the body Because the body is one continuous piece, there's no second chance to add stuffing after the final round. Stuff gradually as you go, not at the end.
- Skipping the plastic washers Safety eyes without washers can pull loose once the head is stuffed firm. Secure each post with its washer immediately after inserting.


Intermediate
Progress Tracker
0 of 0 rounds
Tap a round to tick it off — your place is saved on this device.
The kit
- Loops and Threads Sweet Snuggles Light yarn in Umal Lo
- A #4 velvet yarn (aqua blue color used in tutorial)
- Polyfill for stuffing
- Crochet hooks (6 mm and 4.25 mm)
- Yarn needle
- Stitch marker
- Scissors
- Safety eyes (16 mm) and plastic washers for securing
Gills (make 6)
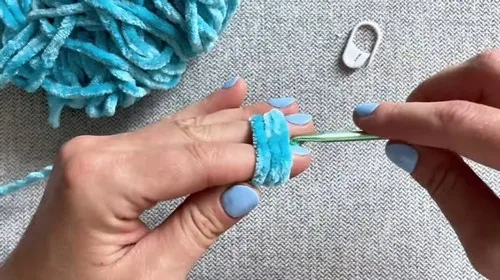
With the 4.25 mm hook and velvet yarn, create a magic circle.
Round 1Work 6 single crochets (sc) into the circle, and then pull it tight.
Round 21 sc, then increase (inc) (repeat 3 times for a total of 9 sc).
Rounds 3–4Sc around (9 sc each row).(9)
Round 51 sc, then decrease (dec) (repeat 3 times to go back to 6 sc).
Round 6Sc around (6 sc), slip stitch to finish and fasten off.
Arms and Legs (make 4)
With the 6 mm hook and Loops and Threads yarn, start with a magic circle.
Round 1Work 6 sc into the circle.
Rounds 2–4Sc around (6 sc each row), fasten off and cut yarn.
Head and Body
With the 6 mm hook and Loops and Threads yarn, create a magic circle.
Round 1Work 6 sc into the circle.
Round 2Chain 1, work 6 increases around (12 sc).(12)
Round 3Chain 1, 1 sc, inc repeat 6 times (18 sc).(18)
Round 4Chain 1, 1 sc, inc, 2 sc, repeat 5 times, ending with 1 sc (24 sc).(24)
Round 5Chain 1, 3 sc, inc repeat 6 times (30 sc).(30)
Round 6Chain 1, 12 sc, attach first gill using no-sew method (3 sc), 12 sc, attach second gill with no-sew method (3 sc).(3)
Round 7Chain 1, sc around (30 sc).Row 8: Repeat Row 6 to attach the next two gills.Row 9: Repeat Row 7.Row 10: Repeat Row 6 to attach the last two gills.Position safety eyes between rows 9 and 10, about 8 stitches apart, and secure with plastic washers.(30)
Round 11Chain 1, 3 sc, dec repeat 6 times (24 sc).(24)
Round 12Chain 1, 1 sc, dec, 2 sc, dec repeat 5 times, ending with 1 sc (18 sc).(18)
Continue Head and Body
Round 13Chain 1, 1 sc, dec repeat 6 times (12 sc).Begin stuffing head with polyfill.(12)
Round 14Chain 1, 6 decreases (6 sc).Finish stuffing head.For the body, work similar to the head, with increases and decreases to shape, attaching limbs using the no-sew method described and interspersed with rows of sc.Finish by stuffing the body and closing the final hole, cutting the yarn, and weaving in ends.(6)
From the collection
Finishing
- Weave in every loose end from the gills, limbs, and body before assembly, since velvet yarn frays if left loose.
- Stuff the head and body firmly as you work the later rounds, packing extra around the eye placement.
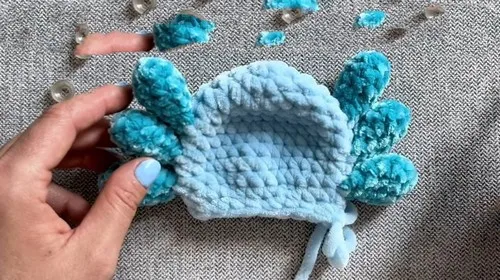
- Attach the four limbs and six velvet gills with a no-sew method, positioning gills along the tail area as noted.
- the 4.25 mm hook and blue velvet yarn, add some stitches along the tail to simulate gills.
Why it works
The body starts with a standard 6-stitch magic circle and increases every round through row 4, so the head grows fastest early on.
The gills are worked flat in the round but kept separate from the body, which lets them attach as an add-on detail rather than shaping the head itself.
Arms and legs are simple straight tubes with no shaping after row 1, which keeps them soft and pose-neutral against the shaped body.
The safety eyes sit between rows 9 and 10, about 8 stitches apart, meaning they go in mid-assembly rather than after the head is fully closed.
What it becomes
- A shelf companion for a desk or reading nook, paired with other small amigurumi animals.
- A handmade gift for someone who collects axolotls or amphibian-themed items.
- A soft toy for a child's room, sized for cuddling alongside other plush stuffed animals.
FAQ
Why does the pattern use two different hook sizes?
The 6 mm hook works the thicker Loops and Threads yarn for the body and limbs. The 4.25 mm hook suits the thinner velvet yarn used for the gills, keeping those stitches tighter.
Can I skip the velvet yarn for the gills?
You could substitute another yarn, but the pattern specifically calls for aqua blue velvet for texture contrast. Any worsted-weight substitute will change the tactile effect of the gills.
Why are the eyes placed mid-body instead of after finishing the head?
The instructions place safety eyes between rows 9 and 10, about 8 stitches apart, before the body is complete. This lets you access the inside of the head to attach the washers securely.
How many gills does the pattern require?
The pattern calls for six gills total, each worked as its own small five-round piece. They attach separately along the tail once finished.