
Free Pattern
Step-by-Step
Crochet
FlowersHow to crochet a calla lily flower petal
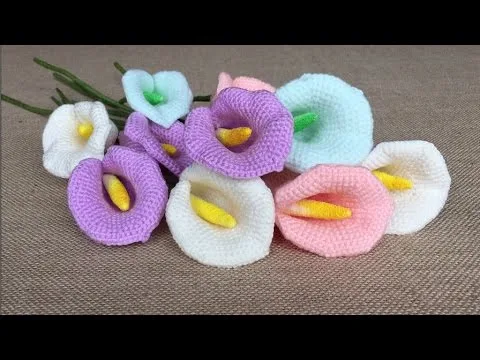
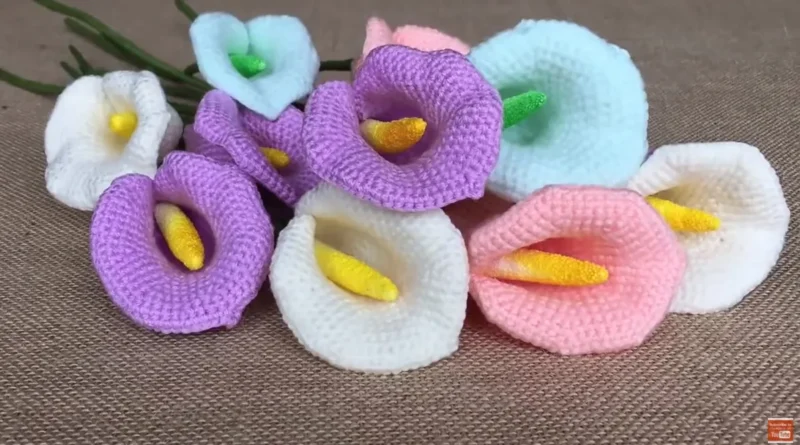
A crocheted calla lily petal, shaped with paired increases into a graceful curl.
- Level
- Intermediate
- Time
- 4-6 hours
- Hook
- 3.5 mm
- Yarn
- Worsted
Pattern highlights
- Chain a short foundation row and work the first row of single crochet across it.
- Work a second plain row to set up an even base before any shaping starts.
- Add a stitch at each end of the row to begin curving the petal's silhouette.
- Repeat that increase row several times so the petal widens into a gradual oval.
- Let the piece curl on its own as the edges grow wider than the middle.
- Weave in ends, then sew the petal onto a stem, adding wire if you want firmness.
About This Pattern
I keep a shelf for flowers that never wilt. This calla lily earns its spot for being quieter than most crochet blooms. No layered petals, no ruffled edges, just one clean shape doing all the work. It slots in beside single-stem projects, the kind you make when you want a result fast but still want it to look considered.
The technique here is plain single crochet worked flat, which is almost deceptive. All the shaping comes from increases placed at both ends of the row, row after row. That paired increase is what turns a rectangle into an oval, and the oval into something that reads unmistakably as a calla lily petal once it curls.
What comes off the hook is a single elegant petal, ready to curve into that trumpet shape the flower is known for. Add a stem, maybe some floral wire for backbone, and it stands on its own or joins a bouquet. It is a small object with a lot of presence.
Worth knowing
There is something satisfying about a shape emerging from nothing but single crochet and counted increases. No fancy stitches, no charts to puzzle over, just a rectangle that gradually widens because you added stitches at both edges, every row, on schedule. Watching the fabric bow into a curve once it's off the hook feels like a small trick. I like that the petal is worked flat, not in the round, because it forces the curl to happen by hand and by choice rather than by default. The materials list is short too. Yarn, a hook, maybe floral wire. It is the kind of make where the payoff outweighs the effort, and that ratio is rare enough to notice.
Common mistakes
- Skipping an edge increase Check both ends of every increase row, not just the first stitch. Missing the last-stitch increase flattens the curve on one side.
- Losing count after the chain Count stitches after row one before moving on. A short foundation chain is easy to misjudge by one stitch.
- Forgetting the chain 1 turn Add the chain 1 before turning at the end of every row. Skipping it tightens the edge and pulls the petal off-shape.
- Curl comes out lopsided Shape the petal with even pressure on both edges once it's off the hook. Uneven handling exaggerates a curve on one side only.
- Increasing on only one side Both ends of the row need the extra stitch, every repeat. One-sided increasing makes a fan shape instead of an oval.

Intermediate
Progress Tracker
0 of 0 rounds
Tap a round to tick it off — your place is saved on this device.
The kit
Yarn
- Choose light worsted weight yarn in white or yellow for the petals, and green for the stem.
Crochet hook
- Size 3.5mm or 4mm.
Tapestry needle
- For sewing the pieces together and weaving in ends.
Scissors
- Scissors.
Floral wire (optional)
- Floral wire (optional): To make the stem sturdy and shapeable.
Stitch markers (optional)
- Stitch markers (optional).
Petal
The petal of the Calla Lily is the most distinctive part. We'll be crocheting a long, oval-shaped petal with a slight curl.
Row 1Chain 10 with white or yellow yarn. Row 1: In the second chain from the hook, work 1 single crochet (sc). Continue to sc in each chain across. Chain 1 and turn. (9 stitches)(9)
Row 2Work 1 sc in each stitch across. Chain 1 and turn.
Row 3* 2 sc in the first stitch, sc in each of the next 7 stitches, 2 sc in the last stitch.* (11 stitches) Chain 1 and turn.(11)
Rows 4–8Repeat Row 3, increasing 2 stitches on both ends of each row until you have 19 stitches.(19)
Row 9Work 1 sc in each stitch across without increasing. Fasten off and weave in ends.
From the collection
Finishing
- Weave in the starting and ending tails at the base of the petal.
- The Calla Lily's petal has a gentle curve. Fold the petal in half lengthwise and sew the bottom part together to create the curled trumpet shape. You can leave the top open and slightly rolled back for that characteristic lily look.
- Sew the curled edge closed and secure the petal to a stem, using floral wire if you want it to hold its shape.
Why it works
Increases land at both the first and last stitch of the row, never just one side.
The petal is worked flat with a turning chain rather than in the round, since it is a single two-sided shape, not a tube.
The increase row repeats across several rows, so width builds gradually instead of jumping, which produces the oval curve.
What it becomes
- Group a few petals into a bouquet alongside other crochet flowers for a lasting arrangement.
- Set a single lily in a small vase as a quiet accent on a shelf or table.
- Attach one to a wrapped gift in place of a bow or ribbon.
Original pattern: https://crochetblog.net/how-to-crochet-a-calla-lily/
FAQ
Can I use a different yarn weight for the petal?
Light worsted is what the pattern calls for, and it holds the shape well. A different weight will change the finished size, so expect some adjustment to the curl.
Is floral wire necessary?
It's listed as optional, and the petal will still hold its crocheted shape without it. Wire just makes the stem sturdier and easier to bend into a display pose.
Why is the petal worked flat instead of in the round?
A calla lily petal is one flat shape that curls into a cone, not a closed tube. Working it in rows lets you control that curl by hand once the piece is finished.
What if my petal won't curl?
Give it a gentle shape by hand along the wider end; the increases create the tendency to curve, but sometimes it needs a little coaxing. A light steam or damp press can also help it hold the shape.