Free Pattern
Step-by-Step
Crochet
Bags & PouchesSimple crochet drawstring pouch for everyday carrying
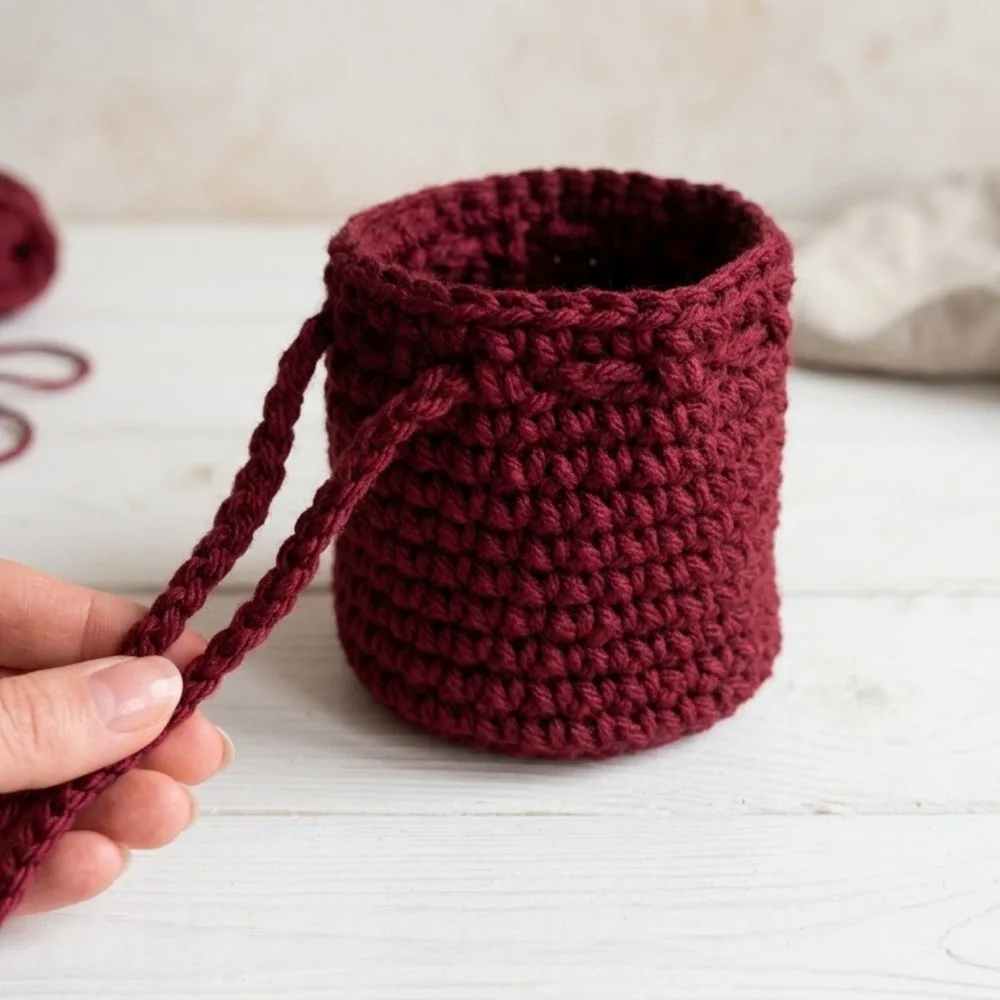
A beginner crochet drawstring pouch worked in the round with a simple channel.
- Level
- Beginner
- Time
- 2-3 hours
- Hook
- 4.0 mm
- Yarn
- Worsted
Pattern highlights
- Start with a magic ring and build the base outward through several increase rounds.
- Join each round with a slip stitch so rounds stay level instead of spiraling.
- Once the base reaches its final width, stop increasing and work even rounds for the body.
- Work the following round through both the stitch and the ch-1 space left behind.
- Fasten off, weave in ends, then chain a length for the drawstring itself.
- Thread the drawstring through the channel and knot or fringe the ends to finish.
About This Pattern
Every collector needs a small vessel pattern, something to hold the odds and ends the rest of the hobby generates. This pouch earns its spot in that drawer of go-to patterns. It's the kind of project I reach for between bigger commitments, when I want progress I can see within an evening.
The technique list stays short on purpose: magic ring, increases worked evenly, joined rounds, a back loop only round for the channel. Nothing here is unfamiliar if you've made a single crochet circle before. What's new is watching those familiar moves add up to something with a function.
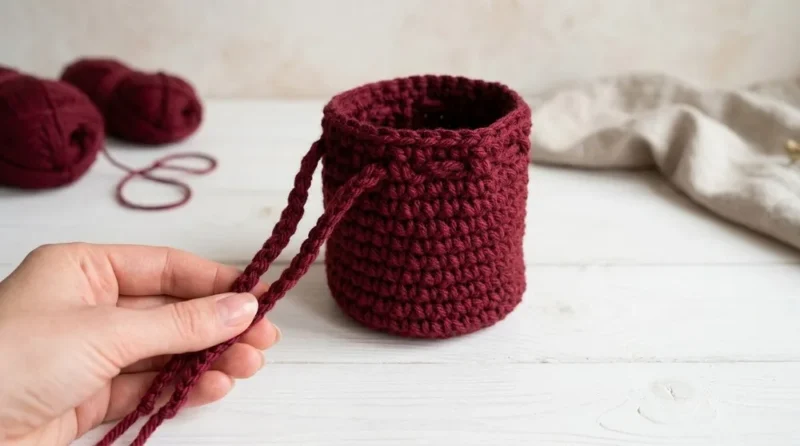
The result is a small, rounded pouch with a drawstring closure. It stands on its own base, flexes enough to tuck into a bag, and holds coins, notions, or a gift. Nothing fussy, nothing wasted.
Worth knowing
The satisfaction here is structural, not decorative. Each increase round in the base lands evenly, so the circle grows flat without buckling or cupping — that's the quiet skill being practiced. Then the back loop only round shifts the fabric's texture just enough to leave a visible ridge, which becomes the drawstring channel. It's a small trick that does real work. Joining each round with a slip stitch keeps the rounds distinct rather than spiraling, which matters once you're threading a drawstring through a specific gap. There's also the pleasure of a project that finishes fast and still teaches something — increasing evenly, working a channel round, threading a closure. Small scope, real technique.
Common mistakes
- Increases drift off pattern Count stitches at the end of each increase round before starting the next one. A drifted increase shows up as a lumpy, uneven base.
- Skipping the join and chain 1 Always slip stitch into the first stitch of the round, then chain 1 before continuing. Skipping this turns joined rounds into an accidental spiral.
- Working both loops on the channel round Back loop only means the far loop, not both. Grabbing both loops here erases the ridge the drawstring needs.
- Missing the ch-1 space in the following round That round works into both the stitch and the ch-1 space left by the previous round. Skip the space and the stitch count comes up short.
- Drawstring chain too short Chain enough length to wrap the pouch with extra for tying. A snug chain leaves nothing to knot or fringe.
Beginner
Progress Tracker
0 of 0 rounds
Tap a round to tick it off — your place is saved on this device.
The kit
Yarn
- Any worsted weight or medium weight yarn (cotton, acrylic, or blends)
Crochet hook
- 4.0mm–5.0mm (adjust for yarn thickness and desired firmness)
Tools
- Scissors
- Yarn needle (for weaving in ends)
Base
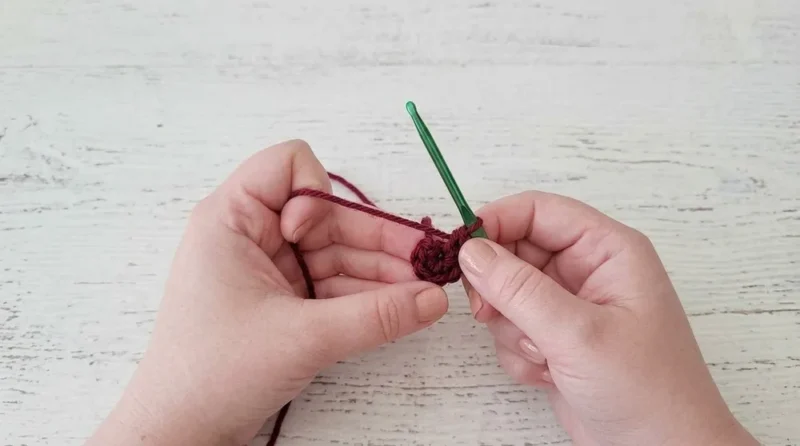
Round 1Make a MR (or ch 2 and crochet into 2nd ch from hook). Ch 1, 6 sc in ring. Pull tight to close the ring. Join with sl st to first sc. Ch 1.
Round 22 sc in each st around ( inc in each st). (12 sts) Join with sl st to first sc, ch 1.
Round 3( 1 sc in next st, 2 sc in next st ) rep around. (18 sts) Join with sl st to first sc, ch 1.
Round 4( 1 sc in each of next 2 sts, 2 sc in next st ) rep around. (24 sts) Join with sl st to first sc, ch 1.
Round 5( 1 sc in each of next 3 sts, 2 sc in next st ) rep around. (30 sts) Join with sl st to first sc, ch 1.Begin Sides
Round 6Work sc in BLO (back loop only) in each st around. No increases. Join with sl st to first sc, ch 1. (30 sts)
Height
Rounds 7+Desired height Sc in each st around (through both loops, no increases). At the end of each round, sl st to first sc, ch 1.Repeat this round until the pouch is your desired height.(Pause before the last 2 finishing rounds for the drawstring, as explained below.)
Drawstring Channel
Channel Round(Sc in next st, ch 1, skip 1 st) rep around. Join with sl st to first sc.
Following RoundCh 1. (Sc in next sc, sc in next ch-1 sp) rep around. Join with sl st to first sc.Fasten off and weave in ends.Drawstring: Ch 55 (or a length to fit easily around your pouch with a little extra for tying).Fasten off, pull yarn through, and tighten.Use a yarn needle or hook to weave the chain through the ch-1 sps of the last rounds.
Adjust so the ends are at the front (opposite the round join).
Knot or trim the ends as desired. You may comb them for fringe.
Assembly
Step 1Your pouch is complete when the drawstring is woven through and ends are knotted or fringed.
Step 2You can use the pouch for small treasures, coins, jewelry, or as a gift bag.
Step 3Finished size is adjustable—make bigger with extra rounds or bigger hook/yarn.
From the collection
Finishing
- Flip the pouch inside-out to weave in all yarn tails.
- Tip: weave the tail through only the top or bottom loops on the inside, so the yarn doesn't show on the outside.
Why it works
The base grows through a standard six-round increase spiral, adding stitches evenly each round to keep the circle flat rather than cupped.
Each round joins with a slip stitch and a chain 1, which keeps the pouch worked in tidy joined rounds instead of a continuous spiral.
The back loop only round creates a horizontal ridge on the outside, which is what the drawstring later passes through as a channel.
Standard size: base diameter approx. 3–4 inches (7.5–10 cm) and height 4–6 inches (10–15 cm), easily adjustable by working more rounds.
Drawstring length: usually 50–60 chain stitches, about 14–18 inches (35–45 cm), enough to wrap around the pouch and tie.
Gauge isn't critical, but for a sturdy pouch aim for about 4 increase rounds to equal roughly 2 inches in diameter.
Hook size affects firmness: use a smaller hook for a stiffer pouch, or a larger hook for a softer one.
This pattern uses US crochet terminology throughout.
Skill level: absolute beginner to beginner — confident single crochet, chain stitches, and working in the round are all you need.
What it becomes
- A jewelry pouch for a travel bag, paired with a few stud earrings or a chain.
- A small gift bag for a handmade item, in place of wrapping paper.
- A coin or notions pouch to keep stitch markers and small tools together.
- Customize with different colors, decorative beads, or embroidered initials to personalize each pouch.
Original pattern: https://redagapeblog.com/free-crochet-drawstring-pouch/
FAQ
Do I need to know any stitch besides single crochet?
No. The whole pouch uses single crochet, chains, increases, and one back loop only round. If you can work a joined round, you have what you need.
Can I make the pouch bigger?
Yes, the pattern notes the finished size is adjustable. Add more rounds to the base or body, or size up your hook and yarn.
Why does the pattern join each round instead of spiraling?
Joining with a slip stitch and chain 1 keeps round edges level, which matters for a symmetrical base and an even channel round. A spiral would blur that line.
What if I don't have a stitch marker for the magic ring?
The pattern gives an alternative: chain 2 and crochet into the second chain from the hook. Either method gets you to the same six-stitch start.