Free Pattern
Step-by-Step
Crochet
Bags & PouchesCrochet lucky money bag with a folded flap closure
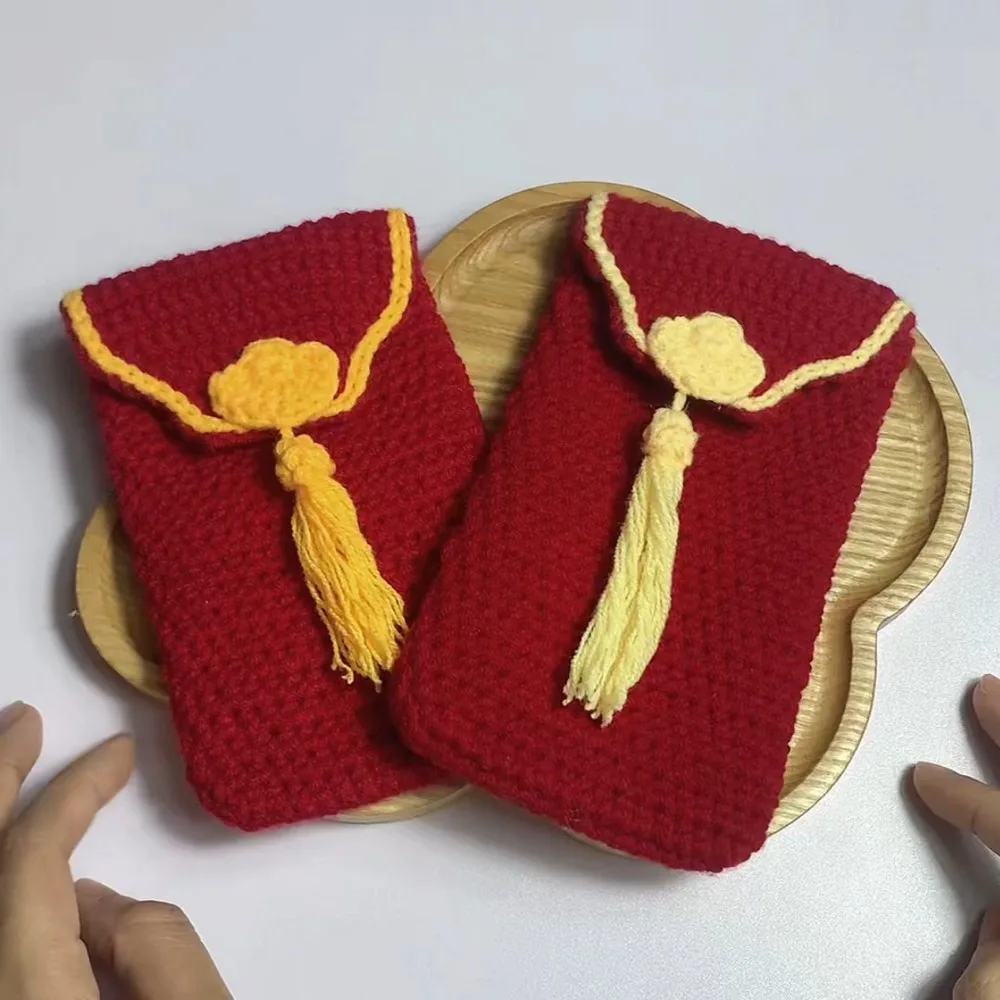
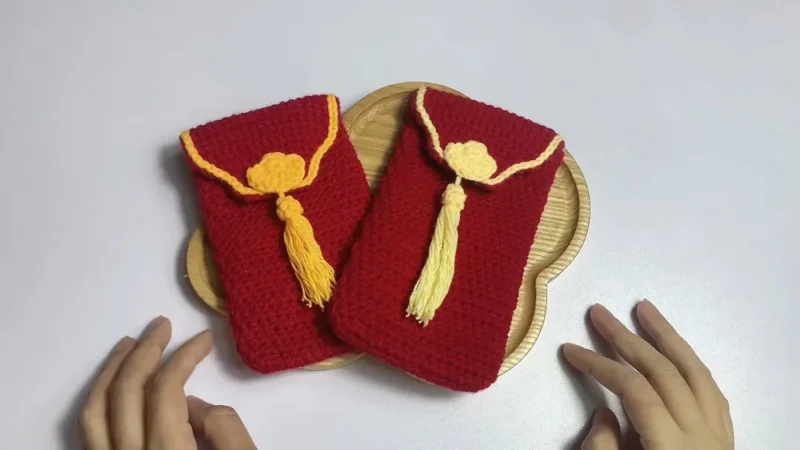
A red and gold crochet pouch with a flat base, worked flap, and hinge fold.
- Level
- Intermediate
- Time
- 4-6 hours
- Hook
- 2.5 mm
- Yarn
- Worsted
Pattern highlights
- Chain a base, then work single crochet rounds outward from an oval, increasing at both ends to shape the sides.
- Work plain half-double crochet rounds, joined with a slip stitch and turning chain, to build the pouch's height.
- Mark stitches at the top edge, then attach yarn there to start the flap worked flat in rows.
- Work several straight rows across the flap, then work one row into the front loops only to form a hinge fold.
- Continue in both loops for a few more rows before starting to decrease at both edges each row.
- Keep decreasing symmetrically until the flap tapers to a point, then fasten off and weave in the tail.
About This Pattern
This pouch sits in the small-container corner of my collection, near coin purses and drawstring bags. It is not a toy, not a garment, just a tidy vessel. I collect pieces like this because a small object teaches technique fast. A money bag gives an oval base and a hinge fold a real job. The scale is small, so a stitch decision shows itself quickly.
The body starts as a flat oval, single crocheted then built up in half-double crochet rounds. Each row after the base joins with a slip stitch and a chain two, not a spiral. That join keeps the seam consistent, which matters more on a small piece than a large one. The flap breaks from the round work entirely and turns flat, row by row. A single row worked into the front loop only creates the hinge, then decreases taper it to a point.
What comes off the hook is a small red pouch with a gold-accented ingot detail and a folding flap. The oval base gives it a stable, coin-purse footprint rather than a round one. The flap tapers to a point instead of a straight edge, so it has some shape memory. Red and gold together read as intentional, not random, once the ingot is glued in place. It is the kind of object that looks handmade on purpose.
Worth knowing
What I like here is the oval base. Two straight sides, two curved ends, built from one starting chain. This pattern shows the two-corner increases plainly, in Round 1 and Round 2. Then the flap flips the logic entirely. Flat rows, a front-loop hinge row, then a slow taper of decreases to a point. Two structures, two techniques, one small pouch. The hot-glued ingot and gold accents are the payoff. A plain red vessel becomes a specific object, not a generic one. The FLO hinge row is a small trick with a big payoff — the flap folds cleanly each time.
Common mistakes
- Missing the oval base increases Skip a 2-sc or 3-sc increase in Round 1 and the base warps instead of lying flat. Count stitches at the end of the round before moving on.
- Working the FLO row into both loops Crochet into both loops instead of the front loop only and the hinge fold disappears. Check the row before you sink the hook, not after.
- Spiraling instead of joining rounds This pouch joins each round with a slip stitch and chain two, not a continuous spiral. Skip the join and the color or seam line drifts sideways.
- Decreasing unevenly on the flap taper Removing stitches from only one edge pulls the point off-center. Decrease at both ends of the row to keep the taper symmetrical.
- Over-gluing the gold accents Too much hot glue seeps through the stitches and stiffens the red yarn around it. Apply a small amount and press rather than flood the area.
Intermediate
Progress Tracker
0 of 0 rounds
Tap a round to tick it off — your place is saved on this device.
The kit
- Milk Cotton yarn in Red (primary body) and Gold (accents and ingot).
- 2.5 mm crochet hook.
- Scissors, tapestry needle, stitch markers, and hot glue.
- The Pouch Body (Red Yarn)
Main Pattern
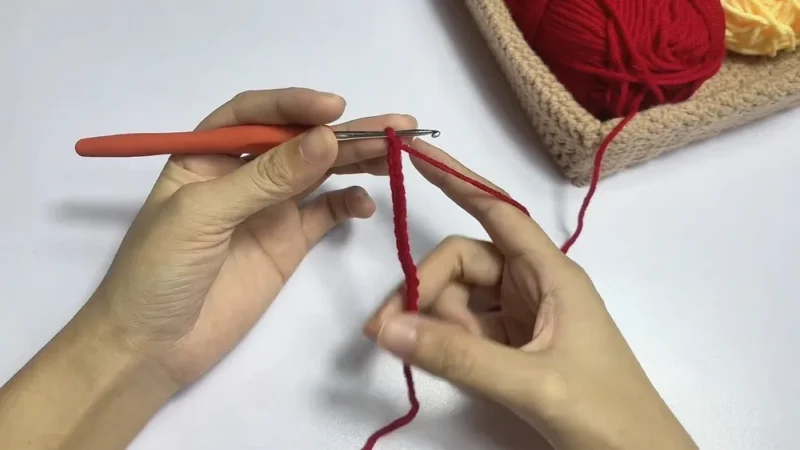
Round 1Skip the first chain. Work 2 single crochet (sc) in the second chain. Work 1 sc in each of the next 12 chains. Work 3 sc in the last chain. Turning to the other side of the chain, work 13 sc and then 2 sc in the final spot. [ 02:43 ]
Round 2Slip stitch (sl st) and chain 2. Work 2 half-double crochet (hdc) in the first stitch. Work 1 hdc in each of the next 13 stitches. Work 2 hdc in each of the next 3 stitches. Work 13 hdc, then 2 hdc in each of the final 2 stitches. (Total: 38 hdc) [ 05:09 ]
Round 3Sl st and chain 2. Work 1 hdc in every stitch around (38 hdc). [ 05:58 ]Rounds 4–23: Repeat Round 3 for 20 more rows to create the height of the pouch. Fasten off and hide the yarn tail. [ 07:20 ]
2. The Flap (Red Yarn)
Setup: Mark 18 stitches on the back side of the bag’s top edge. [ 08:07 ]
Part 2
Rounds 1–3Attach red yarn to the first marked stitch. Work 18 sc across for 3 rows, chaining 1 and turning at the end of each row. [ 09:33 ]
Round 4The Fold Chain 1 and turn. Work 18 sc into the Front Loops Only (FLO) . This creates the natural hinge for the flap. [ 10:13 ]
Rounds 5–8Work 18 sc into both loops for 4 rows. [ 10:50 ]
Round 9Tapering Work 1 decrease, 14 sc, and 1 decrease. [ 11:36 ]
Round 10Work 1 decrease, 12 sc, and 1 decrease. [ 12:19 ]
Round 11Work 2 decreases, 6 sc, and 2 decreases. [ 13:30 ]
Rounds 12–14Work 10 sc across for 3 rows. [ 14:23 ]
Round 15Work 1 decrease, 6 sc, and 1 decrease. Fasten off. [ 15:14 ] 3. Decoration & Edging (Gold Yarn)Flap Edging: Attach gold yarn to the side of the flap. Work slip stitches along the entire edge of the flap to create a clean, golden border. [ 17:04 ]Gold Ingot: Create a magic ring and work 7 sc. In Round 2, use a combination of hdc and dc increases to form a small oval “ingot” shape. [ 19:43 ]Tassel: Create a small 5-sc ball, then attach strands of gold yarn to the bottom. Brush or separate the yarn plies to make the tassel fluffy. [ 22:26 ]
Tutor’s Suggestions
The tutor recommends choosing the side without the “seam” (slip stitch line) to be the front of your bag for a professional finish. Additionally, if the flap appears stiff or stands upright after finishing, place a heavy book on the bag for about 30 minutes to set the fold permanently. [ 17:34 ]
Uses Traditional Gifting: Perfect for holding “Lucky Money” during Tet or Lunar New Year.
Accessory Pouch: Ideal for storing earbuds, jewelry, or lipstick inside a larger bag.
Home Decor: Hang multiple bags on a “Hoa Mai” or “Hoa Đào” tree as festive ornaments.
Conclusion
Crocheting your own lucky money bag adds a deeply personal touch to holiday traditions. This pattern yields a durable and elegant pouch that beautifully showcases the classic red and gold colors of the season.
Pro-Tip: When working the slip stitch border with gold yarn, keep your tension loose. If you pull the slip stitches too tight, the edge of the flap will curl inward rather than lying flat against the bag!
From the collection
Finishing
- Weave in every yarn tail on the inside, where the stitch tension holds it in place.
- Glue the gold ingot onto the flap or body, holding it steady until the glue sets.
- Fold the flap along its front-loop hinge and check that it lies flat.
Why it works
Round 1 sets two increase points at the oval's ends, with 2 sc jumps and a 3-sc corner. That is what turns a straight chain into a stadium-shaped base.
Round 2 repeats those same increase points in half-double crochet. Round 3 drops them, so the pouch stops widening and the walls go straight up.
The flap breaks out of the round and is worked flat, row by row. A closure needs a front and a back, and those are not built the same way.
What it becomes
- A small pouch for coins or a few folded bills, kept in a desk drawer or a coat pocket.
- A jewelry keeper for a ring or a pair of earrings, tucked into a travel bag.
- A gift pouch for a small trinket, paired with a plain gift box or a card.
Original pattern: https://redagapeblog.com/free-crochet-lucky-money-bag-pattern/
FAQ
How big is the finished pouch?
The pattern doesn't give a finished measurement, but the body works up from an oval base through many rounds of half-double crochet. Expect something sized for coins or a small trinket, not a full wallet.
Why does the flap use front loop only for one row?
That single FLO row creates a soft crease so the flap folds down cleanly instead of standing stiff. It's a small trick, but it does the job of a fold line without any blocking.
Do I need to join every round, or can I work in a spiral?
This pattern joins each round with a slip stitch and a chain two, not a continuous spiral. Sticking to the join keeps the increase points at the oval's ends lined up round after round.
What is the gold ingot made from?
The materials list points to gold Milk Cotton yarn and hot glue, so the ingot accent is likely a small crocheted or shaped piece attached after assembly. I'd make it before gluing so it has time to hold its shape.