Free Pattern
Step-by-Step
Crochet
Home DecorFree Crochet Flower Coaster Pattern (Easy Beginner Design)
Make this free crochet flower coaster pattern with a magic ring center and petal rounds—quick, colorful, and perfect for beginners to finish fast.
Level BeginnerTime 1-2 HoursHook 3.0 mmYarn DK/Light Worsted
Pattern highlights
- Begin with a magic ring and work your first round of double crochets separated by chain-1 spaces around the center.
- Pull the magic ring tight to close up any gap before joining the round with a slip stitch.
- Start round two with a fresh ch-3 and work two double crochets into each chain-1 space from the previous round.
- Continue working additional rounds in the same increase pattern to build out the petal shape evenly.
- Join each new round with a slip stitch and keep your stitch count consistent so the flower lies completely flat.
- Once all rounds are complete, fasten off and weave in every yarn tail securely on the wrong side.
- Give the finished coaster a light block to flatten the petals before setting it under your favorite mug.
About This Pattern
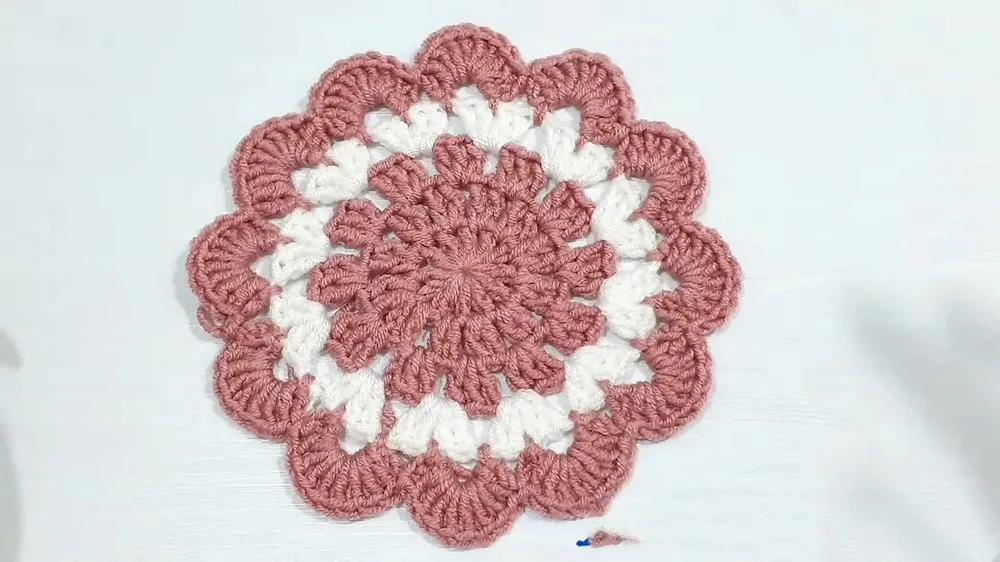
This free crochet flower coaster pattern turns a handful of double crochets and a magic ring into a cheerful little bloom you'll actually use every day. Worked in the round with a simple ch-3, ch-1 rhythm, it builds petal by petal from the center out until you have a sturdy, flat flower perfect for setting under your morning coffee mug. It's an ideal quick-make for crocheters who want instant gratification and a project that looks far more impressive than the effort it takes.
The core techniques here are all fundamentals: starting a magic ring, working double crochets into chain-1 spaces, and increasing stitch count each round to keep the flower lying flat. Because the pattern relies on counting your 12 dc in the first round and keeping consistent ch-1 spaces, it's a great confidence-builder for newer crocheters while still being a satisfying, meditative make for experienced stitchers. Expect to finish one coaster in well under an hour once you settle into the pattern.
The finished coaster is a compact, flat flower shape with soft, defined petals and a neat joined center—sturdy enough to hold a mug or glass without curling at the edges. Made in cotton yarn, it has a crisp, absorbent feel that's practical as well as pretty, and the two-color design gives each coaster a fresh, handmade charm. Stitch up a set in coordinating colors for your own table, or bundle a few together for an easy, thoughtful handmade gift.
You've completed a vibrant and beautiful flower coaster using just chaining and double crochets! This quick and beginner-friendly project makes a great decorative accent or gift.
Variations
One of the best things about this coaster pattern is how easy it is to customize without touching the basic construction. For color combos, try a sunny yellow center with white petals for a classic daisy look, or a deep red center with pink petals for a rose-inspired coaster set. 24/7 Cotton or Sugar 'n Cream both work beautifully here since cotton gives coasters the sturdy, absorbent feel you want under a mug. If you'd like a slightly larger coaster, simply continue the established pattern of increasing stitches evenly into each ch-1 space for an additional round, keeping the ch-1 spacing consistent so the flower still lies flat. For a smaller, more delicate coaster, work with a finer cotton thread and a smaller hook in the 3.0mm range, which will naturally tighten up the stitch gauge. Seasonal color palettes are an easy way to theme a set—soft pastels for spring, warm oranges and browns for fall, or icy blues and whites for winter table settings. You could also experiment with variegated cotton yarn for a single-color version that still shows off the petal shaping without any color changes at all. For gifting, stitch up a set of four in coordinating (not matching) colorways tied with a ribbon, or add a coordinating crochet basket or bowl to make a mini housewarming bundle. If you want texture instead of color contrast, try working the second round in a slightly thicker yarn held together with your base yarn for petals with a little extra dimension.
Common mistakes
- Magic ring pulled too loose, leaving
- Tug each of the 12 dc loops individually before pulling the tail tight, and check that the center is fully closed before joining with the slip stitch.
- Losing count of the ch-1 spaces
- Use a stitch marker on the first dc and count out loud as you work each dc-ch-1 pair around; recount before slip stitching to join.
- Forgetting that the beginning ch-3
- Always treat the ch-3 as stitch one and work your final stitch of the round into the last ch-1 space before slip stitching into the third chain of that ch-3.
- Sloppy color changes that leave
- Finish the last stitch of the round by drawing the new color through the final two loops, then continue the next round directly in the new color for a seamless transition.
- Working 2 dc in the wrong space
- Make sure the two double crochets go into the same ch-1 space from round one, not split between two neighboring spaces, to keep the increase pattern even.
- Not weaving in ends securely, causing
- Weave each tail through several stitches in different directions on the wrong side and trim close, then give the coaster a gentle stretch to test that ends are secure.
Beginner
Progress Tracker
0 of 0 rounds
Tap a round to tick it off — your place is saved on this device.
Materials
Yarn
- 2 colors of your choice, small amounts of each (cotton yarn preferred for coasters)
Hook
- Size recommended for your yarn (typically 3.0 mm to 4.0 mm for DK/light worsted yarn)
Tools
- Scissors
- Yarn needle for weaving in ends
Chain
st(s)
Stitch(es) sl st Slip Stitch
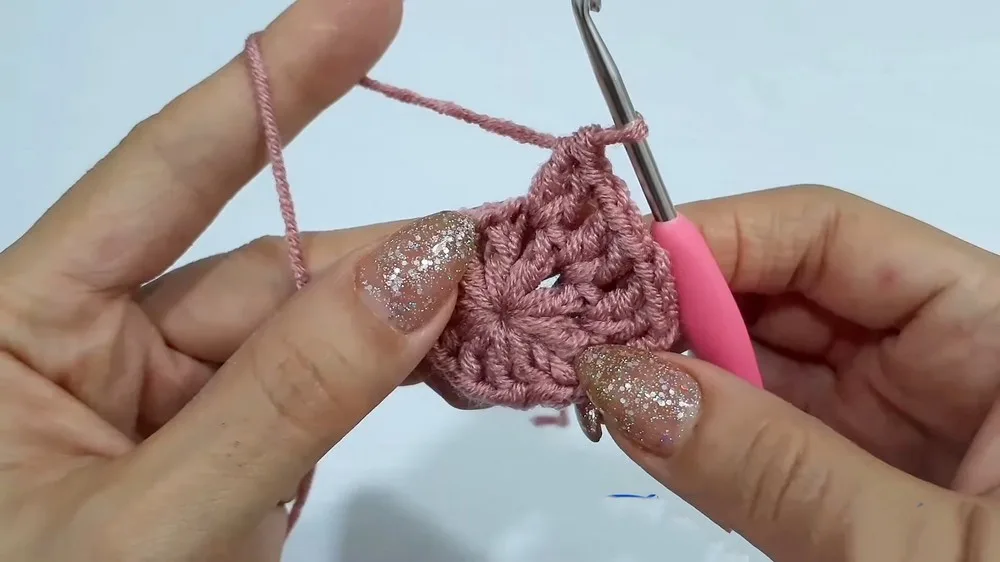
- Round 1(with Color A) Start with a Magic Ring. Ch 3 ( counts as first dc ), ch 1. (Dc in the ring, ch 1); repeat from * to * until you have 12 dc in total (including ch-3 as first dc), with a ch-1 after each dc .Pull magic ring tight to close the center.After the last ch-1, sl st into the third ch of the beginning ch-3 to join.(You have 12 dc, each separated by a ch-1.)
- Round 2Ch 3 ( counts as first dc ). Dc in next ch-1 space , ch 1. (2 dc in next ch-1 space, ch 1); repeat from * to * around.At end, sl st into third ch of beginning ch-3 to join.(You now have 12 sets of 2 dc each, separated by a ch-1.)
- Round 3Sl st in next dc , sl st into next ch-1 space . Ch 3 ( counts as first dc ), 2 dc into same ch-1 space , ch 1.(Skip next 2 dc, 3 dc into next ch-1 space, ch 1); repeat from * to * around.At end, sl st into third ch of beginning ch-3 to join.(You now have 12 groups of 3 dc each, separated by a ch-1.)
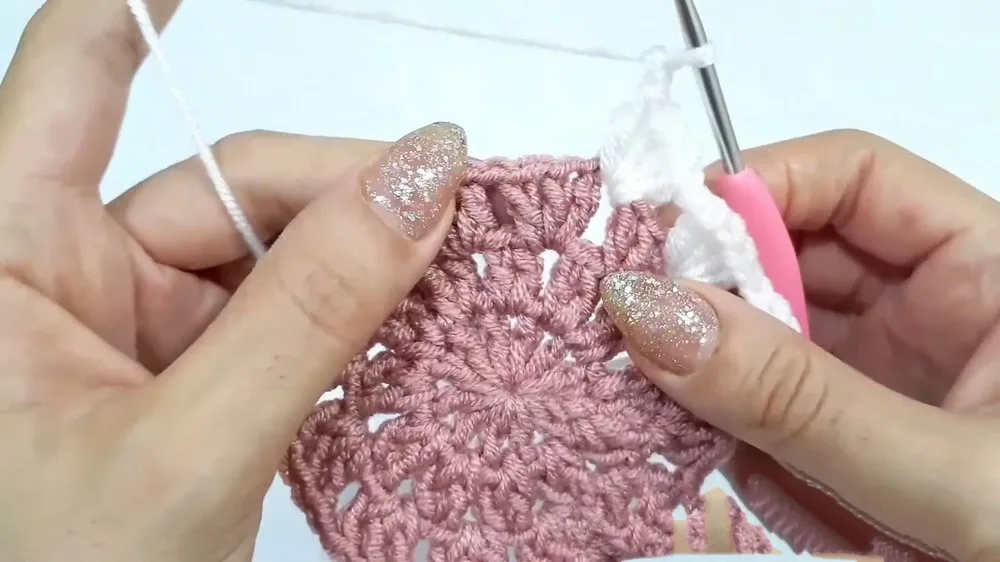
- Round 4(Change to Color B) Attach new color with a slip knot into any ch-1 space. Ch 3 ( counts as first dc ), 3 dc into same ch-1 space (total 4 dc in space).Ch 1, 4 dc into next ch-1 space; repeat from * to * around.At end, sl st into third ch of beginning ch-3 to join.Fasten off Color B.
- Round 5(Back to Color A) Attach Color A: Find space between the 2nd and 3rd dc of any 4-dc group .Insert hook, attach yarn with a slip knot, and ch 5 .Sl st into next ch-1 space, ch 5, sl st into space between 2nd and 3rd dc of next 4-dc group; repeat this sequence around, alternating between ch-1 spaces and the space between 2nd and 3rd dc.Continue until you reach the start; sl st into first space to join .Sl st into first ch-5 loop to move to the start for the next round.
- Round 6(Petals) Ch 3 ( counts as first dc ), 7 dc into same ch-5 space (total 8 dc—this forms a “petal”).Sl st into next ch-5 space, 8 dc into following ch-5 space; repeat from * to * around.At end, sl st into third ch of beginning ch-3 to join.Fasten off and weave in all ends.Finishing Weave in all yarn tails with a yarn needle.
Block your coaster flat if desired.
Assembly
- Step 1Weave in all yarn tails with a yarn needle.
- Step 2Block your coaster flat if desired.
Important notes
💡 Use a 3.0mm to 4.0mm hook depending on how tightly you crochet—swatch first if you want your coaster to match a specific size.
💡 Choose cotton yarn over acrylic for coasters since it holds shape better and absorbs condensation instead of pilling under a cold glass.
💡 Place a stitch marker in the very first dc of each round so you always know exactly where to join with your slip stitch.
💡 Keep your ch-1 spaces loose and even in round one—too tight and round two's 2-dc increases will be hard to work into.
💡 When changing colors, cut the first yarn with a few inches of tail and let it hang on the wrong side until you're ready to weave in, rather than tying knots.
💡 Block your finished coaster lightly by dampening it and pinning the petals flat to dry, which helps it lie perfectly flat under a mug.
More photos
FAQ
Can I use worsted weight yarn instead of DK/light worsted for this coaster pattern?
Yes, worsted weight works fine and will simply produce a slightly larger, thicker coaster. Just size up your hook to around 4.0mm to 4.5mm to keep the stitches from feeling too dense.
Why does my flower curl up instead of lying flat?
Curling usually means your increases aren't quite even, so the outer round has too few stitches for the number of rounds worked. Double check that round two has exactly 2 dc in every ch-1 space around before moving on.
How many coasters do I need to make a full set?
Most crocheters make four to six coasters per set for everyday table use. Since each one works up quickly, a set is a very manageable single-sitting or single-evening project.
Can I make this coaster without changing colors?
Absolutely, you can work the entire coaster in one color if you prefer a more subtle look. The petal shaping and texture will still show beautifully even without a contrasting center.
What's the best way to join the rounds neatly?
Always slip stitch into the third chain of your beginning ch-3 to close each round cleanly. Keeping your join consistent round after round is what gives the flower its neat, professional-looking finish.