Free Pattern
Step-by-Step
Crochet
Bags & AccessoriesCrochet Flower Motif Bag: A Beginner-Friendly Chenille Pattern
Learn to crochet a plush flower motif bag with soft chenille velvet yarn using simple 4-round motifs joined into a gorgeous beginner-friendly purse.
Level BeginnerTime 4-6 HoursYarn Chenille (Bulky)
Pattern highlights
- Begin with a snug slip knot and three chains to form the starting chain circle for your first flower motif.
- Work the first round into the chain circle to establish the flower's tiny, tight center.
- Build outward through the remaining rounds, adding evenly spaced increases so the petals stay flat and balanced.
- Complete all four rounds of the motif, then fasten off and weave in the plush chenille ends neatly.
- Repeat the motif construction to make as many flowers as you'd like for your desired bag size.
- Lay your finished motifs out and arrange them in your preferred pattern before joining anything permanently.
- Follow the eight assembly steps to connect the motifs into the bag's body, base, and sides.
- Finish by adding your handle or strap so the plush flower bag is ready to carry.
About This Pattern
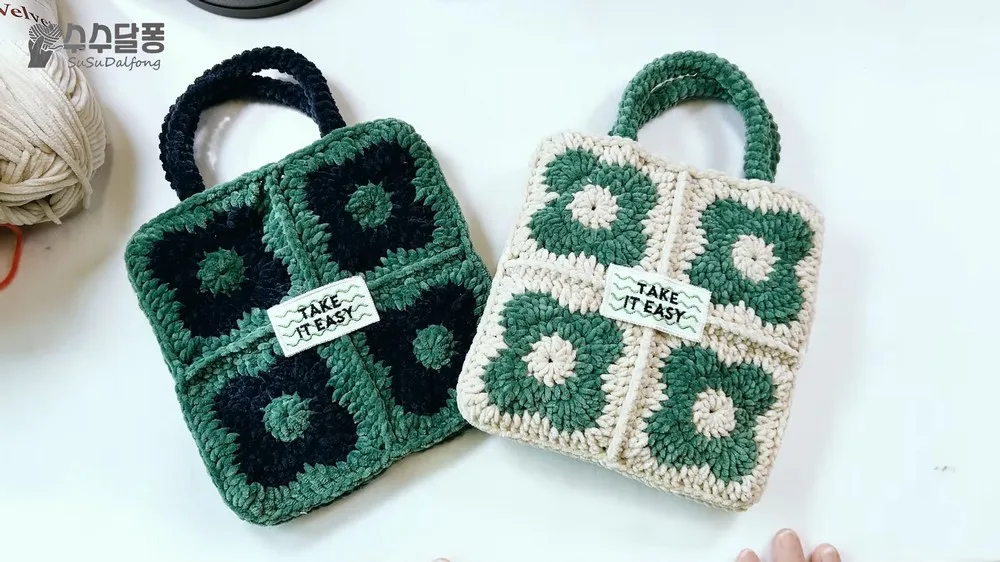
This Flower Motif Bag is proof that beginner-friendly crochet can still look absolutely stunning. Built from repeated flower motifs worked up in plush chenille velvet yarn, this bag has a dimensional, petal-like texture that instantly elevates it from 'homemade' to 'boutique.' It's the perfect project for anyone who wants a wearable accessory that doubles as a conversation piece, whether you're a crochet newbie looking for your first bag project or a seasoned maker craving something soft and satisfying to stitch.
The pattern centers on a simple chain circle technique, starting with a slip knot and three chains before building outward through four rounds per motif. You'll get comfortable with basic increases and shaping as the flower blooms round by round, then move into assembling the finished motifs into a full bag through eight guided assembly steps. Because the stitches themselves are straightforward, this is genuinely approachable for beginners, even though the chenille yarn adds a touch of plush, professional polish. Expect to spend an easy afternoon or a cozy weekend bringing it to life.
When it's finished, you'll have a soft, velvety bag with a distinctive floral silhouette that feels as luxurious as it looks. The chenille yarn gives every stitch a rounded, brushed-suede softness that's irresistible to touch, and the flower motif shape means no two finished bags look quite the same. It's substantial enough to carry your everyday essentials, striking enough to be the star of an outfit, and thoughtful enough to make a gorgeous handmade gift for a friend, sister, or yourself.
Variations
One of my favorite things about this Flower Motif Bag is how endlessly customizable it is once you understand the basic four-round motif. For a bold statement bag, try working your petals in a rich burgundy or emerald chenille (Bernat Blanket Yarn or Chenille both work beautifully) paired with a cream or gold center for contrast. Want something softer and more romantic? A blush pink and dusty sage combo gives the flower a vintage garden feel that's perfect for spring outings. If you're making this as a gift, consider color-matching the motifs to the recipient's favorite outfit or using their birth flower colors for a truly personal touch. For a size adjustment, you can easily scale the bag up by adding an extra round or two of single crochet around the motif's outer edge before assembly, just be sure to keep your increases even so the flower shape stays symmetrical and doesn't ruffle. Going smaller works too, simply stop after round three if you want a more compact clutch-style bag, then adjust your strap length to match. Yarn substitution is easy since chenille comes in so many weights, if you can't find velvet chenille locally, a soft worsted-weight yarn held double will mimic that same plush, rounded stitch definition. For a themed twist, try working the motifs in autumn oranges and browns for a fall-ready accessory, or alternate two contrasting colors between rounds for a striped, ombré-inspired flower that adds extra visual interest without changing the stitch count at all.
I fell hard for this project the moment I pulled my first strand of chenille velvet yarn from the center of the skein and watched that simple slip knot and three-chain start bloom into a full flower. There's something so satisfying about working a chain circle and watching it grow round by round into a dimensional motif with real texture and shape. The chenille yarn does so much heavy lifting here, it's soft, thick, and forgiving, which means your stitches look plush and even without much fuss, even if you're newer to crochet. I love that the pattern keeps things simple with just four rounds per motif, so you're never lost or overwhelmed, but the payoff still looks impressively intricate once everything is assembled. Pulling the yarn from the center of the skein instead of the outside is a small trick that made a huge difference for me, no more tangled, rolling yarn cakes chasing me across the couch. By the time you work through the eight assembly steps and see the finished bag take shape, you'll feel like a total pro. This is one of those patterns that feels indulgent to make and even more indulgent to carry.
Common mistakes
- Pulling yarn from the outside
- Always locate the center pull tail before you start and work from there; it keeps the plush yarn feeding smoothly and prevents frustrating snarls while you're focused on your stitch count.
- Starting the chain circle with a loose
- Snug up your slip knot before working your first three chains, and give the center loop a firm tug closed once round one is complete so the motif starts with a tight, clean center.
- Losing track of which round you're
- Use a stitch marker or small scrap of contrasting yarn to mark the start of each new round, and count your stitches out loud or on paper as you go rather than relying on sight alone.
- Working stitches too tightly
- Relax your grip and aim for even, moderate tension throughout; chenille naturally plumps up stitches, so overly tight work will actually distort the motif's rounded shape rather than making it neater.
- Skipping ahead in the eight assembly
- Lay all your finished motifs out in your intended arrangement before sewing or joining anything, this lets you catch spacing or color-balance issues while they're still easy to fix.
- Rushing the increases
- Keep your increase placement evenly spaced around each round exactly as the pattern indicates, and lay your motif flat on a table periodically to check that it isn't buckling before moving to the next round.

Beginner
Progress Tracker
0 of 0 rounds
Tap a round to tick it off — your place is saved on this device.
Materials
- Chenille (Bulky) weight yarn
- Crochet hook (size to suit your yarn)
Motif Construction
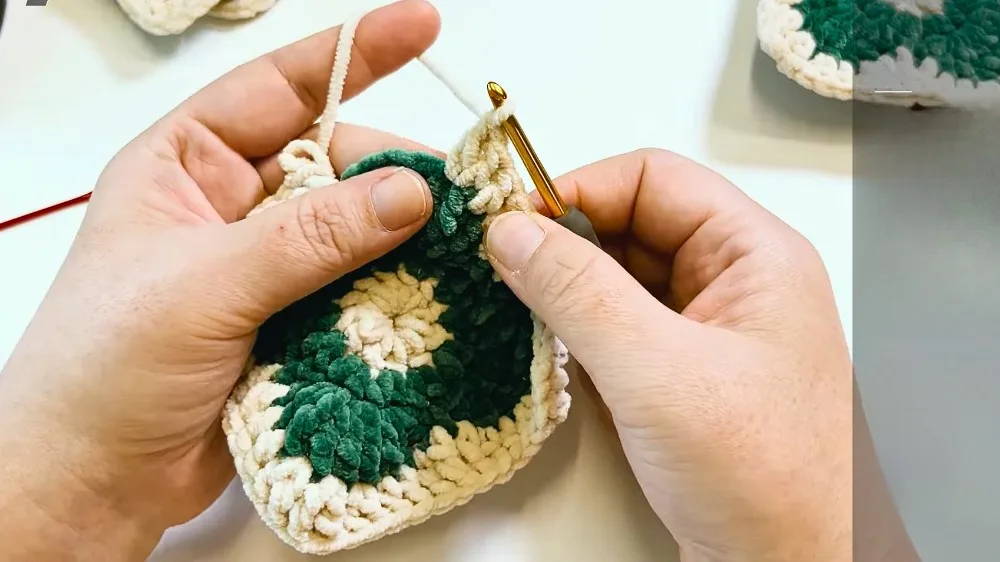
- Round 1The first round is worked inside the chain circle. It consists of creating double crochet stitches, for a total of 12. A modified method is used for finishing the round to create a clean, uniform look.
- Round 2The second round uses a technique to start with a half-double crochet foundation instead of a chain stitch. Each stitch in this round is worked twice.
- Round 3This round forms the flower petals. It involves a sequence of stitches, including double crochet, extended double crochet, and treble crochet, repeated four times.
- Round 4This round squares the circular motif. It begins with a treble crochet and incorporates various stitches to form the corners. Check for symmetry while working on the corners.
After each motif is completed, a blocking process using a cold water spray is recommended to help the shape hold better.
Assembly
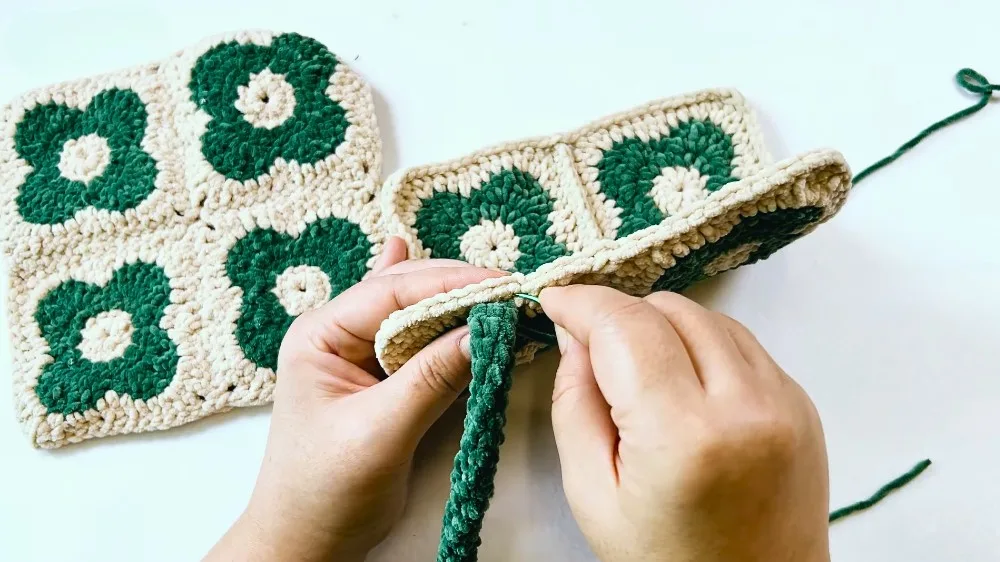
- Step 1Four completed motifs are joined together to create one side of the bag. This is done by holding two motifs with their right sides facing each other and joining them with single crochet stitches along the edges.
- Step 2The two sets of four connected motifs are then joined at the bottom to form the bag.
- Step 3A border is added to the top edge of the bag using slip stitches.
- Step 4A handle is crocheted and then sewn onto the inside of the bag, aligning with the flower pattern.
- Step 5The final step is to seam the two sides of the bag together. A whipstitch technique is used along the outermost loop of the back loops of the border stitches.
- Step 6As an optional last step, a patch can be attached to the finished bag for personalization.
Important notes
💡 Chenille velvet yarn is thick and plush, so size up your hook slightly from what you'd normally use for worsted weight to keep your stitches from feeling too dense or stiff.
💡 Always pull your working yarn from the center of the skein rather than the outside, this one habit will save you from the tangled-mess frustration chenille yarn is notorious for.
💡 Because chenille has a bit of stretch and a fuzzy surface, count your stitches by feel with your fingers as well as by sight, especially in dimmer lighting.
💡 Keep a stitch marker on the first stitch of every round throughout the four-round motif so you never lose your place when the plush texture obscures your V-stitches.
💡 Block or gently steam your finished motifs before assembly if they seem to curl slightly; this helps them lie flat and match up neatly during the eight assembly steps.
💡 Work all your motifs in one uninterrupted sitting if possible so your tension stays consistent, chenille yarn can behave differently after handling, so uniform motifs will assemble far more smoothly.
More photos
FAQ
What kind of yarn works best for this Flower Motif Bag?
Chenille velvet yarn is the star of this pattern because its soft, thick texture gives the flower motifs a plush, dimensional look. If you substitute, choose a similarly soft, rounded yarn like a brushed worsted held double to get a comparable effect.
Is this pattern really beginner-friendly even though it looks intricate?
Yes, the flower shape looks impressive but is built from just four straightforward rounds worked from a simple chain circle. As long as you're comfortable with basic increases, you'll be able to follow along easily.
Why does the pattern recommend pulling yarn from the center of the skein?
Chenille yarn tends to tangle and roll around when pulled from the outside of the skein, which can slow you down and fray your patience. Pulling from the center keeps your working yarn feeding smoothly and tangle-free.
How many motifs do I need to make to complete the bag?
The pattern is built around repeating the core motif construction (worked over 4 rounds) as many times as needed for your desired bag size, then joining them through the 8 assembly steps. Make a few extra motifs if you want a slightly larger or more textured finished bag.
Can I turn this pattern into a smaller pouch instead of a full bag?
Absolutely, simply reduce the number of motifs you join together during assembly to create a smaller silhouette. Just be sure to adjust your strap or handle length to stay proportional to the smaller finished size.