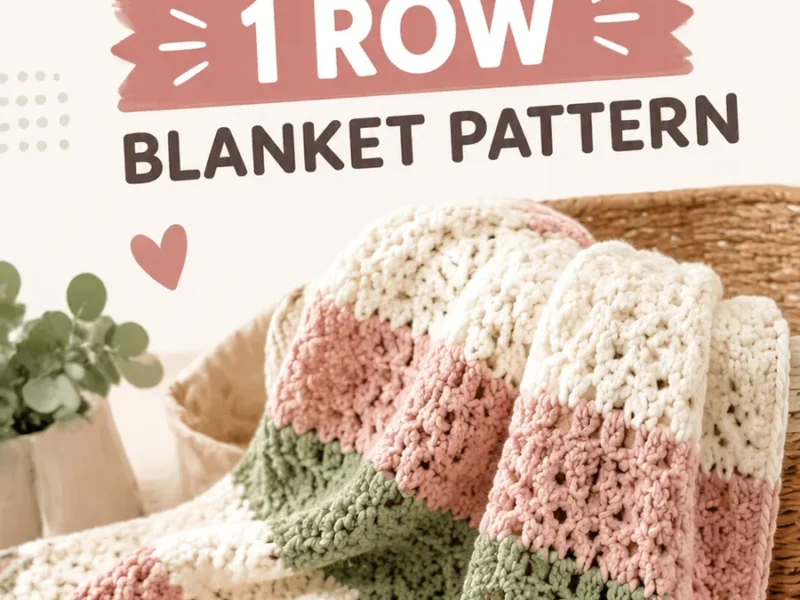
Free Pattern
Step-by-Step
Crochet
Blankets & ThrowsCrochet Heart Stitch Pattern for Beginners (Two-Color Row Repeat)
Learn the crochet heart stitch with this beginner-friendly, two-color row-repeat pattern perfect for blankets, gifts, and cozy home decor projects.
Level BeginnerTime 3-5 HoursYarn Worsted
Pattern highlights
- Start by working rows 1 and 2 in single crochet to build a stable, uniform base for your project.
- Introduce your second color and begin row 3, where the first hints of the heart shape start forming.
- Continue through the mid-section detailing in rows 4 and 5, shaping each heart with careful color placement.
- Work row 6 entirely in single crochet to finish off the heart sequence and return to a plain textured row.
- Repeat rows 3 through 6 as many times as needed to build your fabric to the desired length.
- Keep carrying your unused yarn color neatly along the edge between color changes throughout the repeats.
- Once you reach your target size, finish off and weave in all remaining yarn tails securely.
- Add a picot edge or other simple border around the finished piece for a polished, gift-ready look.
About This Pattern
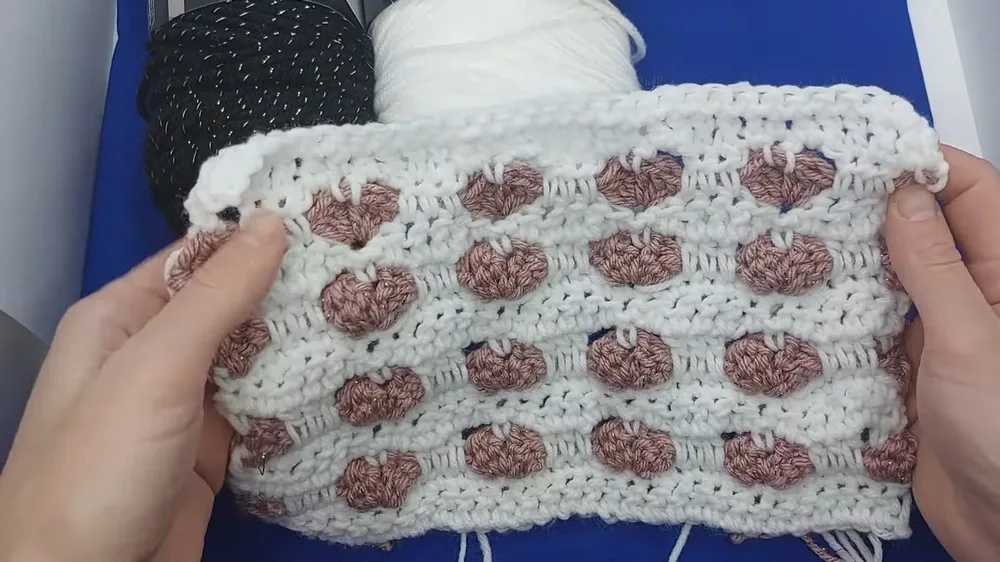
This crochet heart stitch pattern creates a textured, two-color fabric where rows of little hearts float across a uniform stitch background — the kind of design that looks far more complicated than it actually is. What makes it special is how the row-repeat structure builds a continuous chain of hearts down your work, making it endlessly scalable for anything from a coaster to a full-size blanket. It's perfect for beginners who've mastered basic single crochet and are ready to try their first color-change project without diving into complex charts or amigurumi shaping.
The core techniques here are straightforward: single crochet stitches worked across each row, a simple two-color yarn change, and a repeating row sequence (rows 3 through 6) that alternates between forming the heart shapes and stabilizing the design with plain textured rows. You don't need any advanced skills like invisible decreases or magic rings — just consistent tension and a willingness to follow the color-change rhythm. Expect to spend a few focused hours getting comfortable with the pattern, after which the repeats become almost meditative.
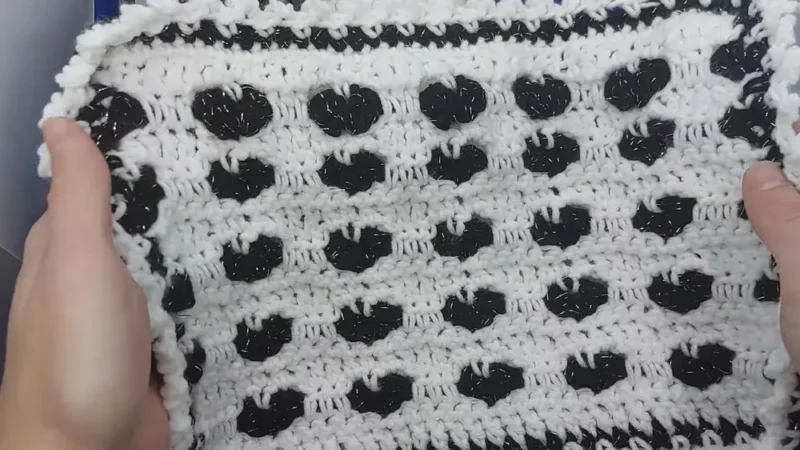
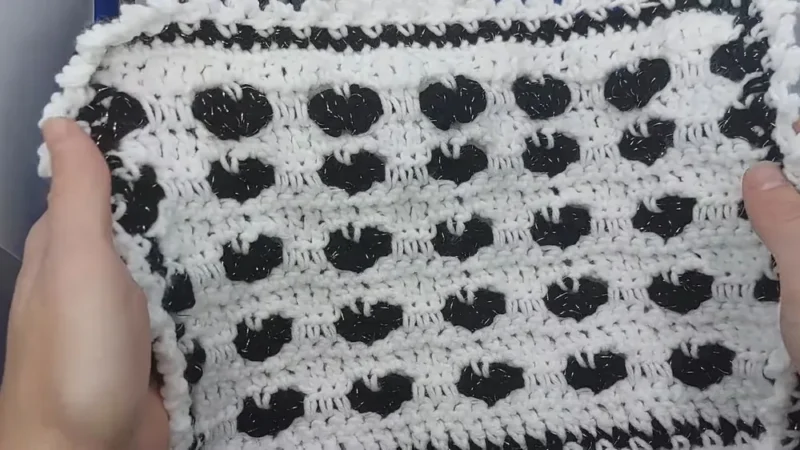
The finished fabric has a lovely, slightly raised texture thanks to the alternating stitch pattern, with crisp pink hearts standing out against a white background (or whatever two colors you choose). It drapes nicely in worsted-weight yarn, making it ideal for a lap blanket, a baby throw, or a set of heart-motif dishcloths. Add a picot edge as suggested in the notes, and you've got a finished piece polished enough to gift for a birthday, anniversary, or just because someone deserves a handmade hug.
Variations
The classic pink-and-white combo (like the Walmart worsted-weight yarns used in the original) is timeless, but this pattern loves to play with color. Try a soft blue and cream for a baby blanket, or deep burgundy and blush for a romantic throw pillow cover. For a bold statement piece, go with black hearts on a mustard-yellow background using Super Saver or Vanna's Choice — both hold their stitch definition beautifully in this texture. You can also make it scrappy: use your leftover worsted-weight stash for the 'stable' rows (1, 2, and 6) and save your prettiest coordinating color for just the heart rows to stretch your yarn budget further. For size changes, simply extend your foundation row to whatever width you need — more stitches means more hearts across, and since the pattern relies on row repeats rather than fixed counts, you can keep repeating rows 3 through 6 vertically until you reach your desired length, whether that's a coaster, a scarf, or a full blanket. Want a denim-and-lace vibe? Swap in a cotton-blend yarn like Lily Sugar'n Cream for a crisper, more structured drape that's perfect for dishcloths or table runners. If you're making this for a nursery, consider alternating the heart color every other repeat (pink, then lavender, then pink again) for a subtly ombré effect down the length of the piece. And don't skip experimenting with the border — a simple picot edge in a third accent color can tie the whole palette together and make the finished piece feel truly custom.
I fell in love with this pattern the moment I saw how those little hearts popped up out of nowhere using just single crochet and a smart color-change trick. There's something so satisfying about working rows 1 and 2 to establish your base, then watching the heart shapes emerge through the mid-section detailing in rows 4 and 5, only to have row 6 bring everything back to a clean, uniform single crochet row that resets you for the next repeat. It's rhythmic in the best way — once you've done one full repeat of rows 3 through 6, your hands just know what to do next. I also love that this uses only two colors and basic stitches, so it's genuinely beginner-friendly, but the finished texture looks intentional and skilled. Finishing it off with a picot edge takes it from 'nice practice swatch' to 'gift-worthy heirloom' in about ten extra minutes. If you've been wanting to try color-change crochet without committing to intarsia or tapestry techniques, this heart stitch is the perfect low-stakes, high-reward starting point.
Common mistakes
- Losing track of which row you're
- Use a row counter or place a removable stitch marker on the first stitch of row 3 each time you start a new repeat, so you always know where you are in the cycle.
- Carrying the unused color too loosely
- Carry your yarn along the edge with consistent, gentle tension — not pulled taut, but not left slack — and give it a gentle tug every couple of rows to keep your edges neat and even.
- Working single crochets too tightly in
- Keep your tension consistent with rows 1 and 2 when you reach row 6; if your hearts rows felt tighter, consciously loosen up slightly so row 6 matches your original base gauge.
- Changing colors in the wrong stitch
- Always complete the last stitch of the old color by pulling the new color through on the final yarn-over, and double-check your heart's positioning against the row below before continuing.
- Skipping a gauge swatch before
- Work a small sample through at least one full repeat of rows 3-6 first to confirm your finished heart size and overall fabric width match your project plan.
- Forgetting to weave in ends from color changes as you go.
- Weave in each tail immediately after cutting it rather than waiting until the end — this keeps your project neat and prevents a tangled mess of loose ends later.
Beginner
Progress Tracker
0 of 0 rounds
Tap a round to tick it off — your place is saved on this device.
Materials
Yarn
- Two colors of worsted-weight yarn (Walmart white and pink).
Tools
- Crochet hook and scissors.
Starting the Base: Rows 1 and 2
Instructions on chaining in multiples of six plus three are provided, allowing you to make swatches for practice or adjust the chain length based on your desired project size.
- Round 1The tutorial begins with a row of double crochets in each chain across. This serves as the foundation for the heart pattern.Row 2: Single crochets are worked across to add texture. At the end of this row, the first color is switched to the second color (pink).
Main Pattern
- Round 3introduces half-heart shapes using double crochet clusters. The instructor demonstrates how to form each half of the heart by working multiple unfinished stitches into one stitch.
Hearts are spaced apart with chain stitches, creating clean and visible shapes. The row ends with half of a heart, ensuring a balanced design.
Mid-Section Detailing: Rows 4 and 5
Row 4 : This row incorporates half double crochets worked into the previous row’s double crochets. Additional single crochets are added between the hearts to enhance the design’s structure.
- Round 5A simple double crochet pattern is worked across the row, filling spaces and creating stability for the next row of hearts.
Securing the Design: Row 6
- Round 6Row 6 involves single crochets worked across the row, finishing off the sequence of heart shapes. It returns to a uniform base pattern, preparing for row repeats.
The heart design is achieved by repeating rows 3 through 6 for the desired length of the project. These rows alternate between forming hearts and stabilizing the design with textured stitches.
Assembly
- Step 1Border Options : The instructor showcases two swatches—one with a border (picot edge) and one without. Adding a border helps tidy loose edges and creates a polished look.
- Step 2Suggestions : The heart pattern can be applied to various projects, such as baby blankets or Valentine’s Day gifts.
Important notes
💡 Use a hook one size smaller than the yarn label recommends if you want a tighter, more defined heart texture — it makes the color-change rows pop more crisply.
💡 Keep both yarn balls close together and untangled while working the color changes; a small yarn bowl or two separate bags can save you a lot of frustration.
💡 Place a stitch marker at the start of every row 3 so you always know exactly where each new heart repeat begins, especially helpful if you set the project down mid-row.
💡 Block your finished piece lightly with steam or a damp cloth before adding the picot border — this evens out any tension inconsistencies between the heart rows and the base rows.
💡 If your worsted-weight yarn is a lighter fiber like acrylic, expect the hearts to have slightly less definition than with a plumper cotton blend — choose your yarn based on how crisp you want the texture.
💡 Save your yarn tails from color changes at a consistent length (about 4-6 inches) so weaving them in later is quick and uniform across the whole piece.
More photos
Original pattern: https://redagapeblog.com/crochet-heart-stitch/
FAQ
Can I use more than two colors for the heart stitch pattern?
Yes, absolutely — you can assign a different color to each heart repeat for a rainbow effect, or use a third color just for the picot border. Just keep the same two-color logic within each individual row repeat to maintain the heart shape.
How much yarn do I need for a blanket-sized project?
This depends on your finished dimensions, but since the pattern is a row repeat, you can calculate yardage based on how much yarn one full repeat of rows 3-6 uses, then multiply by how many repeats you need. It's a good idea to buy an extra skein of each color as a buffer.
Is this pattern good for using up scrap yarn?
Yes, it's a great scrap-buster since the stable rows (1, 2, and 6) can use any neutral color from your stash while you save a special color just for the heart rows. Just make sure all your yarns are the same worsted weight for consistent texture.
Do I need to know how to do a picot stitch before starting?
No, the picot edge is only used as an optional finishing touch at the very end, so you can complete the entire heart pattern first and learn the picot stitch separately when you're ready to add the border.
Why does row 6 feel different from the heart rows?
Row 6 is intentionally worked in plain single crochet across the row to reset your fabric to a uniform base before the next heart repeat begins. This stabilizing row is what keeps the hearts from blending into each other and gives the whole design its structured, repeating look.