Free Pattern
Step-by-Step
Crochet
AccessoriesHow to Crochet Lace Fairy Wings, Step by Step
Notes on crocheting lace fairy wing motifs, round by round, before sewing to a base.
- Level
- Intermediate
- Time
- 4-6 hours
- Hook
- 4.5 mm
- Yarn
- Lace
Pattern highlights
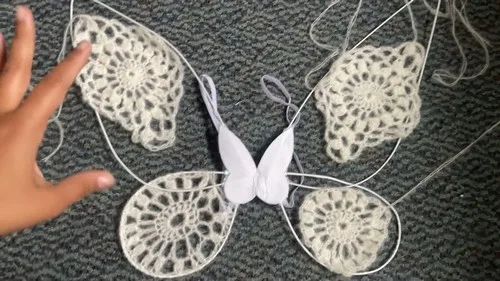
- Start with a slip knot and a short chain joined into a small ring.
- Pack that ring with double crochets to build the first solid round.
- Open the lace with a round of chain spaces between single double crochets.
- Close the bottom edge with a round of cluster stitches and connecting chains.
- Repeat the whole motif once more so you have a matching pair.
- Shape the upper wing separately with corner chains and additional cluster stitches.
- Edge the top piece and sew both motifs onto a pre-shaped wing base.
About This Pattern
This one lives in the appliqué drawer of my collection, next to doilies and other pieces made to be attached to something bigger. It is not a garment. It is not a toy. It is a lace motif with a job: to sit on a wire frame and look like it grew there. I like patterns that admit their own purpose this plainly.
The techniques are all familiar ones, just stacked in a particular order. A tight ring start, a packed round of double crochet, a round that opens into chain spaces, then a cluster round that scallops the edge. Add a separately worked top section with corner chains and more clusters, and you have shaping without any actual increases counted row by row.
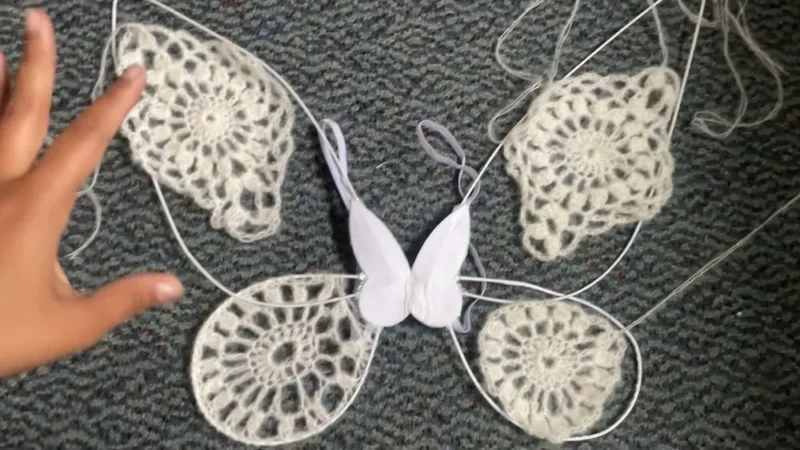
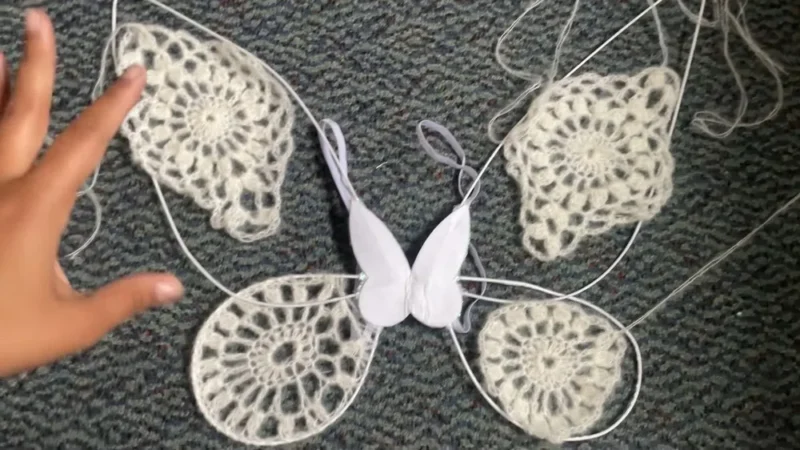
The finished object is two lace pieces per wing, sewn onto a pre-shaped fairy wing base bought elsewhere. It reads more like embroidery on a frame than like typical crochet. That handoff to a ready-made form is what makes it fast to finish and a little unusual to plan for.
Worth knowing
The satisfaction here is in the sequence, not the size. You start with almost nothing, a chain-4 ring, and by the third round you have a scalloped lace edge with real structure to it. The cluster stitch is the technical heart of the piece, partial double crochets held on the hook until one pull closes them together. Working the top section with its chain-7 corners is a nice change of rhythm after the round motif. And because the final step is sewing finished lace onto a pre-shaped base, you get to skip the usual guesswork about shaping a wing from scratch. It is satisfying in the way that assembling something is satisfying, not just making it.
Common mistakes
- Losing count in the double crochet round Place a stitch marker at the start of round 1 so you can check your total before joining.
- Skipping the slip stitch join Always join back to the top of the starting chain at the end of a round, or the motif will spiral instead of lying flat.
- Pulling the cluster through too soon Keep each partial double crochet's loops on the hook until you have worked all of them, then pull through together.
- Shortening the corner chains Follow the chain-7 corner as noted for the top wing shape, since a shorter chain flattens the corner.
- Sewing on mismatched motifs Make both lace pieces for a wing before attaching either, so the pair matches when seamed to the base.
Intermediate
Progress Tracker
0 of 0 rounds
Tap a round to tick it off — your place is saved on this device.
The kit
- Lace weight yarn (mohair suggested, but acrylic can also be used)
- 4.5 mm crochet hook
- Scissors
- Darning needle
- Stitch markers
- Pre-shaped fairy wings as a base (can be found on Amazon or physical stores)
Starting Loop
Create a slip knot and chain 4. Join to the first chain with a slip stitch to form a ring.
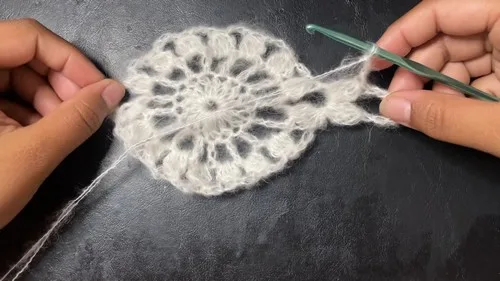
Round 1Chain 3 (counts as your first double crochet). Add 15 more double crochets into the ring. Join with a slip stitch to the top of the initial chain 3. (16 stitches total)(16)
Round 2Chain 5 (counts as 1 double crochet + chain 2), double crochet in the next stitch, chain 2 . Repeat - around for a total of 16 stitches. Join with a slip stitch to the 3rd chain of the starting chain 5.(16)
In Round 3 (Cluster Round):
Round 3Chain 2, then work a cluster stitch where you partially perform double crochets but do not complete them until the end. Pull through all loops on the hook, chain 3. Repeat around and finish this bottom piece of the wing by joining with a slip stitch.
You need to produce two of these for both wings.
Top Wing
Top Wings (Extension of Round 3):
Continuing From Round 3: Start with a slip stitch into the next space and chain 7 to create a corner.
Creating Corners:
Follow a process similar to the cluster from round 3 but with an additional sequence to accommodate the shape of the top wing. Chain 3 to 7 in between depending on shaping, and complete similar clusters.
Adding Details:
Single crochet, then chain 4, single crochet across to form the top edges of the wings. Repeat the corner shape at each end.
Finishing:
Repeat the process for the curvature on the other side, maintaining the diamond shape typical of fairy wings.
From the collection
Finishing
- Attaching Crochet to Base: Use a darning needle and long tail to sew the crocheted pieces onto the pre-shaped wing base. Use stitch markers to aid the attachment and ensure no movement while sewing.
- Detail Work: Ensure to loop through stitches and not just spaces for secure attachment.
Why it works
The chain-4 ring joined with a slip stitch is the true center; every round after it radiates outward from that join.
Round 1 fills the ring with double crochets, and that stitch total sets the spacing for the chain-2 spaces worked in round 2.
Each round ends with a slip stitch join back to the start, which keeps the motif flat instead of spiraling.
What it becomes
- A costume accessory for dress-up play or photography, paired with a simple dress or leotard.
- An appliqué sewn onto the back of a jacket or the flap of a bag.
- A display piece for a shelf or shadow box, shown alongside other lace motifs.
Original pattern: https://crocheteverything.com/crochet-fairy-wings-tutorial-step-by-step/
FAQ
Can I use worsted weight yarn instead of lace weight?
The pattern calls for lace weight with a 4.5 mm hook, so a heavier yarn will change the drape and scale. Stick with lace weight if you want the motif to match the pre-shaped base it is meant for.
What if I can't find pre-shaped fairy wing bases?
The pattern names these as the intended mounting surface, sourced from Amazon or physical stores. Without one, you would need a different way to give the finished lace its wing shape and structure.
Do the two wing pieces need to match exactly?
Yes, the pattern calls for two of the starting loop motifs, one for each wing. Working them back to back, or at least checking stitch counts against each other, helps keep the pair even.