Free Pattern
Step-by-Step
Crochet
AccessoriesRibbed Crochet Headband with Front Post Half Double Crochet
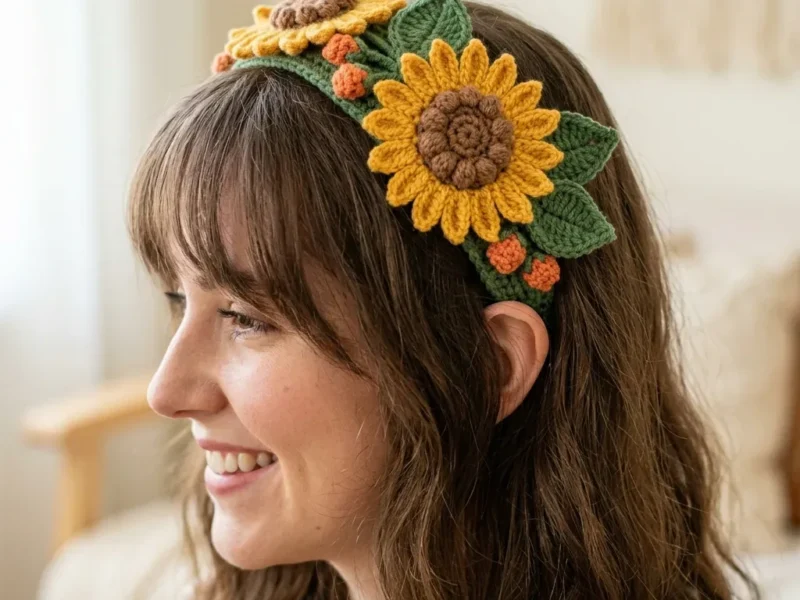
A rectangle worked flat, seamed into a ribbed crochet headband with raised vertical texture.
- Level
- Confident Beginner
- Time
- 2-4 hours
- Hook
- 5 mm
- Yarn
- Worsted
Pattern highlights
- Chain a foundation length, then work a base row of half double crochet across it.
- Alternate a row of plain half double crochet with a row mixing hdc and front post hdc.
- Keep repeating the two-row sequence until the rectangle reaches the length you want.
- Turn after every row so the fabric builds evenly in both directions.
- Join the two short ends together to turn the flat panel into a loop.
- Add an optional round of single crochet along the long edges if you want a cleaner finish.
- Shape the joined band by hand and block it before wearing.
About This Pattern
Every notebook needs a few projects that aren't fussy. This headband is one of mine. No shaping to track, no increases to count mid-row, just a rectangle that behaves itself from start to finish. I keep it filed under the quiet wins — the kind of pattern you hand a new crocheter without apologizing for it first.
The finished object is a band, not a hat — one long strip, hdc across in rows, then the short ends brought together with a seam. It reads as structured ribbing but behaves like a stretchy fabric headband, which is exactly the point of working it flat first.
Quick facts: Skill level — confident beginner. Terminology — US crochet terms. Finished size — approximately 20 inches circumference x 4 inches height (51 cm x 10 cm). Gauge — approximately 14 half double crochet stitches x 10 rows = 4 inches x 4 inches (10 cm x 10 cm). Check your gauge before starting if you want the finished headband circumference to match these measurements.
Pro tip: choose a yarn with a little natural elasticity, such as a soft wool blend or acrylic blend, to help the headband keep its shape while staying comfortable. For color, soft neutrals create a classic look, while bright shades make the accessory more playful.
Worth knowing
There's something satisfying about a stitch pattern that looks more complicated than it is. The front post hdc columns do all the visual work — vertical lines, a knit-rib impression — while the actual instruction is just four stitches repeating down the row. I like that the rectangle stays flat and predictable the whole way through, so I can watch the texture build without worrying about shaping. The seam at the end is a small, honest moment: two short edges, one join, and suddenly it's a loop instead of a strip. It's the kind of project where the technique teaches itself by row three, which is rare and worth noting in the notebook.
Common mistakes
- Uneven edges Count stitches at the end of every row to maintain 14 stitches.
- Headband feels too tight Increase the finished length before joining.
- Texture looks flat Make sure front post stitches are worked around the stitch posts rather than into the stitch top.
- Fabric curls Light blocking can help relax the stitches.
Confident Beginner
Progress Tracker
0 of 0 rounds
Tap a round to tick it off — your place is saved on this device.
The kit
- Medium worsted weight yarn, approximately 120 yards (110 meters)
- 5 mm crochet hook, US H-8
- Yarn needle for sewing and weaving ends
- Scissors
- Measuring tape
Main Headband Panel
Construction note: The turning chain does not count as a stitch throughout the pattern. Each row is turned. The headband is created as one rectangle, then the short ends are joined with a seam.
Foundation: Ch 15.
Row 1Hdc in second ch from hook and each ch across. Turn. (14 sts)
Row 2Ch 1, hdc in first st, fp hdc around next st, hdc in next st, fp hdc around next st. Repeat the sequence of hdc, fp hdc across the row. End with hdc in the final stitch. Turn. (14 sts)
Row 3Ch 1, hdc across all stitches. Turn. (14 sts)
Row 4Ch 1, hdc in first st, fp hdc around next st, hdc in next st, fp hdc around next st. Repeat across. End with hdc in final stitch. Turn. (14 sts)Rows 5 through 50: Repeat Rows 3 and 4 twenty-three more times. You will have 50 total rows and the panel will measure approximately 20 inches (51 cm) long.Joining the headband — step by step: Fold the rectangle so the short ends meet. Thread the yarn needle with a long yarn tail. Use a whip stitch or mattress stitch to sew the short edges together. Secure the seam firmly and weave in all loose ends.
Special Stitch Explanation
Front Post Half Double Crochet (fp hdc): Yarn over, insert hook from front to back and then back to front around the post of the stitch from the previous row, yarn over and pull up a loop, yarn over and pull through all loops on hook.
Optional Edge Finish
Join yarn at the side edge.
Round 1Work one round of single crochet evenly around both long edges.
Round 2Join with a slip stitch and fasten off.Weave in remaining ends.
Assembly
Step 1After completing the crochet headband, gently shape it with your hands and lay it flat. If needed, lightly steam block or wet block according to your yarn fiber recommendations.
Step 2For best results, wash handmade accessories gently and allow them to air dry flat. Avoid stretching the headband while wet so it maintains its original shape.
Finishing
- Weave in all loose ends with a yarn needle once the panel reaches the desired length.
- Join the two short ends with a seam to close the rectangle into a loop.
- Shape the joined headband by hand and block it before it's worn.
Why it works
The panel is worked flat in turned rows rather than in the round, which keeps the ribbed stitch pattern easy to read on both sides before seaming.
The alternating rows — one plain hdc row, one hdc-and-front-post-hdc row — are what build the vertical ribbing instead of a dedicated rib stitch.
The seam joining the two short ends is the only shaping step in the whole piece; everything else is straight rows.
To resize, change the panel length before joining the ends: child size is approximately 18 inches (46 cm), teen size is approximately 19 inches (48 cm), and adult size is approximately 20 to 22 inches (51 to 56 cm). For a wider band, add foundation chains in multiples of 2 to increase the height.
What it becomes
- An ear warmer for daily wear, paired with a plain knit sweater so the texture stands out.
- A quick handmade gift sized down using the child or teen length adjustment.
- A hair-control accessory for workouts, paired with a simple ponytail or braid.
Original pattern: https://duniarecipe.com/pink-clay-bead-bracelet-ideas-cute-diy-jewelry-designs-for-every-style/
FAQ
Can I make this headband wider or narrower?
Yes, the foundation chain length sets the width, so adjust it before starting row one. Just keep an odd stitch count in mind for the alternating pattern to line up.
Do I need to know front post stitches already?
No, the special stitch section walks through the front post half double crochet step by step. It's a beginner-friendly way to meet the technique for the first time.
Is the single crochet edge necessary?
No, it's listed as an optional edge finish. I'd add it if the long edges look a little loose after blocking.
How do I resize this for a child or teen?
The notes give approximate panel lengths for child and teen sizing before joining the ends. Measure around the head and adjust the rectangle length to match, then seam.