Free Pattern
Step-by-Step
Crochet
AccessoriesEasy crochet scrunchie with a ruffled edge for beginners
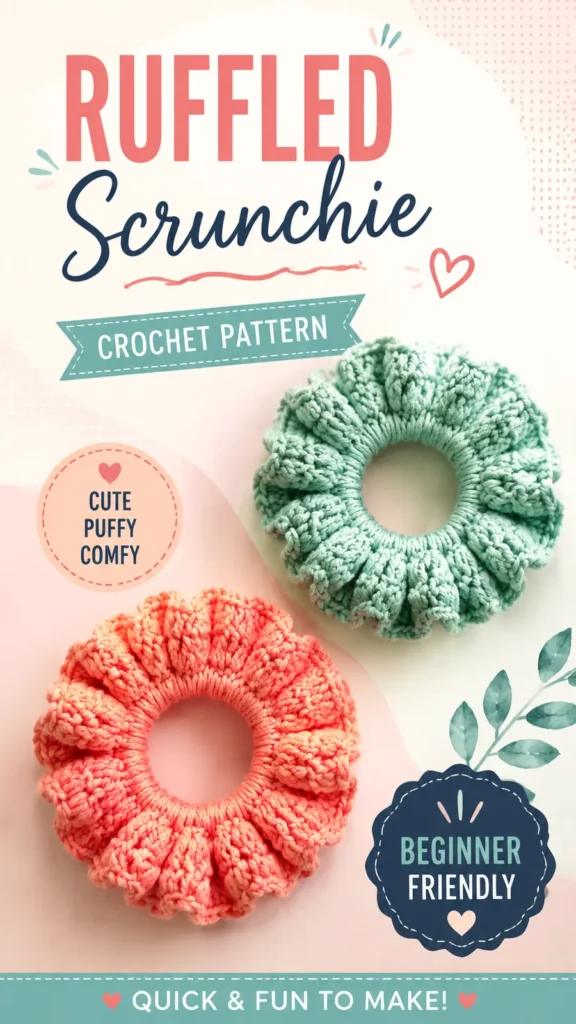
A beginner crochet scrunchie worked directly around the elastic, with a ruffled double crochet edge.
- Level
- Beginner
- Time
- 1-2 hours
- Hook
- 3.5 mm
- Yarn
- Category 3 Light
Pattern highlights
- Attach the yarn around the elastic and work single crochet evenly over it to cover the band.
- Join the round with a slip stitch so the circle closes cleanly before continuing.
- Double the stitch count with increases to give the ruffle room to form later.
- Work a plain round of single crochet to settle the stitches before shaping starts.
- Build fan-shaped double crochet clusters around the edge to create the ruffled texture.
- Repeat the cluster round into the gaps left by the previous one to deepen the ruffle.
- Fasten off and weave in the ends so the elastic stays fully hidden inside the cover.
About This Pattern
I keep a small drawer for projects that don't need a pattern book, just an evening and leftover yarn. A scrunchie belongs there. It's the kind of make I pull out when I want something finished before the kettle's cold, and this one earns its place with a ruffle that looks more complicated than it is.
The technique here is working straight into the elastic instead of crocheting a strip and stitching it closed later. Single crochet forms the snug base, then increases and double crochet clusters build outward. Each round is joined, so the piece grows in tidy, closed circles rather than a spiral.
What comes off the hook is a circular cover with a ruffled outer edge and a plain inner band that grips the elastic. The clusters fan out in round four and get echoed again after, giving the wavy, flower-like silhouette the pattern promises. It's small, bright, and done fast.
Finished size is approximately 4 inches (10 cm) outer diameter. Gauge runs about 18 single crochet stitches by 20 rounds for every 4 inches (10 cm), worth checking if your scrunchie is coming out noticeably tighter or looser than that.
Cotton blends give the ruffle a smooth finish, while acrylic blends make it fuller. Choose cheerful colors and soft yarn, and this becomes a quick way to build a little collection of scrunchies for every season.
Worth knowing
The satisfaction is in watching flat single crochet turn into a ruffle without any shaping math of my own. Round one sits quiet around the elastic, round two doubles it, and by round four the double crochet clusters start fanning out into that gathered, floral look. There's no seam to sew, no stuffing, no counting rows of pattern repeats across a garment. I like that the join at the end of every round keeps the circle honest instead of drifting into a spiral. It's a project where the structure does the decorating. And because it uses so little yarn, it's a fair excuse to finally use that one odd skein that's too pretty to throw out and too small for anything else.
Common mistakes
- Twisting the elastic in round Check the elastic lies flat before joining the first round with a slip stitch. A twist here is hard to fix once later rounds are worked.
- Losing track of the join Mark the first stitch of each round with a stitch marker. It keeps the join from drifting into a spiral.
- Skipping the wrong stitch in the cluster round Read the skip-and-cluster sequence slowly on round four; skipping an extra stitch throws off the count of forty clusters.
- Working the cluster round too tight Keep the double crochet clusters loose so the fan shape can open up instead of staying flat.
- Crocheting around a worn-out elastic Start with a fresh elastic hair tie at about 2 inches diameter so the finished scrunchie holds its shape.
Beginner
Progress Tracker
0 of 0 rounds
Tap a round to tick it off — your place is saved on this device.
The kit
- 1 standard elastic hair tie, approximately 2 inches (5 cm) diameter
- Category 3 light weight yarn, about 25 yards (23 meters)
- 3.5 mm (US E-4) crochet hook
- Yarn needle
- Scissors
- Stitch marker
Main Pattern
The scrunchie is worked in joined rounds around the elastic. The chain 1 at the beginning of rounds does not count as a stitch. Join each round with a slip stitch to the first single crochet unless otherwise stated.
Round 1Attach yarn around the elastic with a slip knot. Work 40 sc around the elastic. Join with a sl st to the first sc. Do not twist the elastic. (40 sts)
Round 2Ch 1. Work 2 sc in each stitch around. Join with a sl st. (80 sts)
Round 3Ch 1. Sc in each stitch around. Join with a sl st. (80 sts)
Round 4Ch 1. In the same stitch, work 3 dc. Skip the next stitch. Repeat the following sequence around: 3 dc in next stitch, skip next stitch. Join with a sl st to the first dc. (40 ruffle clusters)
Round 5Ch 1. Work 3 dc in the space between each ruffle cluster from the previous round. Join with a sl st. (40 ruffle clusters)
Round 6Ch 1. Work 1 sc between each cluster around. Join with a sl st. (80 sts) Fasten off: Cut yarn, leaving a 6 inch (15 cm) tail. Pull yarn through the final loop and secure.
Special Stitch
Ruffle Cluster: Work 3 dc into the same stitch. This creates a small fan that builds the gathered outer texture.
Assembly
Step 1To maintain the shape of your handmade crochet scrunchie, gently reshape the ruffles after washing. Hand washing in cool water is recommended for delicate yarns. Allow the accessory to air dry flat or around a small rounded object to preserve the circular shape.
Step 2Acrylic yarn can usually handle gentle washing, while cotton blends may benefit from careful blocking. Avoid stretching the crochet fabric aggressively because repeated pulling can loosen the stitches around the elastic.
Finishing
- Fasten off after the final ruffle round and leave a short tail for weaving.
- Weave the tail through several stitches on the inside of the band to secure it.
- Trim the yarn close to the work so no loose end shows through the ruffle.
- Gently stretch the crochet fabric around the elastic to evenly distribute the ruffles.
- Lightly steam or block the ruffle edge if needed to improve the shape.
Why it works
Round one works directly into the elastic rather than a foundation chain, which is why the cover has no seam.
The increase in round two doubles the stitch count evenly, giving later rounds enough stitches to fan into clusters.
The skip-and-cluster pattern in round four alternates worked and skipped stitches, which is what pushes the ruffle outward instead of lying flat.
What it becomes
- A quick everyday hair tie that pairs well with a low bun or a simple ponytail.
- A small handmade gift to tuck in with a card, since it uses so little yarn.
- A stash-busting project for leftover cotton blend scraps that are too small for anything bigger.
Original pattern: https://duniarecipe.com/easy-crochet-scrunchie-hair-accessories-pattern-for-beginners/
FAQ
Can I use a thicker yarn than category 3?
A light category 4 yarn is mentioned as suitable too. Just expect the finished ruffle to sit a bit bulkier around the elastic.
Do I need to crochet a strip and sew it around the elastic?
No. This pattern works stitches directly around the hair tie from round one, which avoids a seam entirely.
Why does my ruffle look flatter than the photo?
Check that the double crochet clusters in round four and five are loose enough to fan outward. Tight tension flattens the gathered look.
How much yarn does one scrunchie actually use?
About 25 yards is enough for the full six rounds. It's a good project for using up a small leftover skein.