
Free Pattern
Step-by-Step
Crochet
AmigurumiHow to crochet a plush ladybug amigurumi
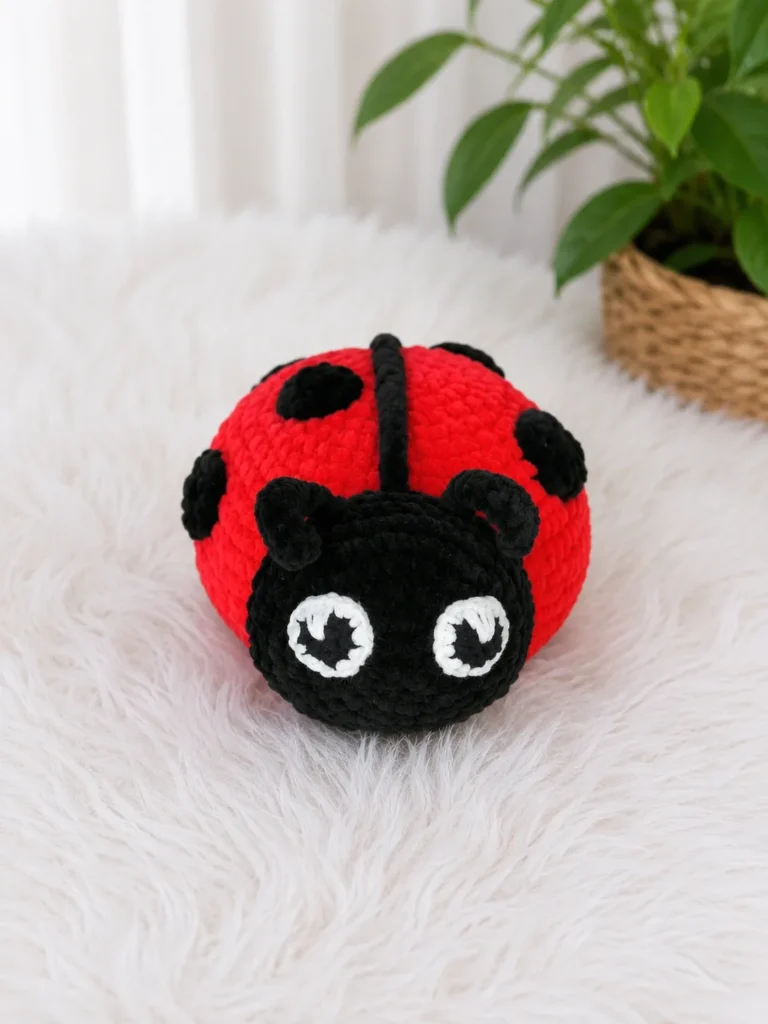
A plush ladybug amigurumi worked in rounds, with spots, antennae, and a whipstitched head.
- Level
- Intermediate
- Time
- 4-6 hours
- Hook
- 4.0 mm
- Yarn
- Worsted
Pattern highlights
- Work the Head the same way, building a flat spiral disc from the center outward in a continuous round.
- Crochet several Spots as small flat pieces, repeating the same few rounds until you have enough to scatter.
- Make two Eyes by combining black and white yarn in one small piece each.
- Chain and single crochet back along the same chain twice to form the two curled Antennae.
- Stuff the Head with fiberfill before whipstitching it onto the front of the Body.
- Arrange and sew the Spots, Eyes, and Antennae in place to finish the face and back.
About This Pattern
This ladybug lands on the small-critter shelf of my amigurumi collection, next to the round-bodied bugs and beetles I keep collecting. I like a pattern with a clear silhouette — a red body, a black head, a scatter of spots — because it reads as a ladybug from across the room. It is not the first insect I have made, but it is the one I keep coming back to when I want something quick and cheerful.
The construction leans on a few dependable amigurumi moves: a magic ring start, a doubling increase round, and a continuous spiral for the Body and Head so there is no seam to track. The Spots and Eyes are small flat pieces, made in multiples and sewn on after. The Antennae skip the round entirely — they are a plain chain worked back on itself, curled by a single increase near the tip.
What comes off the hook is a firm little dome of a bug, soft-cornered from the plush yarn and dense enough to hold its shape without wire. The velvet or bunny-style yarn gives it a slightly fuzzy, huggable finish rather than a crisp stitch texture. Once the Head, Spots, and Eyes are sewn on, it sits upright on its own — a shelf toy as much as a cuddle toy.
A few pattern notes worth keeping in mind: it's written in US crochet terms, and the Body and Head are worked in a continuous spiral with no joining slip stitch — use a stitch marker to track where each round begins. Gauge isn't critical here, but your fabric should be firm enough that the fiberfill doesn't show through; if you can see daylight through your stitches, drop to a smaller hook.
Worth knowing
What I like here is how few pieces there are and how much they say. The Body and Head are each just a flat spiral disc, worked from a magic ring outward with one plain increase round — no shaping decisions, no counting decreases. The Spots repeat six or seven times, so by the third one my hands know the rhythm without looking at notes. The Eyes mix black and white yarn in a small two-color piece, which is the fussiest bit and over quickly. The Antennae are the odd one out: a chain, then a return pass of single crochet and slip stitches that curls the tip on its own. Nothing here needs shaping a face or limbs from scratch — it is all discs, dots, and one curled cord.
Common mistakes
- Losing track of the round Since the Body and Head are worked in a continuous spiral, a stitch marker is essential — move it up every round or the increase pattern drifts.
- Skipping the color-change skip The pattern skips two stitches before joining the new yarn on the Body; skip fewer or more and the color ring will sit unevenly.
- Loose plush-yarn stitches Bulky velvet yarn hides gaps less than it seems; keep stitches snug so the fiberfill doesn't peek through.
- Uneven Spot placement Sewing Spots on one at a time without stepping back can leave the layout lopsided; lay all of them out on the Body first, then sew.
- Curling the Antennae the wrong way The single crochet and slip stitch return pass is what makes the tip curl; work it loosely or it will sit stiff and straight instead.


Intermediate
Progress Tracker
0 of 0 rounds
Tap a round to tick it off — your place is saved on this device.
The kit
- Yarn (main): 50 g red and 50 g black plush or velvet yarn (e.g., Himalaya Dolphin Baby, YarnArt Dolce, Wolans Bunny Baby, or similar bulky velvet-weight yarn)
- Yarn (details): Small amount of black and white DK/sport-weight yarn (e.g., YarnArt Jeans or similar) for the eyes
Hook
- US G-6 / 4.0 mm
Stuffing
- Approximately 100 g polyester fiberfill
- Stitch marker
- Plastic yarn needle with wide eye
- Scissors
- Lighter (to carefully seal velvet yarn ends if needed)
Body (in red yarn)
Round 16 sc in MR. (6)
Round 2inc in each st around. (12)
Round 3sc, inc repeat 6 times around. (18)
Round 4sc, inc, 2 sc, inc repeat 5 times, sc. (24)
Round 53 sc, inc repeat 6 times around. (30)
Round 62 sc, inc, 4 sc, inc repeat 5 times, 2 sc. (36)
Round 75 sc, inc repeat 6 times around. (42)
Round 83 sc, inc, 6 sc, inc repeat 5 times, 3 sc. (48)
Round 97 sc, inc repeat 6 times around. (54)
Round 104 sc, inc, 8 sc, inc repeat 5 times, 4 sc. (60)
Rounds 11–16sc in each st around. (60) Work 6 rounds even. Switch to black yarn.
Round 178 sc, dec repeat 6 times around. (54)
Round 187 sc, dec repeat 6 times around. (48)
Round 196 sc, dec repeat 6 times around. (42)
Round 205 sc, dec repeat 6 times around. (36)
Round 214 sc, dec repeat 6 times around. (30)
Round 223 sc, dec repeat 6 times around. (24)Stuff the body firmly now.
Round 232 sc, dec repeat 6 times around. (18)
Round 24sc, dec repeat 6 times around. (12)
Round 25dec 6 times around. (6)Sl st to close, fasten off, and weave in the end.
Head (in black yarn)
Round 16 sc in MR. (6)
Round 2inc in each st around. (12)
Round 3sc, inc repeat 6 times around. (18)
Round 4sc, inc, 2 sc, inc repeat 5 times, sc. (24)
Round 53 sc, inc repeat 6 times around. (30)
Round 62 sc, inc, 4 sc, inc repeat 5 times, 2 sc. (36)
Rounds 7–9sc in each st around. (36) Work 3 rounds even.Sl st to close, leave a long yarn tail for sewing.
Spots — Make 6–7 (in black yarn)
Round 16 sc in MR. (6)
Round 2inc in each st around. (12)Sl st to close, leave a long yarn tail for sewing.
Eyes — Make 2 (in black and white yarn)
These are worked in two stages — a black center circle followed by a white outer ring.
Black Center Rnd 16 sc in MR. (6)
Black Center Rnd 2inc in each st around. (12)Sl st to close, fasten off the black yarn.
White Outer RingSkip 2 stitches from the slip stitch join, then attach white yarn. Ch 1, inc, sc repeat 5 times, inc, sl st to join.Leave a long yarn tail for sewing.
Antennae — Make 2 (in black yarn)
Row 1Chain 15. Working back along the chain, starting in the 3rd chain from the hook: sc in next st, 2 sc in next st, sl st in each remaining st to end. (10 sl sts)Leave a long yarn tail for sewing.(10)
Assembly
Step 1Sew the Head onto the flat front of the Body using the long yarn tail and a whipstitch. Center it at the black end of the body so it sits naturally.
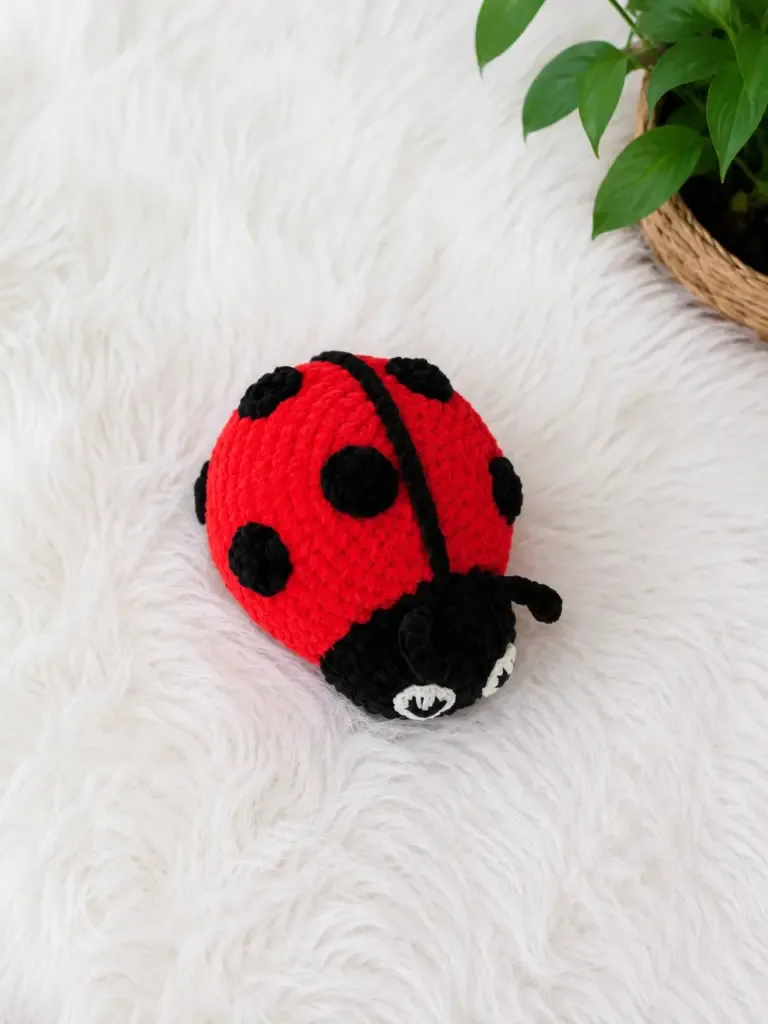
Step 2Arrange the Spots on the red upper half of the Body. Space them evenly — three or four per side works well — then sew each one down using its yarn tail.
Step 3Sew the Eyes onto the front of the Head, positioning them side by side with a small gap between them.
Step 4If you’d like, embroider a small white highlight dot onto each eye using white yarn for an extra touch of life.
Step 5Optionally, add a dividing line down the center of the Body using a chain of black yarn stitches sewn or surface-chained in place.
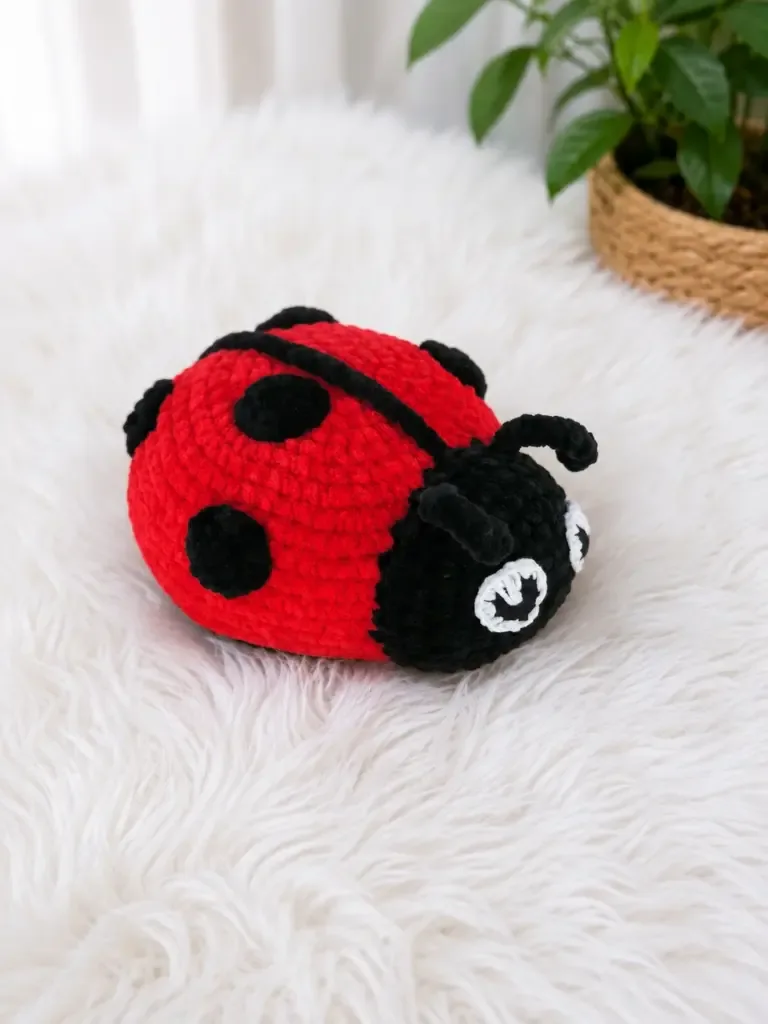
Step 6Sew the Antennae to the top of the Head, one on each side, angling them slightly outward.
Step 7Weave in all remaining ends, using a lighter to seal any synthetic yarn tails if needed.
From the collection
Finishing
- Stuff the Head firmly with polyester fiberfill before sewing it shut, so the plush yarn doesn't let filling show through.
- Weave in the yarn tails left at the color-change point partway through the Body.
- Leave the long tails on the Head, Spots, Eyes, and Antennae uncut, then use them directly for whipstitching each piece onto the Body.
Why it works
The Body opens with 6 single crochets into a magic ring, then a full increase round that takes it to 12 stitches — the standard doubling start for a flat spiral.
The Antennae skip the round shaping used elsewhere: they are a straight chain worked back on itself in single crochet and slip stitches, which curls the tip into shape.
What it becomes
- A garden-themed nursery shelf, sitting alongside other small amigurumi bugs and critters.
- A soft, huggable toy for a toddler who likes small, easy-to-grip shapes.
- A desk or windowsill companion, propped up as a bit of color near houseplants.
Original pattern: https://amistitch.com/crochet-your-own-adorable-plush-ladybug/
FAQ
Can I use a different weight of yarn for the Body and Head?
You can, but the pattern is written for bulky velvet-weight yarn, so a lighter yarn will make a smaller, less plush ladybug. I'd adjust the hook size to match and expect a firmer, less fuzzy finish.
Why does the pattern call for a stitch marker?
The Body and Head are worked in a continuous spiral with no joining slip stitch at the end of each round. Without a marker, it is easy to lose track of where a round starts and drift off the increase pattern.
How many Spots should I actually make?
The pattern gives a range of 6–7, which is enough to space them across the red upper half without crowding. I usually make the higher number and decide on placement once they are all sewn.
Can I skip the white detail yarn and make the eyes fully black?
You could, but the eyes are meant to mix black and white DK-weight yarn for contrast against the Head. Leaving out the white will make the face read flatter, so I'd keep at least a small white highlight.