Free Pattern
Step-by-Step
Crochet
Bags & AccessoriesCrochet mushroom bag pattern with drawstring closure
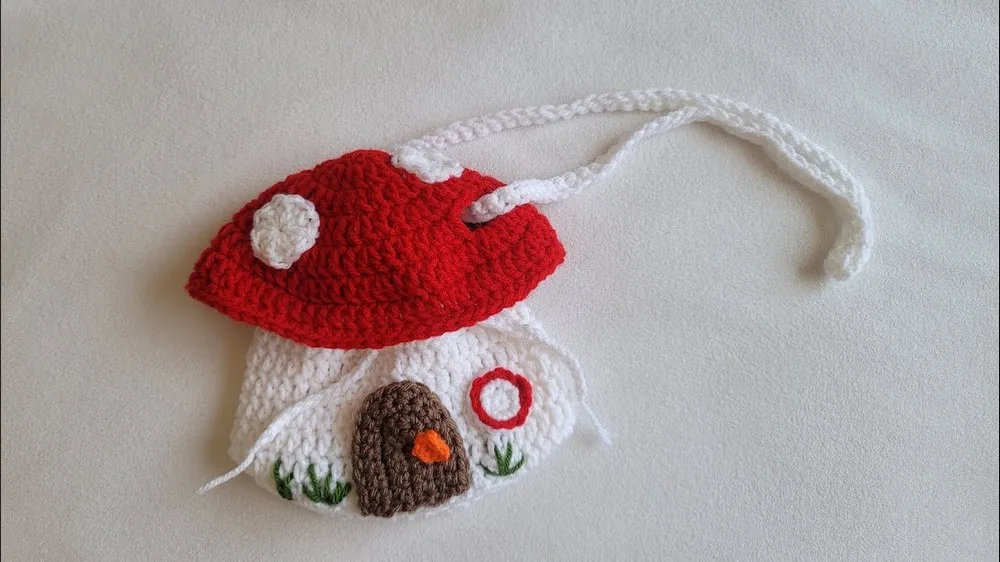
A charming crochet mushroom bag with a ridged cap, eyelet drawstring, and tiny orange doorknob.
- Level
- Intermediate
- Time
- 4-6 hours
- Hook
- 5.5 mm
- Yarn
- Worsted
Pattern highlights
- Start the cap with a magic ring, then build outward through several rounds of DC increases.
- Work a back loop only round to leave a visible ridge marking the cap's lower edge.
- Continue in plain double crochet rounds to shape the bag body below that ridge.
- Make the small orange doorknob separately from its own magic ring and set it aside.
- Sew the door, doorknob, windows, and spots onto the body and cap as desired.
- Attach a strap to the cap sides, then thread the drawstring through the eyelets and knot it.
About This Pattern
This one lands in the novelty-bag corner of my notebook, next to the little animal purses and the fruit pouches. It is the kind of project I file under 'makes people stop and ask questions.' Not a plain tote. A mushroom, worn as a bag, which is a strange sentence to write and a fun thing to hand someone.
The techniques are all familiar on their own, stacked in a new order. Magic ring start, standard DC increases building a domed cap, a back loop only round to mark a ridge, then plain DC for the body. A single crochet round and an eyelet round close it out, setting up the drawstring.
What comes out the other end is a small crocheted purse shaped like a mushroom cap over a body, with a door, a doorknob, and spots sewn on after. A strap connects at the cap sides. A drawstring runs through the eyelet round. Whimsical, wearable, and clearly made by hand.
Worth knowing
The satisfaction here is in the ridge. That back loop only round does real work — it is the line where cap meets body, and it appears with no shaping trick beyond which loop you pick up. I like that kind of quiet engineering. The eyelet round is its own small pleasure too: two single crochets, a chain-2, skip two, repeating around, and suddenly you have a working drawstring channel without any extra piece. Add a tiny five-stitch doorknob worked in orange, a strap you crochet or chain to length, and pieces sewn on after — door, windows, spots — and the whole thing rewards patience more than speed. It is fiddly in the finishing, straightforward in the stitches.
Common mistakes
- Working both loops on the ridge round Check that you are picking up back loops only on that round, or the ridge will not stand out from the plain rounds around it.
- Losing the round after the increases Place a stitch marker at the first stitch before the back loop only round so you know exactly where the ridge starts.
- Skipping the wrong stitches in the eyelet round Count two single crochets before each chain-2, skip-2 repeat so the eyelets land evenly spaced around the bag.
- Doorknob magic ring pulled too loose Cinch the magic ring tight before working the five single crochets, or the doorknob will show a gap at the center.
- Attaching the strap before threading the drawstring Thread the drawstring through the eyelets first, then attach the strap so it does not block your access to the eyelet round.

Intermediate
Progress Tracker
0 of 0 rounds
Tap a round to tick it off — your place is saved on this device.
The kit
Yarn in six colors
- Yarn in six colors: pink (for mushroom top), white (for mushroom spots), brown (for bag body), green (for grass), dark brown (for the door), and orange (for the doorknob).
- Category 4 yarn and a 5.5 mm crochet hook (adjust hook size if using a different yarn category).
- Darning needle.
- Scissors.
Main Pattern
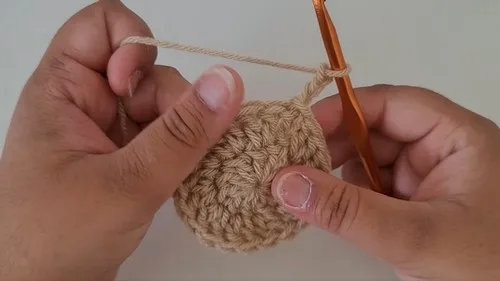
Start with a magic ring.
Round 1Chain 3, 10 double crochets (DC) into the ring. Slip stitch (SL ST) to the first DC to close round. (10 stitches)(10)
Round 2Chain 3. Do a round of increases by making 2 DC in each stitch around. SL ST to close round. (20 stitches)(20)
Round 3Chain 3. 1 DC, then an increase in the next stitch. Repeat - around the round. SL ST to close. (30 stitches)(30)
Round 4Chain 3. Follow with 2 DC, then an increase. Repeat - around. SL ST to close. (40 stitches)(40)
Round 5Chain 3. 3 DC, then an increase. Repeat - around. SL ST to close. (50 stitches)(50)
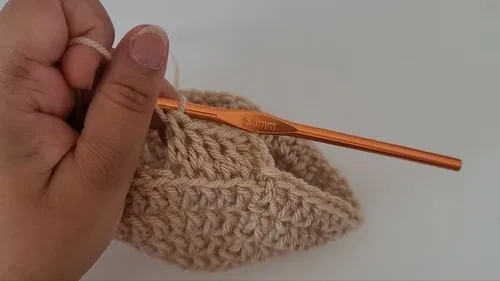
Round 6Chain 3. Instead of working into each stitch, work 1 DC into the back loops only all around. No increases. SL ST to close. (50 stitches)(50)
Rounds 7–14Chain 3, then DC in each stitch around (normal stitches, not back loop only). SL ST to close each round. (50 stitches each round)(50)
Round 15Chain 1, then do a round of single crochet (SC) in each stitch around. SL ST to close. (50 stitches)(50)
Round 16This round creates the eyelets for the drawstring. 2 SC, then chain 2 and skip 2 stitches. Repeat from to around. SL ST to close. (Variety in stitch count due to chain spaces)
Round 17Chain 1, then work SC around, including 2 SC in each chain-2 space from the previous round. This maintains stitch count and shapes the purse's drawstring channel.
Door and Doorknob
Door, Doorknob, Cap Top & Spots
Door
Step by step With dark brown yarn, chain 7. Starting from the second chain from the hook, make 5 SC. In the last chain, make 3 SC (turning the corner). Work another 5 SC on the other side of the chain foundation. Chain 1 and turn. Follow the pattern of making rows with SC, adding increases at both ends for the door's shape over several rows.
Doorknob
Start with a magic ring using orange yarn.
Chain 1, then 5 SC into the ring. Pull tight and SL ST to the first SC. Leave a long end for sewing onto the door.
Top of Mushroom
Step by step With pink yarn, start off as you did with the bag body, making a magic ring and follow an increasing pattern similar to the bag's base but with modifications to create the mushroom cap shape, including the creation of holes for the drawstring.
Mushroom Spots and Window
Step by step Use white yarn to create several circles (magic ring, chain 3, then a series of DCs in the ring). Fasten off and leave a tail for sewing onto the mushroom cap. For the window, start with a magic ring, chain up, and follow a pattern to create a small square or round shape. Add a border in a contrasting color if desired.
Assembly
Step 1Sew the door, doorknob, windows, and mushroom spots onto the bag body and cap as desired.
Step 2Crochet or chain a long strap for the purse, attach it to the sides of the mushroom cap.
Step 3Using yarn, create a drawstring and thread it through the eyelets of the purse. Tie knots at the ends to prevent fraying and to keep it in place.
From the collection
Finishing
- Weave in ends from the cap, the body, and the separate doorknob piece before assembling.
- Sew the door, doorknob, and any spots or windows onto the bag body and cap.
- Attach the strap to the cap sides, then thread the drawstring through the eyelet round and knot the ends.
Why it works
The increase rounds are staggered, each adding one more plain stitch between increases, which is what keeps the cap flat and round rather than cupping or ruffling.
The back loop only round sits right after the last increase round, and working it in back loops only, with no increases, is what carves the ridge separating cap from body.
The eyelet round alternates two single crochets with a chain-2, skip-2 repeat, spacing openings evenly so the drawstring pulls the bag closed without one side puckering.
What it becomes
- A small purse for a child who likes character bags, paired with a plain outfit so the mushroom does the talking.
- A market bag stand-in for light items, carried alongside a canvas tote for anything heavier.
- A decorative hanging piece on a hook or shelf, styled next to other amigurumi novelty makes.
Original pattern: https://crocheteverything.com/easy-unique-crochet-mushroom-bag-tutorial-charming-project-with-little-fun/
FAQ
Can I make the bag bigger by adding more increase rounds?
Yes, adding a round before the back loop only round would widen the cap. Keep the increase pattern consistent so the shape stays flat.
What does the back loop only round actually do?
It creates a visible ridge where the cap meets the body, since only the back loops are worked and no increases happen that round. It is the line that gives the bag its mushroom silhouette.
How does the drawstring actually stay in place?
It threads through the chain spaces made in the eyelet round, and knotting the ends keeps it from pulling free or fraying.