
Free Pattern
Step-by-Step
Crochet
AmigurumiHow to crochet a plush bunny with dress and bow
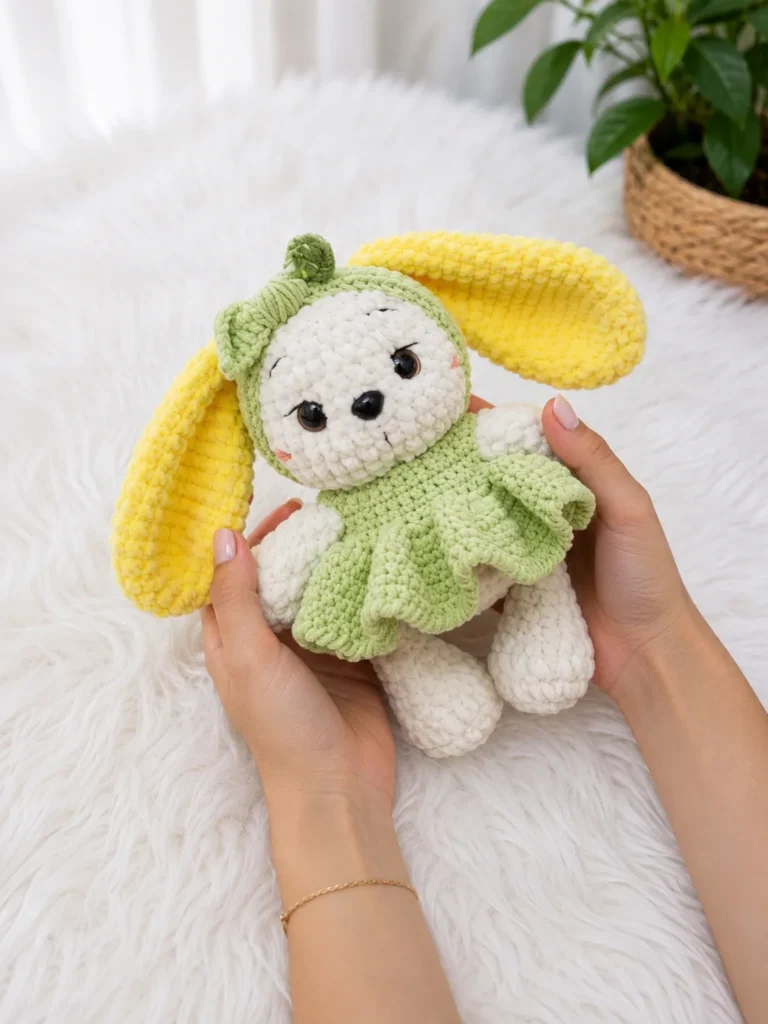
A crocheted bunny plush pattern with legs, arms, ears, a dress, and a bow headband.
- Level
- Intermediate
- Time
- 6-8 hours
- Hook
- 3.5 mm
- Yarn
- Bulky
Pattern highlights
- Start with the smaller pieces — lower legs, upper arms, and ears — worked separately in the round before joining anything.
- Move on to the body and head, worked as one continuous spiral piece from base to crown.
- Stuff and close the body, then whipstitch the legs and arms into place using the yarn tails.
- Attach or pin the ears at the top of the head once the body is fully assembled.
- Finish with the bow headband, then embroider the face and add the dress closure last.
About This Pattern
A dressed animal plush like this Zayusha bunny sits near the top of my amigurumi shelf. I keep a running list of patterns that pair a toy body with a wardrobe, and this one earns its spot. It is not a quick weekend make. Between the legs, arms, ears, body, dress, and headband, there are six separate pieces to track. That is exactly what makes it satisfying to log.
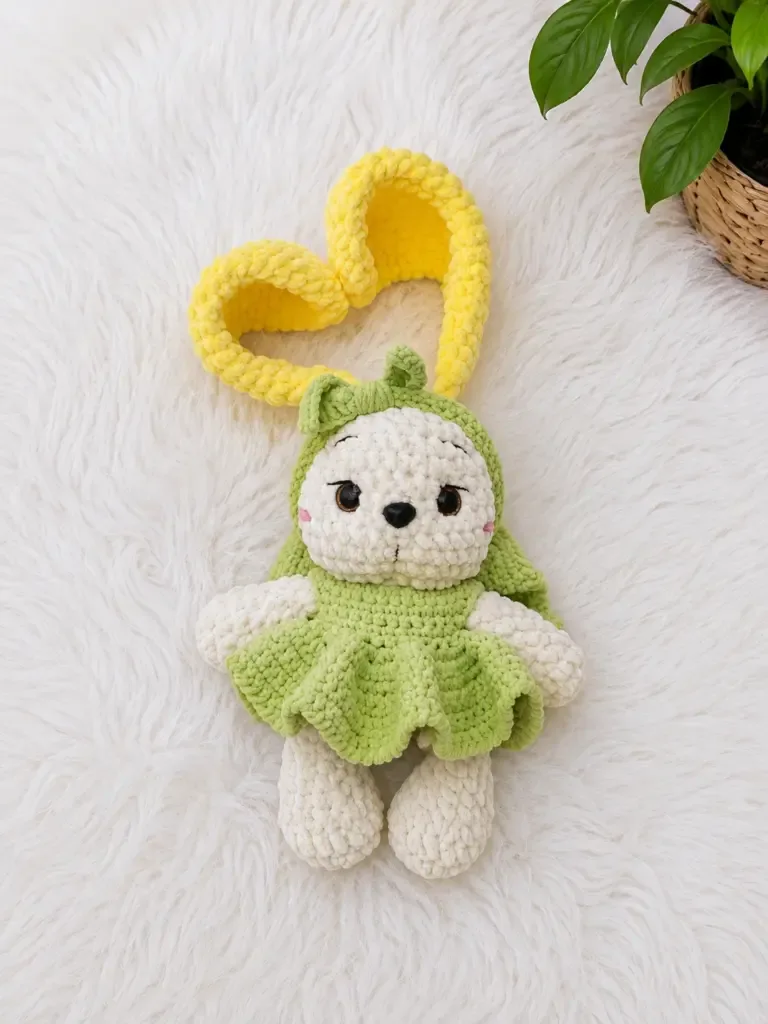
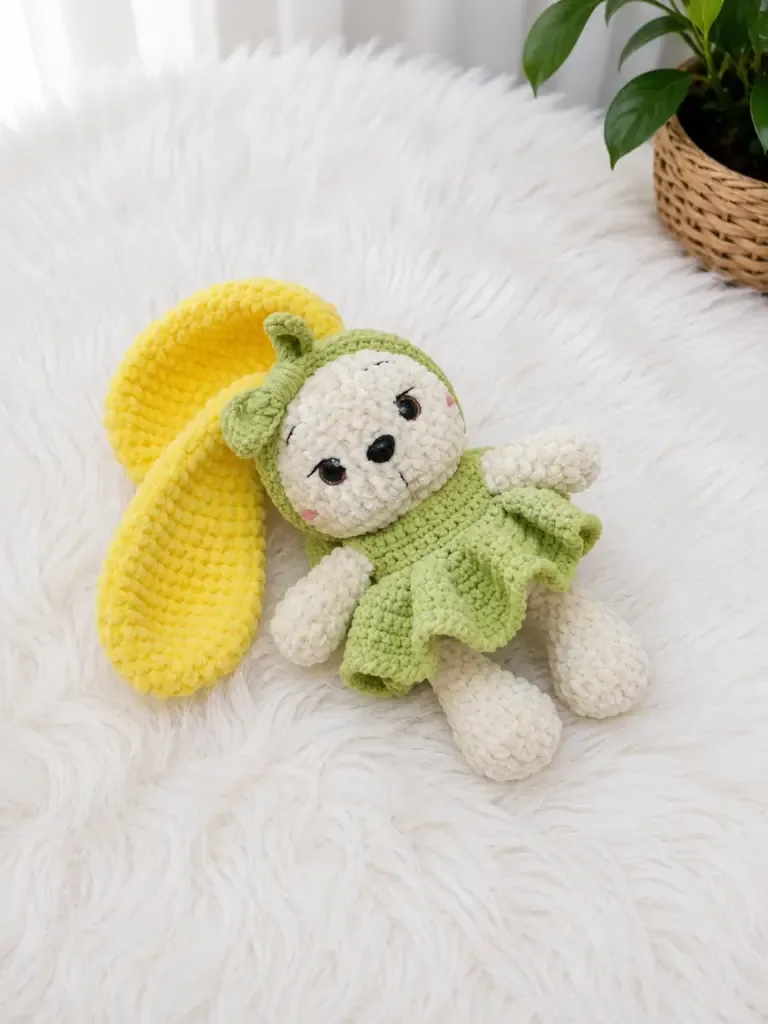
What comes off the hook is a small bunny in a plush body with a fabric dress and a bow headband to match. The proportions read as a nursery toy rather than a display figure, though it can hold either job. Stuffed firmly and finished with embroidered features, it has enough weight to sit upright on a shelf. It is the kind of piece that photographs well next to a mug of tea.
This pattern is written in US crochet terminology. Gauge is not critical for this project, but your fabric should be tight enough that fiberfill does not show through the stitches.
Common mistakes
- Losing the spiral round count Place a stitch marker at the start of every round, since the body and head are worked continuously without joins.
- Overstuffing before the body is closed Add fiberfill gradually and check the shape before sealing, since a plush body will bulge if packed too tight too early.
- Treating the ears like the sc rounds Remember the ears are worked entirely in hdc, which grows faster than sc, so count rounds rather than measuring by feel.
- Skipping the turning chain on the dress The dress is worked flat in rows, and forgetting the starting chain each row will pull the edge out of shape.
- Attaching the arms at the wrong height Sew the upper arms at roughly rounds 9–10 of the body, checking both sides match before pulling the whipstitch tight.


Intermediate
Progress Tracker
0 of 0 rounds
Tap a round to tick it off — your place is saved on this device.
The kit
- Yarn (body): Bulky plush yarn in your preferred color — approx. 100–150 g (e.g., any Dolphin Baby-weight plush or equivalent)
- Yarn (clothing): DK weight cotton yarn in a contrasting color — approx. 50 g
- Hook size (body/toy): E-4 / 3.5 mm
- Hook size (clothing): C-2 / 2.5 mm
Safety eyes
- 13 mm, 1 pair
- Fiberfill / stuffing
- Black yarn or embroidery thread — for embroidering the nose and facial details
- One button or snap closure — for the dress back
- Stitch markers
- Yarn needle / tapestry needle
- Scissors
Lower Legs (make 2)
Round 16 sc in MR. (6)
Round 2inc in each st around. (12)
Round 3sc, inc repeat 6 times around. (18)
Round 4sc in each st around. (18)
Round 53 sc, dec 6 times, 3 sc. (12)
Round 6sc in each st around. (12)
Round 74 sc, dec repeat 2 times around. (10)
Round 8sc in each st around. (10)
Round 93 sc, dec repeat 2 times around. (8)
Rounds 10–11sc in each st around. (8)At the end of Rnd 11, work 1 additional sc to re-center the beginning of the round. Lightly stuff the piece. Fold flat and sc through both layers across — 4 sc. Leave a long yarn tail for sewing on.
Upper Arms (make 2)
Round 16 sc in MR. (6)
Round 2sc, inc repeat 3 times around. (9)
Round 3sc in each st around. (9)
Round 4dec, 7 sc. (8)
Rounds 5–9sc in each st around. (8)At the end of Rnd 9, work 1 additional sc. Lightly stuff the piece. Fold flat and sc through both layers across — 4 sc. Leave a long yarn tail for sewing on.
Note: The arms can be crocheted directly into the body during finishing if preferred.
Ears (make 2)
The ears are worked in hdc throughout.
Round 16 hdc in MR. (6)
Round 3hdc, inc repeat 6 times around. (18)
Round 2inc in each st around. (12)
Round 42 hdc, inc repeat 6 times around. (24)
Round 53 hdc, inc repeat 6 times around. (30)
Rounds 6–7hdc in each st around. (30)
Round 83 hdc, dec repeat 6 times around. (24)
Rounds 9–11hdc in each st around. (24)
Round 122 hdc, dec repeat 6 times around. (18)
Rounds 13–15hdc in each st around. (18)
Round 16hdc, dec repeat 6 times around. (12)
Rounds 17–19hdc in each st around. (12)
Round 20hdc, dec repeat 4 times around. (8)
Rounds 21–23hdc in each st around. (9)Lightly stuff the ear. Fold flat and sc through both layers across — 4 sc. Leave a long yarn tail for sewing on.
Note: The ears are best attached by crocheting them directly into the second-to-last round of the head.
Body & Head (worked as one continuous piece)
Begin with the body, then increase into the head without breaking yarn.
Round 16 sc in MR. (6)
Round 2inc in each st around. (12)
Round 3sc, inc repeat 6 times around. (18)
Round 42 sc, inc repeat 6 times around. (24)
Round 53 sc, inc repeat 6 times around. (30)
Rounds 6–8sc in each st around. (30)
Round 93 sc, dec repeat 6 times around. (24)
Round 10sc in each st around. (24)
Round 112 sc, dec repeat 6 times around. (18)Stuff the body firmly before continuing.
Round 12sc in each st around. (18)
Round 13inc in each st around. (36)
Rounds 14–20sc in each st around. (36)
Round 214 sc, dec repeat 6 times around. (30)
Round 22sc in each st around. (30)
Round 233 sc, dec repeat 6 times around. (24)Insert safety eyes between Rnds 23–24. Embroider the nose at Rnds 22–23 using black yarn. Attach ears into this round if crocheting them directly into the head.
Round 242 sc, dec repeat 6 times around. (18)
Round 25sc, dec repeat 6 times around. (12)
Round 26dec 6 times around. (6)Stuff the head firmly. Pull the yarn tail through the remaining 6 stitches, cinch closed, and weave in the end. Add a gentle pull at the neck to define the head-body separation.
Solokha Bow Headband
The headband length is customized to your bunny’s head. Measure the circumference of the finished head and use that number as your center stitch count. The petal ends add 12 ch on each side.
Foundation Chain: Cast on: 12 ch (left petal) + [head circumference stitch count] ch + 12 ch (right petal), plus 1 ch to turn.
Row 1Starting in the 2nd ch from hook — sl st, sc, hdc, 2 dc, 2 tr, 2 dc, hdc, sc, sl st, then sc across the center section (as many sc as your head circumference count), then at the far end: sc, hdc, 2 dc, 2 tr, 2 dc, hdc, sc, sl st.
Row 2Turn the work. Working along the other side of the foundation chain — sl st, sc, hdc, 2 dc, 2 tr, 2 dc, hdc, sc, sl st, sc across center section, sl st, sc, hdc, 2 dc, 2 tr, 2 dc, hdc, sc, sl st.Fasten off and weave in ends. Fold the piece in half at the center and tie or wrap a short length of yarn around the midpoint to cinch it into a bow shape.
Dress
The dress is worked flat, top-down, turning at the end of each row. Each row begins with 1 ch (turning chain, does not count as a stitch). Leave a short yarn tail at the cast-on edge — this will be used to form a button loop at the back opening.
Foundation Chain: Cast on 30 ch + 1 ch to turn. (31 ch total)
Row 1Starting in the 2nd ch from hook — 4 sc, 3 sc in same st (inc), 5 sc, 3 sc in same st (inc), 8 sc, 3 sc in same st (inc), 5 sc, 3 sc in same st (inc), 4 sc. (38)
Row 2sc in each st across. (38)
Row 35 sc, 3 sc in same st (inc), 7 sc, 3 sc in same st (inc), 10 sc, 3 sc in same st (inc), 7 sc, 3 sc in same st (inc), 5 sc. (46)
Row 47 sc, ch 6, sk 9 sts, sc in next st, 14 sc, ch 6, sk 9 sts, sc in next st, 7 sc. (40 sc + 2 ch-sps)
Rows 5–6sc in each st across, working sc into each ch of each ch-sp. (40)
Row 7inc in each st across. (80)
Row 8inc in each st across. (160)
Rows 9–14sc in each st across. (160)Finish the hem with a reverse single crochet (crab stitch) edging along the bottom edge, working left to right. Work the same crab stitch edging along the neckline and back opening edges.Seam the back edges together, leaving a small opening at the top for the button. Use the yarn tail from the cast-on edge to form a small button loop. Sew on the button or snap closure.
Assembly
Step 1With the body fully stuffed and closed, position the lower legs flat against the base of the body. Sew each leg firmly in place using the yarn tail and a whipstitch, ensuring both legs are symmetrical.
Step 2Attach the upper arms to either side of the body, roughly at rounds 9–10 of the body section. Sew using the yarn tail with a whipstitch, pulling firmly so there is no gap.
Step 3If the ears were not crocheted directly into the head, pin them in place on top of the head — evenly spaced and centered — then sew down using the yarn tail.
Step 4Confirm that the safety eyes are secured between rounds 23–24 and that the nose is embroidered neatly at rounds 22–23.
Step 5Dress the bunny in the dress and fasten the button or snap at the back.
Step 6Place the Solokha bow headband around the bunny’s head, positioning the bow at the top or slightly to one side.
Step 7Weave in all remaining yarn tails.
From the collection
Finishing
- Weave in yarn tails before stuffing so the plush yarn does not work loose inside the toy.
- Stuff each piece firmly, then whipstitch the legs, arms, and ears onto the closed body.
- Sew on the button or snap closure at the dress back, then embroider the nose and face last.
Why it works
The legs increase steadily through round 3, then decrease sharply at round 5 to shape the ankle.
The ears use hdc for all 14 rounds, a taller stitch than the sc used on the body.
The body and head are worked as one continuous 18-round spiral, with no seam at the neck.
What it becomes
- A shelf piece for a nursery or playroom, standing next to other stuffed animals.
- A handmade gift for a child who already has a stuffed-toy collection going.
- A quiet studio project to pair with other amigurumi patterns in a matching color palette.
Original pattern: https://amistitch.com/zayusha-the-plush-bunny-free-crochet-pattern/
FAQ
Why are the ears worked in a different stitch?
The ears use hdc throughout instead of the sc used on the body. That taller stitch gives them enough body to hold their own shape without added wire.
Do I need to seam the neck separately?
No. The body and head are worked as one continuous 18-round piece, so there is no neck seam to sew.
Is the dress worked in the round like the body?
No, the dress is worked flat in rows, turning at the end of each one with a starting chain. That is different from the continuous spiral used for the legs, arms, and body.