
Free Pattern
Step-by-Step
Crochet
AppliquéCrochet Snake Appliqué Pattern For Head, Mouth And Tongue Details
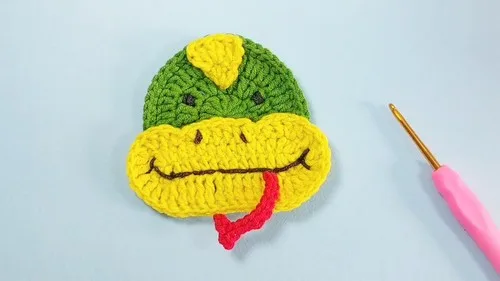
A crocheted snake appliqué with a shaped head, forked tongue, mouth, and triangle piece.
- Level
- Intermediate
- Time
- 1-2 hours
- Yarn
- Worsted
Pattern highlights
- Chain a short length for the tongue, then slip stitch twice into one chain to fork the tip.
- Begin the head with a magic ring, then work four rounds outward to build its curve.
- Chain a longer foundation for the mouth, then stitch down one side and around the tip.
- Turn the corner at the mouth's end with taller stitches, giving it a rounded point.
- Build the head triangle flat, turning after each row to widen it into a wedge.
- Fasten off each piece separately, since none of them join into a continuous whole.
- Assemble the four shapes by eye before stitching them onto your finished project.
About This Pattern
I keep a running list of appliqué shapes that earn a permanent spot in my pattern box, and this snake head lands right in it. It's the kind of motif you set aside for a hat brim, a bag flap, or a cardigan pocket that needs a face. Small pieces like this one let a crocheter practice rounds and increases without committing to a full amigurumi body. I like starting new stitchers here, where the stakes are low and the stitches stay honest and countable.
The tongue starts as a single chain, forked by slip stitching twice into the same back bump before finishing down the rest of the chain. The head begins in a magic ring, four rounds deep, gaining stitches the way most flat amigurumi circles do. The mouth works differently: a foundation chain turned into an oval by stitching down one side in single and half-double crochet and around the last chain in double crochet. The head triangle is worked flat in rows, turning after each one, with increases building straight edges into a point.
What comes off the hook is a small collection of shapes waiting to become one snake face: a rounded head, a forked tongue, an oval mouth, and a triangle that sits above the eyes. Sewn together, they read instantly as a snake, flat enough to lie against fabric without bulk. It suits a child's cardigan, a felt banner, or a soft toy that needs a face with personality. The whole thing stays small, portable, and forgiving of an evening's attention.
Worth knowing
There's something satisfying about the tongue's little fork — two slip stitches sunk into the same back bump before the chain finishes on its own. It's a neat trick that needs no extra chain, just a change of direction. I like how the head triangle uses paired increases in only three stitches, so two rows are enough to shape a wedge instead of a fan. The head's rounds build the way a good circle should, adding stitches steadily until round two doubles the last. None of the four pieces asks for anything exotic, just close attention to where each increase and slip stitch lands. That precision is the whole appeal here.
Common mistakes
- Skipping the chain's back bump Work slip stitches into the back bump of each chain, on both the tongue and mouth, so the front stays smooth and the fork sits neatly.
- Losing the fork on the tongue Slip stitch twice into the same back bump, then keep going down the chain, or the two branches won't separate.
- Miscounting the mouth's foundation chain Recount before turning the corner at the last chain, since a missing chain throws off where the double crochets land.
- Forgetting to turn the head triangle Turn your work at the start of row two, or the increases stack on the wrong side and the wedge twists.
- Joining head rounds unevenly Slip stitch into the top of the first double crochet each round, not a neighboring stitch, to keep the rounds aligned.

Intermediate
Progress Tracker
0 of 0 rounds
Tap a round to tick it off — your place is saved on this device.
The kit
- Worsted weight yarn
- Crochet hook (size to suit your yarn)
Head
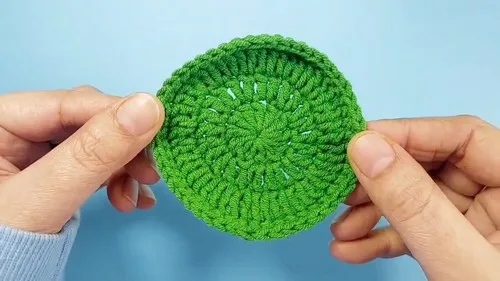
Round 1Make a magic ring and chain three. Then, create 12 double crochets into the ring.Close the ring and slip stitch on top of the first double crochet.
Round 2Chain one and make one single crochet in the first stitch. Place two double crochets in each stitch around for a total of 24 stitches.Slip stitch into the first double crochet to finish.
Round 3Chain one and create a single crochet in the same space, followed by a double crochet.Repeat two double crochets in each stitch around for a total of 48 stitches.Slip stitch to the first double crochet to close the round.
Round 4Chain one and make one single crochet in each stitch around for a total of 48 stitches.Slip stitch to the first single crochet and fasten off.
Mouth
Start : Make a slip knot and chain 16.
Round 1Skip the first three chains and create one double crochet in the fourth chain's back bump.Make 11 half-double crochets in the next 11 chains.In the last chain, create five double crochets.On the other side, make 11 half-double crochets in the next 11 stitches.Place three double crochets in the last stitch and then slip stitch into the first double crochet to complete the round.
Round 2Chain three and make one double crochet in the same stitch. Continue with a combination of double crochets, half-double crochets, and slip stitches around, ending by slip stitching into the first double crochet.
Head Triangle
Row 1Make a magic ring, chain three, and create two double crochets in the ring. Close the ring.
Row 2Chain three and turn your work. Make two double crochets in the first stitch, two in the next, and two in the last stitch.Fasten off.
Tongue
Start : Chain 12.
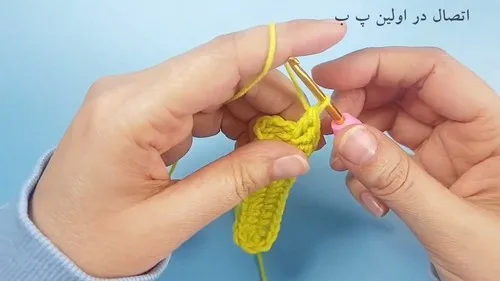
PatternSkip the first three chains and slip stitch into the fourth chain's back bump. Chain three and slip stitch into the same back bump. Then, slip stitch into each chain's back bump to the end and fasten off.
From the collection
Finishing
- Weave in every yarn tail on the head, tongue, mouth, and triangle before laying pieces out together.
- Block each flat piece lightly so the curves round out and the wedge stays straight-edged.
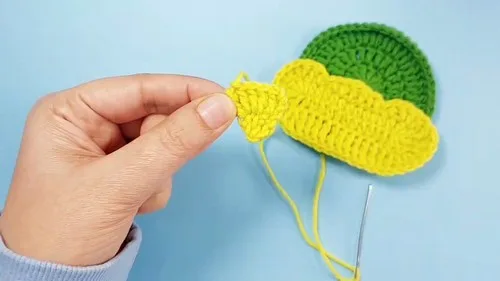
- Layer the tongue under the mouth and the triangle above the head, then stitch each piece to your background fabric.
Why it works
The tongue's fork comes from slip stitching twice into the same back bump before finishing down the rest of the chain.
The mouth's foundation chain is stitched down both sides, turning a straight row of chains into a closed oval shape.
The head triangle begins in a magic ring like the head, then turns flat after row one so increases build straight edges instead of a curve.
What it becomes
- Stitch it onto a child's cardigan pocket, paired with a plain knit or fleece background.
- Sew it to a canvas tote as a single bold motif, without competing prints nearby.
- Frame it flat inside an embroidery hoop for a small piece of textile wall art.
Original pattern: https://crocheteverything.com/crochet-snake-applique-pattern-perfect-for-your-next-project/
FAQ
Do the head, tongue, mouth, and triangle join into one continuous piece?
No, each part is fastened off on its own. You sew them together at the end, layering the triangle, mouth, and tongue onto the head.
Why does the mouth start with a foundation chain instead of a magic ring?
A foundation chain gives the mouth its long oval shape, which a ring can't do as cleanly. Working down both sides of the same chain keeps the piece flat and even.
What is the back bump, and why does it matter for the tongue?
It's the ridge on the underside of a foundation chain, and stitching into it keeps the front loops free and the edge smooth. Skipping it changes how the fork sits at the tip.
Can I make the appliqué larger by adding rounds to the head?
You could add a round to the head if you want a bigger face, though it will change how the triangle and mouth line up. I'd test the fit before committing to extra rounds.