
Free Pattern
Step-by-Step
Crochet
AmigurumiLittle crochet strawberry keychain pattern
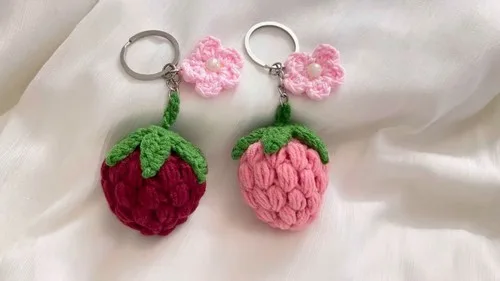
A quick crochet strawberry keychain built from cluster stitches, tapered leaves, and a simple chain stem.
- Level
- Beginner
- Time
- 2-4 hours
- Hook
- 3.0 mm
- Yarn
- Worsted
Pattern highlights
- Start the body with a magic ring and build clusters outward round by round.
- Increase the cluster count each round until the strawberry reaches its widest point.
- Decrease steadily to close the top, stuffing the body before it seals shut.
- Work the leafy top flat in green yarn, shaping each leaf with mixed stitch heights.
- Chain a short stem and knot it into a loop for hanging.
- Sew the leaves and stem loop onto the top of the strawberry.
- Slip a keychain ring through the stem loop to finish the whole piece.
About This Pattern
A strawberry keychain earns its place fast in any collector's notebook. It's small, it's portable, and it finishes in a single sitting. I like pieces that reward quick focus—no multi-skein commitment, no half-finished sweater guilt lurking on a hook. This one slots between bigger amigurumi projects, the kind you grab when you want to finish something today. A keychain travels well too: bag charm, gift topper, pocket companion, no fuss.
What comes off the hook is a plump little strawberry. Its seeds are implied by cluster texture, not stitched on. Six leaves fan across the top, a green stem loop peeking through them. Stuffed firm, closed at the crown, it holds its shape without wire or cardboard inserts. Clip it to a keychain ring and it becomes a bag charm. Leave the ring off, and it's a tiny shelf piece instead. Either way, it's finished before you've properly warmed up your hook.
Worth knowing
The satisfaction here is in the clusters. Four HDC stitches, a yarn over, a chain to close. Repeat that rhythm and the strawberry's bumpy skin appears almost by accident. Watching the round count double from two clusters to eight to twelve is oddly satisfying. Feeling the piece round out in your palm makes it more so. The leafy top is its own small puzzle. Six leaves, each built from four different stitch heights, taper to a point in sequence. That's a lot of stitch vocabulary for one small object. Then the decrease rounds pull it all back in. Stuffing it feels like tucking the whole project to bed. Small, but never boring.
Common mistakes
- Losing track of cluster count Count clusters, not stitches, since each cluster hides several loops. Mark the end of every round with a stitch marker.
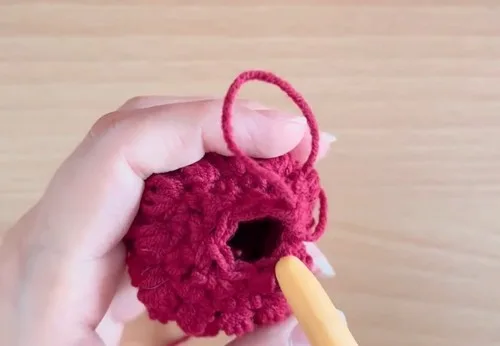
- Stuffing after the top closes Add stuffing before the final decrease stitches pull the opening shut. Trying to stuff through a tiny hole is nearly impossible.
- Leaves crocheted too tightly Keep the chain-5 base loose so the leaf can taper properly. A tight chain flattens the leaf instead of shaping it.
- Magic ring left too loose Pull the tail firmly before starting round one of the body. A loose ring leaves a visible gap at the strawberry's base.
- Stem loop cut too short Check the chain-7 loop fits your keychain ring before knotting it off. A short loop means unpicking the knot and starting again.


Beginner
Progress Tracker
0 of 0 rounds
Tap a round to tick it off — your place is saved on this device.
The kit
- Cotton yarn in two colors
- 3.0 mm crochet hook
- Scissors
- Needle
- Keychain ring
- Stuffing
Body
Made with cotton yarn in the main strawberry color.
Round 1Start by making a magic ring; work 4 HDC cluster stitches into the magic ring; yarn over, pull through all the loops on the hook, and chain 1; repeat for a second cluster within the magic ring to form a basic shape; close the round with a slip stitch into the second chain.
Round 2Slip stitch between the two initial cluster shapes to position your yarn; chain 1, then create a cluster of 4 HDC stitches in the same space; repeat in the same and next spaces, ensuring you have 2 cluster shapes in each; complete the round to have a total of 8 cluster shapes; slip stitch into the second chain to close the round. (8 clusters)(8)
Round 3Repeat the process of creating clusters in each space around, aiming for 12 cluster shapes by the end; ensure each space has a cluster followed by a chain to separate from the next cluster. (12 clusters)(12)
Rounds 4–5Continue adding more rounds, creating one cluster shape in each space around until you achieve the desired size of the strawberry; you'll know you're done when you have 5 rounds of clusters.
Final RoundStart closing the top by reducing the number of stitches; perform a single crochet decrease across the round until you have 6 stitches left; fill your strawberry with stuffing as desired; decrease until closed and finish off by pulling the yarn through the last loop. (6)
Leafy Top
Round 1Using green yarn, start a magic ring; chain 2, then work 12 HDC into the ring. (12 HDC)
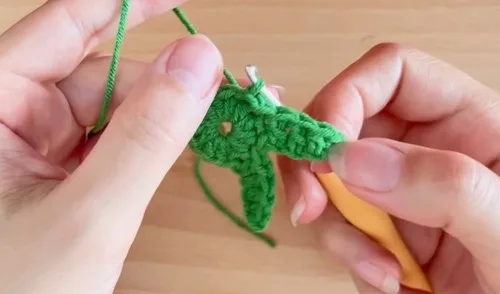
Round 2Form the leaf by chaining 5, working back down the chain with a single crochet, half double crochet, and two double crochets to create a tapered leaf shape; slip stitch into the base and repeat to create 6 leaves.Finish off and sew onto the top of your strawberry.
Stem
Round 1Chain 7 with green yarn; cut the yarn, then pull through the loop to secure.Knot to form a loop and attach to the top of the strawberry along with the leafy part.
Assembly
Step 1Sew the leafy top onto the top of the strawberry.
Step 2Attach the stem loop to the top of the strawberry along with the leafy part.
Step 3Optionally, attach the keychain ring through the loop.
Step 4Optionally, add additional decorations like a crochet flower and attach it to the keychain ring for added charm.
From the collection
Finishing
- Stuff the body lightly before working the last decrease rounds closed.
- Weave in ends separately for the body, the leaves, and the stem chain.
- Sew the leafy top and stem loop to the crown, then attach the keychain ring.
Why it works
The body opens with two clusters in the magic ring. That count doubles to eight, then grows to twelve, a typical amigurumi increase curve.
The leafy top is worked flat rather than in the round. Each of the six leaves is shaped on its own, one chain at a time.
The final round decreases the body to six stitches. That leaves a small opening for stuffing before it closes fully.
What it becomes
- A bag charm clipped to a canvas tote or an everyday backpack.
- A zipper pull for a pencil case or a small pouch.
- A small gift topper tied onto a wrapped present for a friend.
Original pattern: https://crocheteverything.com/quick-crochet-strawberry-keychain-pattern-adorable-handmade-accessory/
FAQ
What hook and yarn does this pattern use?
A 3.0 mm hook and cotton yarn in two colors. One color forms the body, the other the leaves and stem.
Do I need the keychain ring, or can I skip it?
The ring is optional. Skip it and the piece still works as a small stuffed charm or shelf sitter.
Why does the pattern use two yarn colors?
The body is worked in the main strawberry color, while the leafy top and stem use green yarn for contrast.
How long does this project usually take?
It's a quick make. The body is only five rounds, and the leaves and stem add just a few more.