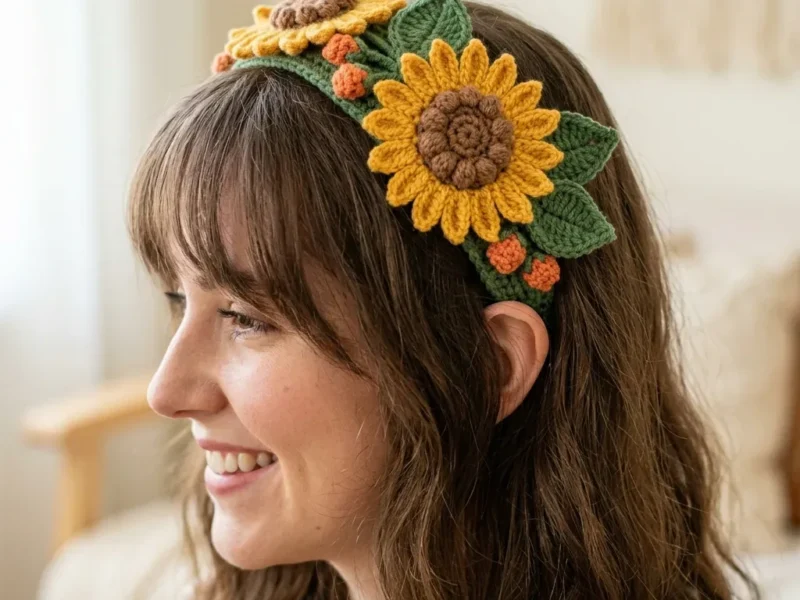
Free Pattern
Step-by-Step
Crochet
AccessoriesCrochet sunflower hair band pattern without any glue
A two-layer sunflower hair band crocheted in rounds, joined with brown yarn petals, no glue needed.
- Level
- Beginner
- Time
- 2-3 hours
- Yarn
- Worsted
About This Pattern
I keep a shelf for small notions—things that don't eat a whole weekend. This sunflower hair band lives there. It's a one-sitting project, not a month-long sweater. Flower appliqués and hair accessories share a drawer in my mind: quick, colorful, good for leftover yarn. This one earns its spot because it actually functions. It clips onto a real hairband instead of just sitting pretty on a shelf. That's rarer than it sounds in this kind of pattern.
The construction is simple geometry dressed up as a flower. Two identical rounds of increases build the front and back pieces, worked flat from a magic ring. The back round does double duty. That's where the actual hairband gets tucked between stitches and locked in with a chain. Then a third yarn, brown this time, joins both layers together. Half double crochet and double crochet pairs fan out into petal shapes around the edge. No separate stitching, no glue, just hook work.
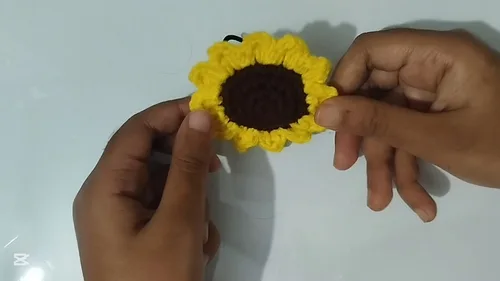
What comes off the hook is a flat sunflower disc on a plain hairband. Yellow front, green back, brown petals framing the join. It's small enough to make in one evening. It's sturdy enough to wear all day without drooping. I like that it hides its own hardware. The band disappears inside the stitches, so all anyone sees is the flower.
Worth knowing
The satisfaction here is in the trick, not the flower. Hiding a plastic hairband inside a crocheted round so it reads as handmade—that's the clever bit. I like watching the stitch count climb cleanly: six, then twelve, then eighteen. Each increase lands right where the last one left off. The petal join at the end is its own reward. It's a rhythm of half double and double crochet that fans out evenly, no measuring involved. And because the whole thing works flat in rounds, there's no seaming to dread. It's a fast make with one genuinely satisfying problem solved in the middle.
Common mistakes
- Loose magic ring Pull the tail firmly before working the first round. Otherwise the center leaves a gap once the petals fan out.
- Uneven increase spacing Count stitches between increases in rounds three and four as you go. One skipped stitch throws off the flat circle.
- Forgetting the hairband Insert the hairband during the back piece's last round, not after. Adding it later means unpicking finished stitches.
- Mismatched front and back size Work the front and back through the same number of rounds. Otherwise the layers won't line up for joining.
- Sloppy petal join Keep the chain-2 spaces even around the edge. Uneven spacing makes petals bunch on one side and gape on the other.
Beginner
Progress Tracker
0 of 0 rounds
Tap a round to tick it off — your place is saved on this device.
The kit
- Crochet Hook
- Yellow Yarn (for the flower front)
- Green Yarn (for the flower back)
- Brown Yarn (for the sunflower center)
- A hairband (for making a hair accessory)
- Scissors
- Yarn Needle
Main Pattern
Round 1Start with a magic ring using yellow yarn. Chain 1. Make 6 single crochets (sc) into the ring. Pull the tail to tighten the ring. You should have 6 sc in the magic ring.(6)
Round 2Increase by making 2 sc in each stitch around. You will have 12 sc by the end of this round.
Round 3Pattern: 1 sc, then an increase (2 sc in the next stitch). Repeat this pattern 6 times, totalling 18 sc.
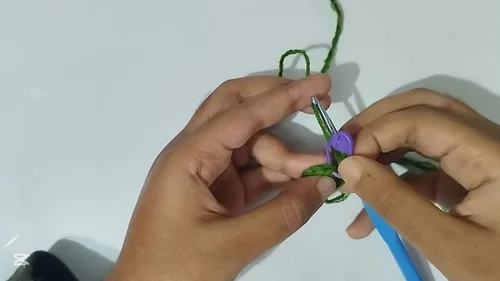
Round 4Pattern: 2 sc, then an increase. Repeat 6 times, making a total of 24 stitches. Slip stitch to end, then cut the yarn.Back Part of the Sunflower: Repeat Rounds 1-4 as in the front part, but with green yarn.In Round 3, before closing, incorporate the hairband by placing it between stitches and securing it with a chain stitch.
This avoids the need for glue.
Joining Front and Back
Put the front and back parts together with wrong sides facing each other.
Using brown yarn, join the parts by crocheting around through both layers: Start with a chain 1.
Make 1 half double crochet (hdc) and 1 double crochet (dc) in the same stitch.
Chain 2, then make 1 dc and 1 hdc into the next stitch.
Slip stitch to secure and start the next petal.
Repeat this petal pattern around for a total of 12 petals.
Assembly
Step 1After the last petal, slip stitch to join, cut the yarn, and weave in all ends with a yarn needle.
From the collection
Why it works
The front and back pieces use identical increase rounds. That keeps both flower faces the same size before joining.
The hairband goes in during the back piece's last round. That sandwiches it between the two layers instead of stitching it on afterward.
The brown petal join works through both layers at once. That's what holds the sandwich together, no sewing needed.
What it becomes
- Use this sunflower as a decorative piece on its own, or attach it to the hairband for a charming, handmade hair accessory.
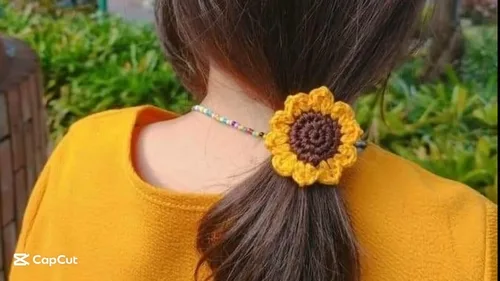
- Clip it onto a ponytail for an everyday accessory that pairs well with plain cotton tops.
- Give it as a small handmade gift tucked into a card, no wrapping paper needed.
- Use it to dress up a plain hairband drawer with something that doesn't look store-bought.
Original pattern: https://crocheteverything.com/crochet-hair-band-pattern-easy-to-make-without-glue/
FAQ
Does the yarn weight matter for this pattern?
A sturdier yarn keeps the flower structured once it's gripping a hairband, so I'd avoid anything too thin. Any weight works as long as the hook size matches, since the pattern doesn't lock you into one.
How do I keep the hairband from slipping out?
The chain stitch in the back piece's last round locks the hairband in place. Make sure it sits snugly between stitches before you secure that chain.
Can I make the front and back different colors from the pattern?
Yes, yellow and green just give the classic sunflower look here. Any two colors work, since the construction doesn't depend on which yarn goes where.
Why does the back piece need the hairband inserted partway through?
That's the only point where the stitches are still open and flexible, before the round closes solid. Insert it after, and you'd have to unpick stitches to get it in.