
Free Pattern
Step-by-Step
Crochet
AmigurumiHow to crochet a teddy bear head and body for a keychain
A simple half double crochet teddy bear head and body, shaped with increases and decreases.
- Level
- Intermediate
- Time
- 4-6 hours
- Yarn
- Worsted
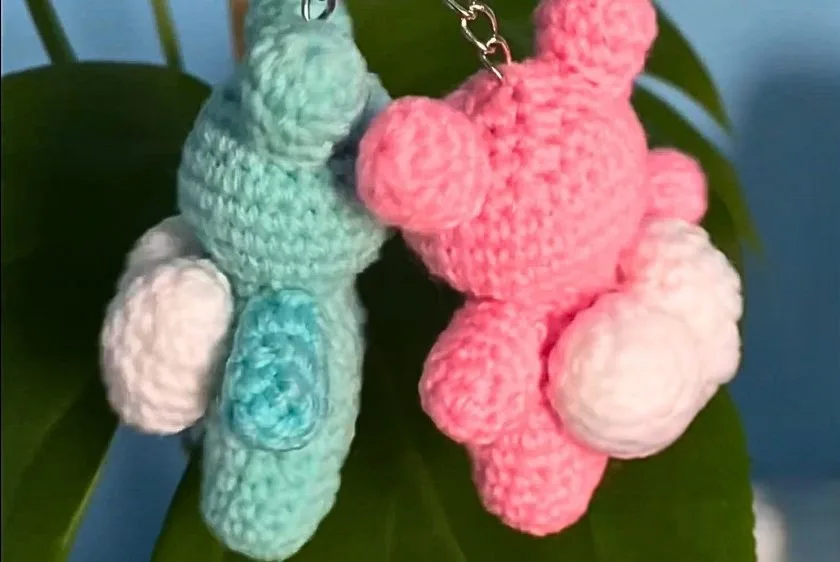
Pattern highlights
- Start the head with a magic ring so the center closes without a gap.
- Work the first rounds with half double crochet and increases to round out the shape.
- Mark the first stitch of each round so you don't lose your place partway through.
- Begin decreasing in the later rounds to narrow the shape back toward the top, then close with a slip stitch and cut the yarn.
- the body, make two legs first, each with a magic ring, increases to shape the foot, and a plain round on top.
- Join the two legs and work six more rounds, mixing increases and decreases to shape the body and narrow it near the neck, then finish with a slip stitch and continue in the second part of the tutorial.
About This Pattern
I keep a shelf for the small stuff. Keychains, charms, things that ride on a zipper pull. A teddy bear pair belongs there, not on the sofa. This one starts small too — just a head and a body — with the rest of the bear waiting in a second part of the tutorial. I like that it's split. It means I can sit with one part until I actually understand it.
The technique list here is short and honest. Magic ring to start, half double crochet for the bulk of the fabric, increases to round it out, decreases to close it in. A slip stitch joins each round instead of spiraling on, which keeps the shape tidy. Nothing exotic. Just the basics, repeated with intention.
What comes off the hook is a rounded head, built in eight rounds, ready to meet a body of matching size. It's not finished yet — no arms, no face, no keychain hardware — but the shape is already recognizably a bear. That's the quiet satisfaction of amigurumi: the form arrives before the details do.
Worth knowing
There's something clarifying about a pattern that only asks for one stitch. Half double crochet does all the work here — no fancy stitch changes, no charts to misread. The satisfaction comes from watching increases build a dome in the first rounds, then watching even rounds hold that shape steady, then watching decreases pull it closed again. It's a small, complete arc: open, hold, close. The magic ring start means no hole to hide later, and the slip stitch join keeps every round finished instead of trailing off. For a keychain meant to travel in a pocket or clip to a bag, that tidiness matters. It's a piece you can finish in one sitting and still feel like you learned something about shaping.
Common mistakes
- Losing the start of the round Clip a stitch marker or pin into the first stitch of every round. Move it up each time so you always know where a round begins.
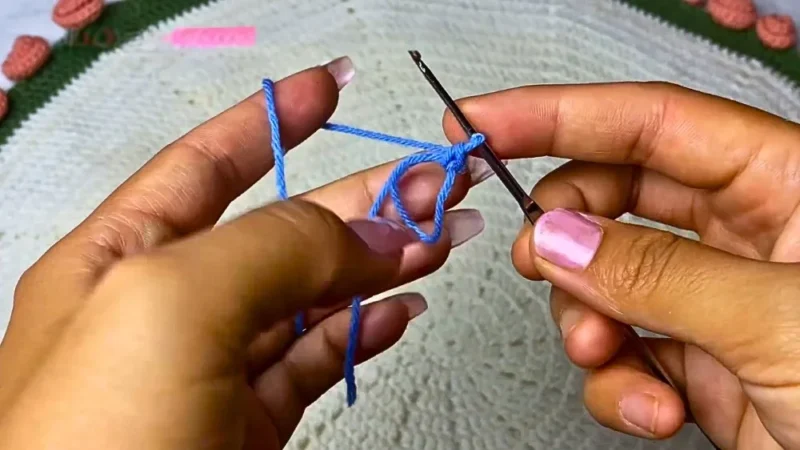
- Magic ring left too loose Pull the tail firmly before working the first round into the ring. A loose ring leaves a small hole at the center of the head.
- Increases bunched in one spot Space increases out evenly across the round rather than working them side by side. An uneven spread makes the head look lopsided instead of round.
- Stuffing after it's too late Add stuffing gradually as the decrease rounds narrow the opening. Waiting until the last round makes it hard to pack evenly.
- Tight or loose slip stitch join Keep the same tension for the closing slip stitch as the rest of the round. A join that's too tight puckers the top; too loose leaves a visible gap.


Intermediate
Progress Tracker
0 of 0 rounds
Tap a round to tick it off — your place is saved on this device.
The kit
- Yarn
- Crochet hook
- Stitch marker or pin
Head
The head is constructed over eight rounds.
Rounds 1–4The head begins with a magic ring. The subsequent rounds use a combination of half double crochets and increases to gradually expand the piece, forming the rounded shape of the head.
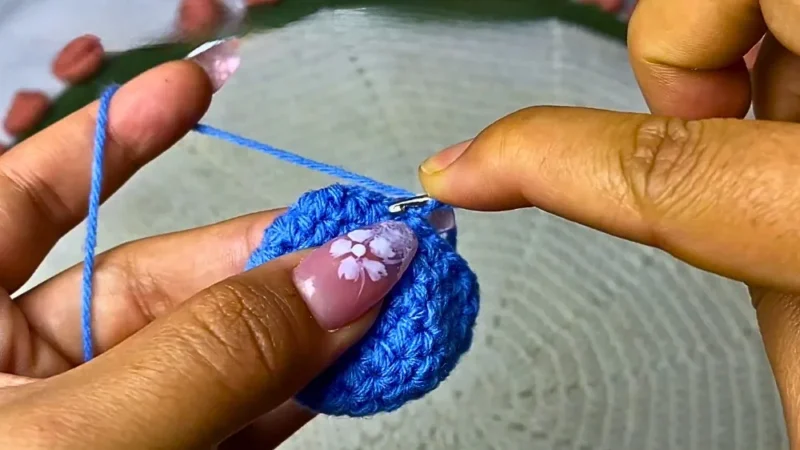
Rounds 5–6These rounds are worked with a single half double crochet in each stitch, creating height without increasing the circumference.
Rounds 7–8These final rounds use a combination of half double crochets and decreases to close the head and create the final shape. The round is finished with a slip stitch, and the yarn is cut.
Body
The body is started by first creating two separate pieces for the legs, which are then joined together to form a base.
Legs (Rds 1-3)Legs (make two): Each leg starts with a magic ring and is worked over three rounds. The first two rounds use half double crochets and increases to shape the foot, and the third round is a single half double crochet in each stitch.
Rounds 4–9Joining and Body: The two completed legs are then joined together to begin the body. The body is worked over six subsequent rounds. The rounds use a mix of half double crochets, increases, and decreases to shape the body and gradually reduce the size as it nears the neck.End of Body: The body portion of the tutorial concludes with a slip stitch, and the yarn is cut. The remaining steps, including attaching the head and body, are covered in the second part of the tutorial.
From the collection
Finishing
- Weave in the starting tail from the magic ring before you forget which end it is.
- Stuff the head before the last decrease round closes the opening too far to reach.
- Slip stitch the final round to join it neatly, then cut and weave in the yarn.
Why it works
Increases are concentrated in the earlier rounds, which is what pushes the flat magic ring into a dome.
The middle rounds use a single half double crochet in every stitch, holding the circumference steady while adding height.
The final rounds pair half double crochet with decreases, then close with a slip stitch before the yarn is cut.
What it becomes
- Clipped to a bag or backpack zipper, paired with its matching bear for a set.
- Kept on a keyring as a small charm, alongside other soft amigurumi keepers.
- Given as a matching pair to two people, one bear for each of them.
Original pattern: https://redagapeblog.com/crochet-couple-teddy-bear-keychain/
FAQ
Do I need to know how to crochet in the round already?
Yes, this pattern assumes you're comfortable starting with a magic ring and working rounds joined by slip stitch. If that's new to you, practice the magic ring on its own first.
Why is half double crochet used instead of single crochet?
Half double crochet builds fabric a bit faster and gives slightly more height per round, which suits the rounded shaping here. It's still dense enough to hold stuffing without gaps.
How much should I stuff the head?
Enough to fill it firmly without stretching the stitches thin, added as you work through the decrease rounds. Underfilling leaves it floppy; overfilling can distort the shape.
Can I make the body before the head?
The order in the pattern works either part first, since both rely on the same magic ring start and shaping logic. I'd just keep your yarn and hook consistent so the two pieces match.