Free Pattern
Step-by-Step
Crochet
CardigansDusty rose grid stitch cardigan with tie front
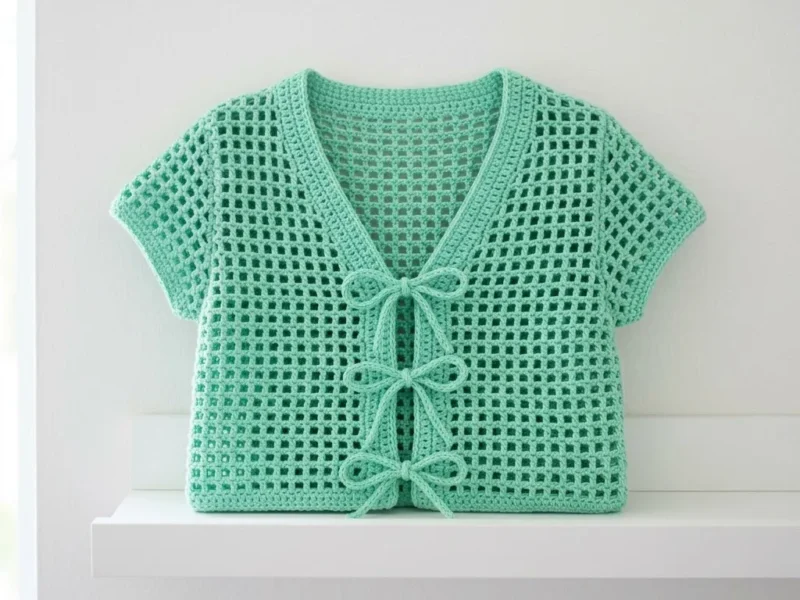
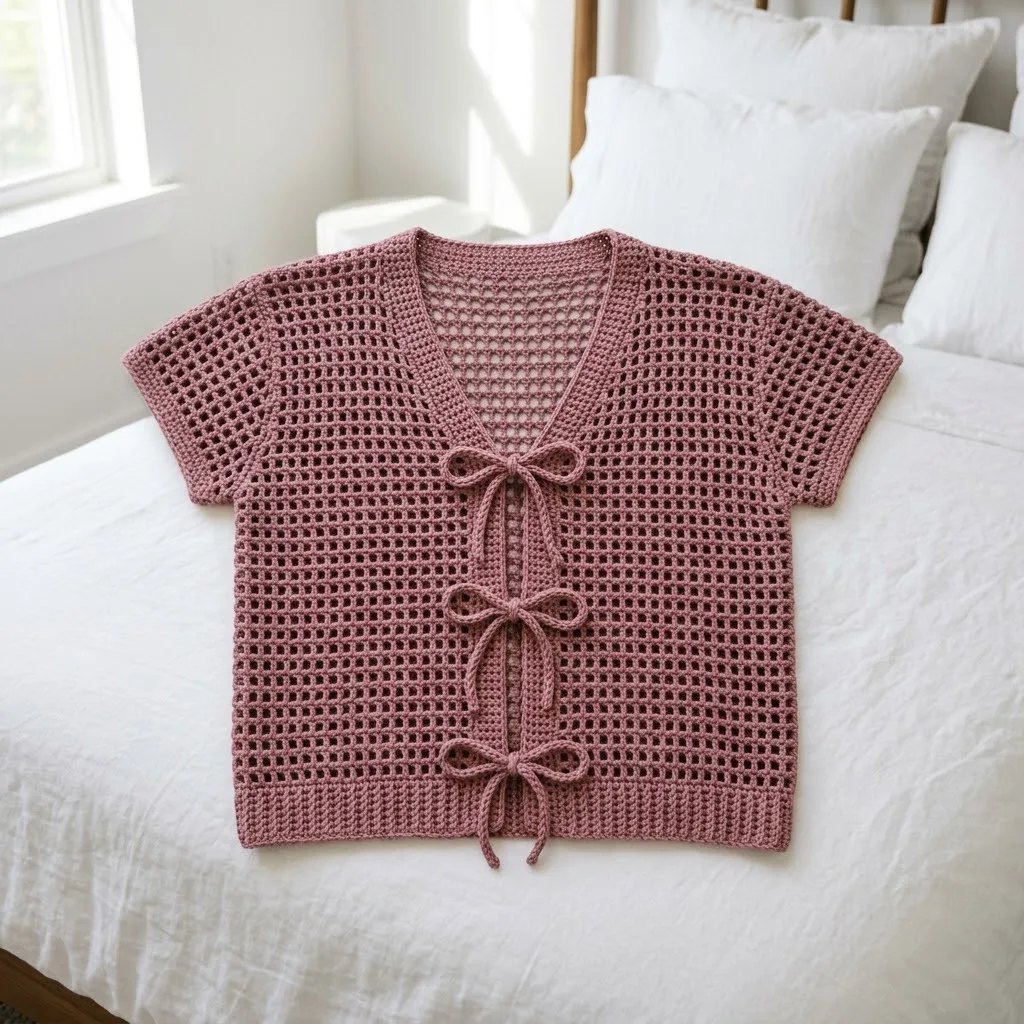
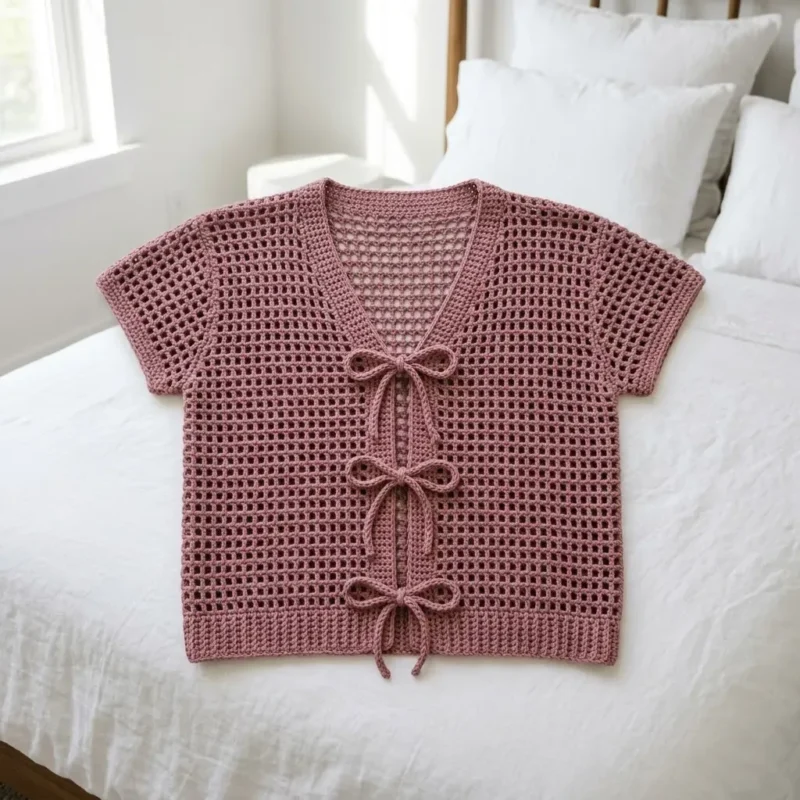
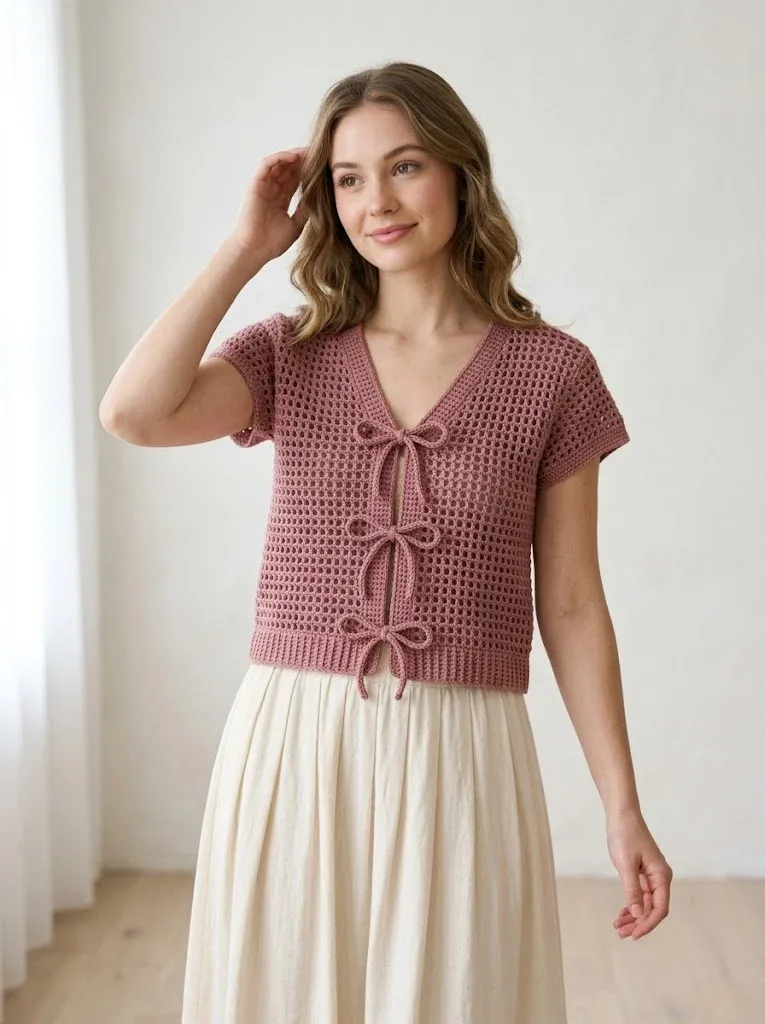
A grid stitch cardigan worked flat in dusty rose, finished with front ties.
- Level
- Intermediate
- Time
- 10-15 hours
- Hook
- 4.0 mm
- Yarn
- DK
Pattern highlights
- Chain a long foundation row, then work rows of double crochet and chain-1 spaces to build the grid stitch.
- Keep repeating that same row until the front panel reaches its target length before shaping begins.
- Split the piece at the V-neck to shape the right front and left front separately, worked flat.
- Shape the back panel on its own, then join the pieces at the shoulders and sides.
- Work the short sleeves to their finished length and stitch them onto the body.
- Attach fabric or crochet ties at the front edges so the cardigan can cinch or hang open.
- Block the finished piece to even out the grid stitch and set the drape before wearing.
About This Pattern
A cardigan is a different kind of project from the purses and clutches that usually fill a pattern queue. It asks for yardage, patience, and a stitch simple enough to survive being worked for eighteen inches straight. This grid tie cardigan earns its place in a collection as the piece you reach for when you want something wearable, not just decorative. It sits between garment and accessory, since the ties do half the shaping work.
The whole body grows from one grid stitch: double crochet, chain one, skip one, repeated row after row until the ch-1 spaces line up into a lattice. Rows 3 through 20 just repeat that same row, so the technique is not the challenge — the patience is. V-neck shaping starts once the front panel hits its target length, splitting the piece into right and left fronts worked flat. Nothing here is fussy, but nothing lets you skim either.
Finished, it lands somewhere between an open cardigan and a wrap, with ties doing the work of a closure. The dusty rose shade in DK cotton keeps the lattice pattern visible rather than lost in fuzz. At 36 to 40 inches around, with short sleeves and an 18-inch body, it reads as an easy layer for three-season wear, not a heavy winter coat.
This project sits at a Confident Beginner to Intermediate skill level. Anyone comfortable with basic chain and double crochet stitches, or who has finished a few scarves or blankets, is ready for it. The grid stitch is repetitive and easy to memorize within the first few rows, and the shaping and seaming stay simple throughout.
This pattern is written for a Small/Medium size, with notes for adjusting the fit. Gauge matters here since this is a garment: 18 stitches and 10 rows should measure 4 inches in the grid stitch pattern. Swatch first, and go up a hook size if you have too many stitches per inch, or down a size if you have too few.
Worth knowing
There's something satisfying about a stitch this transparent about what it's doing. Every double crochet lines up over a ch-1 space from the row below. The grid reads clean from across the room — no guessing. V-neck shaping happens gradually, in flat panels, so there's no curve fighting a decrease. The ties are the real payoff. Instead of buttons or a zipper, two ties let the fit shift day to day. It's a forgiving garment overall. Gauge matters for sizing, but the open structure hides small tension slips better than a solid stitch would.
Common mistakes
- Losing the ch-1 spaces Count ch-1 spaces, not just stitches, or the grid drifts off pattern within a few rows. Check against the previous row before turning.
- Skipping gauge check The grid stitch grows differently than solid dc, so swatch it before committing to the full width. A loose gauge can add inches you don't want.
- Uneven V-neck shaping Mark where shaping begins on both fronts so the neckline stays symmetrical. Working from memory instead of counting rows is where mismatches creep in.
- Substituting a heavier yarn A DK weight keeps the lattice open and drapey; anything heavier stiffens the grid. Stick close to the recommended weight if drape matters to you.
- Skipping the blocking step The grid stitch looks tight and puckered off the hook until it's blocked open. Pin it out before deciding the fit is wrong.
Intermediate
Progress Tracker
0 of 0 rounds
Tap a round to tick it off — your place is saved on this device.
The kit
Yarn
- Approximately 800 to 1000 yards of DK weight yarn (light worsted also works)
- Shown in a dusty rose/mauve pink shade
- Recommended fibers: cotton, cotton blends, or bamboo blends for best drape and breathability
Suggested brands
- Paintbox Yarns Cotton DK, Lion Brand 24/7 Cotton, or Drops Safran
Hook
- 4.0mm (G/6) crochet hook for main body
- Adjust up or down to match gauge
Notions
- Yarn needle for weaving ends and seaming
- Scissors
- Stitch markers (optional but helpful)
- Measuring tape
- Gauge
- 18 stitches and 10 rows = 4 inches in grid stitch pattern
- Finished Measurements
- This pattern is written for size Small/Medium, with notes for adjustments.
Bust
- 36 to 40 inches (with ties adjusting fit)
Length
- 18 inches from shoulder to hem
Sleeve Length
- 4 inches (short sleeve)
Foundation
Ch 82 (or a multiple of 2 plus 2 for your desired width).
Row 1Dc in 4th ch from hook (skipped chains count as first dc), *ch 1, sk 1 ch, dc in next ch*, repeat from * across. Turn. (40 dc, 39 ch-1 spaces)
Row 2Ch 3 (counts as dc), *dc in next ch-1 sp, ch 1*, repeat from * to last dc, dc in top of turning chain. Turn.Rows 3 through 20: Repeat Row 2. Your panel should measure approximately 8 inches at this point.Begin V-Neck Shaping (Right Front):
Row 21Ch 3, work in pattern across first 18 grid spaces only. Turn, leaving remaining stitches unworked. (This creates the right front neckline)
Rows 22–35Continue in grid pattern on these 18 spaces, decreasing 1 grid space at neck edge every other row by simply not working the last dc at the neck side. (14 grid spaces remain at Row 35)
Rows 36–45Work even in grid pattern on remaining stitches. Fasten off.
Left Panel (Front and Back)
Work exactly as Right Panel, reversing all shaping. The V-neck decreases will be on the opposite side.
Right Back
Join yarn at armhole edge where you left off on Row 21.
Row 21BCh 3, work in grid pattern across remaining 18 spaces. Turn.
Rows 22B-45BWork even in grid pattern. Fasten off.
Joining Shoulders
Place right front and right back pieces with right sides together. Using a yarn needle and a length of yarn, whip stitch or mattress stitch the shoulder seams together, joining approximately 4 inches at each shoulder.
Repeat for left front and left back.
Side Seams
With right sides together, seam each side from the bottom hem up, stopping approximately 7 to 8 inches from the shoulder to leave armhole openings. Your armholes should be about 7 to 8 inches deep.
Sleeves (Make 2)
The sleeves are worked directly into the armhole openings, working in the round.
Round 1Join yarn at underarm seam. Ch 3, work approximately 34 dc evenly around the armhole opening, placing stitches into row ends and any available spaces. Sl st to top of ch 3 to join. (Approximately 34 dc)
Rounds 2–6Ch 3, dc in each dc around. Sl st to join.
Round 7 (Edging)Ch 1, sc in each st around. Sl st to join. Fasten off.
The finished sleeve should measure approximately 4 inches from shoulder to cuff.
Sizing Flexibility
The tie closures allow for flexible fit across several sizes. For a larger size, add additional grid repeats to your starting chain (each repeat is 2 chains).
Neckline and Front Edging
This edging creates a clean finished look along the entire front opening and neckline.
Row 1Join yarn at bottom right front corner. Ch 1, sc evenly up the right front edge, around the V-neck, and down the left front edge. Work approximately 3 sc for every 2 rows along straight edges. At the V-neck point, work 3 sc in the center stitch to turn the corner smoothly.
Row 2Ch 1, turn. Sc in each sc around, working 3 sc in corner points. Fasten off.
Bottom Hem Edging
Row 1Join yarn at one side seam. Ch 1, sc evenly across the entire bottom hem. Sl st to join.
Row 2Ch 1, sc in each sc around. Sl st to join. Fasten off.
Tie Closures (Make 4 Pairs, 8 Total)
Each tie is a simple chain.
TieCh 60. Fasten off, leaving a 6-inch tail for attaching.
These ties will be attached in pairs at four points along the front opening. Space them evenly, approximately 3 to 4 inches apart, starting just below the V-neck and ending near the bottom hem.
Attaching Ties
Using your yarn needle, thread the tail through the front edging at your chosen attachment point. Secure with a few stitches, then weave in the end. Attach one tie on the left front and one directly across on the right front to create a pair that ties into a bow.
Repeat for all four pairs.
Blocking
For best results, gently wet block your finished cardigan. Soak in cool water with a drop of wool wash or gentle soap for 15 minutes. Roll in a towel to remove excess water. Lay flat on a blocking mat or clean towel, shaping to measurements. Allow to dry completely.
Blocking will even out your stitches, soften the fabric, and help the grid pattern open up beautifully.
From the collection
Finishing
- Weave in all remaining ends using your yarn needle. For a polished look, weave ends back through the same stitches for at least 2 inches before trimming.
- Block the grid stitch flat and pin it to open the lattice and set the finished width.
- Attach the ties at the front once blocking is dry, so they sit flat against the grid.
Why it works
The foundation chain uses an even multiple, so dc and ch-1 spaces align into a grid immediately.
Row 2 repeats for rows 3 through 20, so the grid stitch is one row memorized, not many.
V-neck shaping starts once the front panel hits its length, splitting right and left fronts into flat pieces.
Turning chain counts as the first double crochet throughout the pattern.
When working into the grid pattern, work dc stitches into the ch-1 spaces of the previous row, not into the dc posts, to keep the grid stacking correctly.
Sleeves are worked directly onto the armhole openings, and tie closures are simple crocheted chains attached to the front edges, so there are no buttonholes or zippers to fuss with.
What it becomes
- Throw it over a tank top for an office day that needs a little more coverage.
- Wear it open over a sundress as a light layer for cool evenings outdoors.
- Pair it with jeans and a plain tee for a weekend errands layer that isn't a hoodie.
Original pattern: https://crochr.com/dusty-rose-grid-tie-cardigan-free-crochet-pattern/
FAQ
Can I make this cardigan longer or shorter than the pattern?
Yes. Add or subtract full repeats of the grid stitch row before you reach the V-neck shaping. Just keep track of your total row count so both fronts match.
What yarn weight works best if I don't have DK?
Light worsted is listed as a substitute and should behave close to DK. Adjust your hook size until your swatch matches the listed gauge.
Do the ties replace buttons entirely?
Yes, this cardigan closes with ties instead of a button band. That keeps the front edges simple, since there's no buttonhole shaping to work into the grid.
Why does the pattern call for cotton or bamboo blends?
Those fibers hold their shape and drape well in an open stitch like this grid. A springier wool would pull the ch-1 spaces closed and hide the lattice.