Free Pattern
Step-by-Step
Crochet
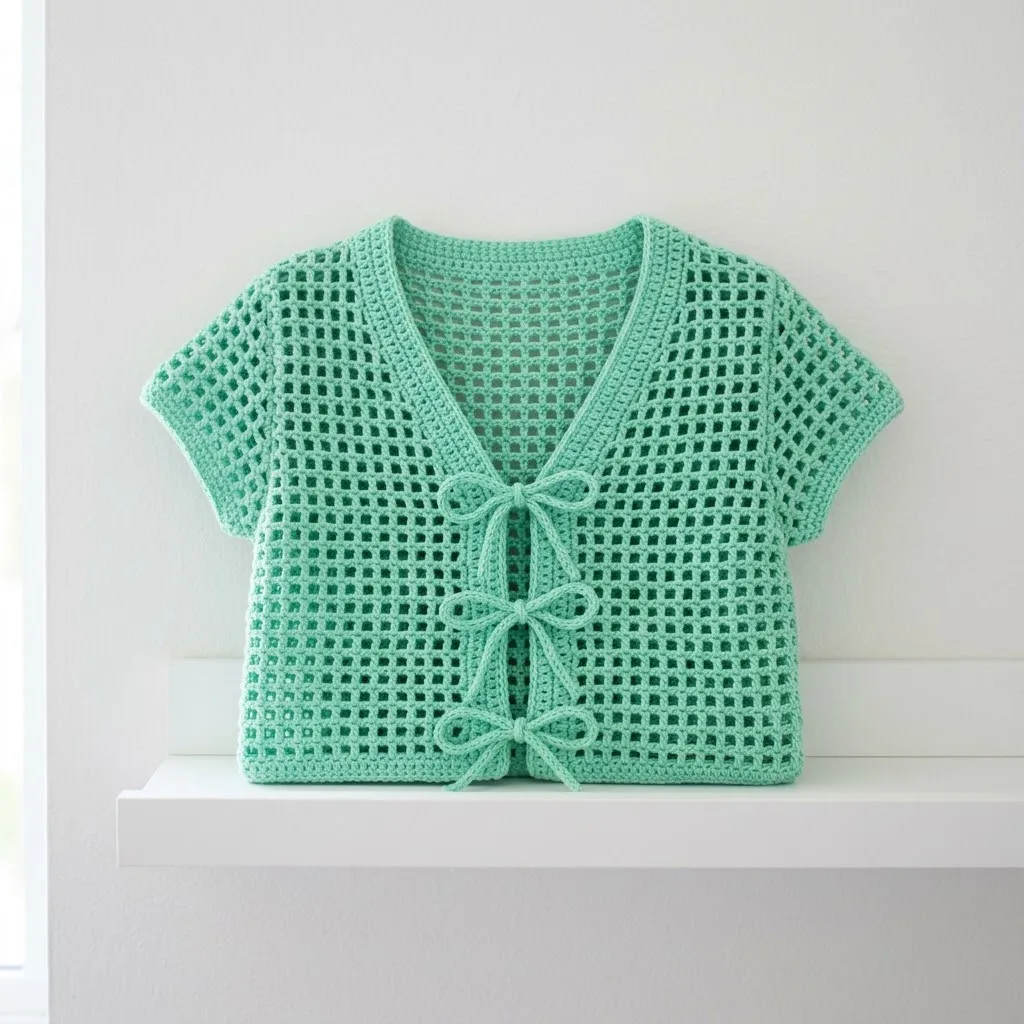
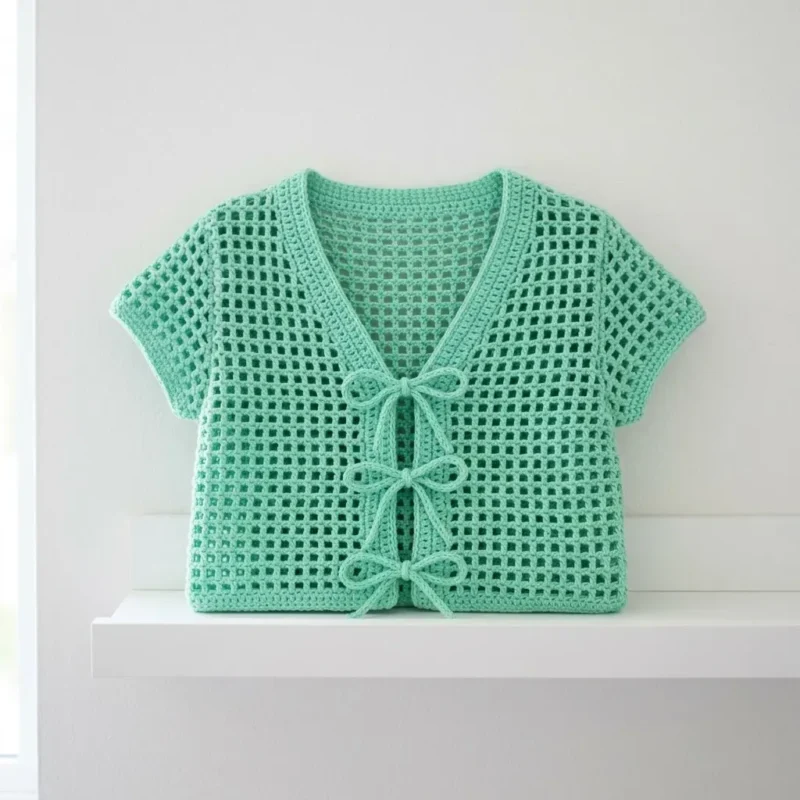
CardigansLace tie cardigan in mint green cotton
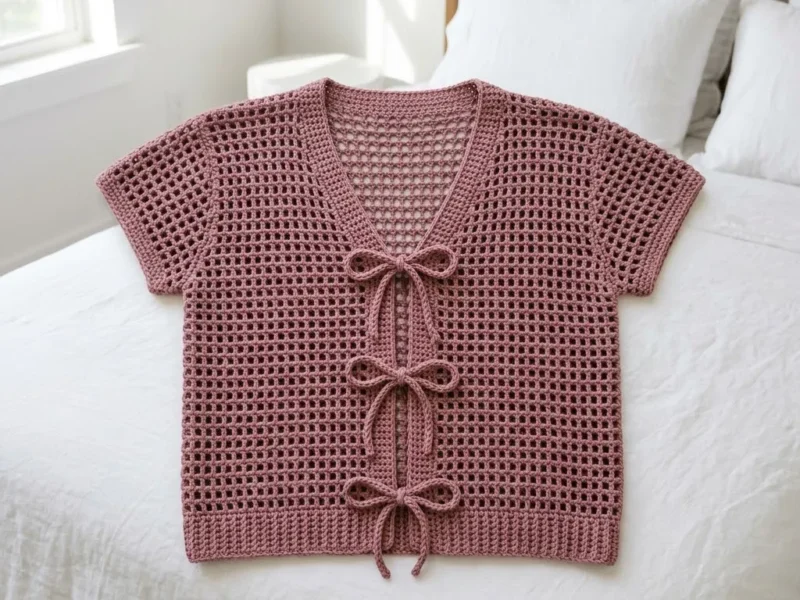
A lacy mesh cardigan with ties, built from double crochet squares and a shaped V-neck.
- Level
- Intermediate
- Time
- 4-6 hours
- Hook
- 4.0 mm
- Yarn
- DK
Pattern highlights
- Work a small practice swatch first to get comfortable with the dc, chain-one, skip-one rhythm.
- Build the back panel from its foundation chain, repeating the mesh row until it reaches the required length.
- Work each front panel on its own foundation, shaping the V-neck by leaving mesh squares unworked at the edge.
- Continue the front neckline decreases over several rows until the shaping is complete.
- Work the sleeve as a separate flat piece using the same mesh pattern.
- Make the tie cords separately, ready to attach once the pieces are joined.
About This Pattern
This is the kind of piece I file under 'warm-weather layers' rather than winter wardrobe. It is light, open-worked, and made for days when you want coverage without heat. In a collection full of amigurumi and baby sets, a grown-up mesh cardigan is a nice change of pace, and a reminder that lace crochet earns its keep outside of doilies.
The whole thing rests on one repeated idea: a double crochet, a chain, skip a stitch, repeat. That little unit becomes a mesh square, and the squares stack into panels. The V-neck front introduces simple decreases by leaving squares unworked at the edge. Sleeves use the same mesh, worked flat rather than in the round, so the technique never really changes, just the shape.
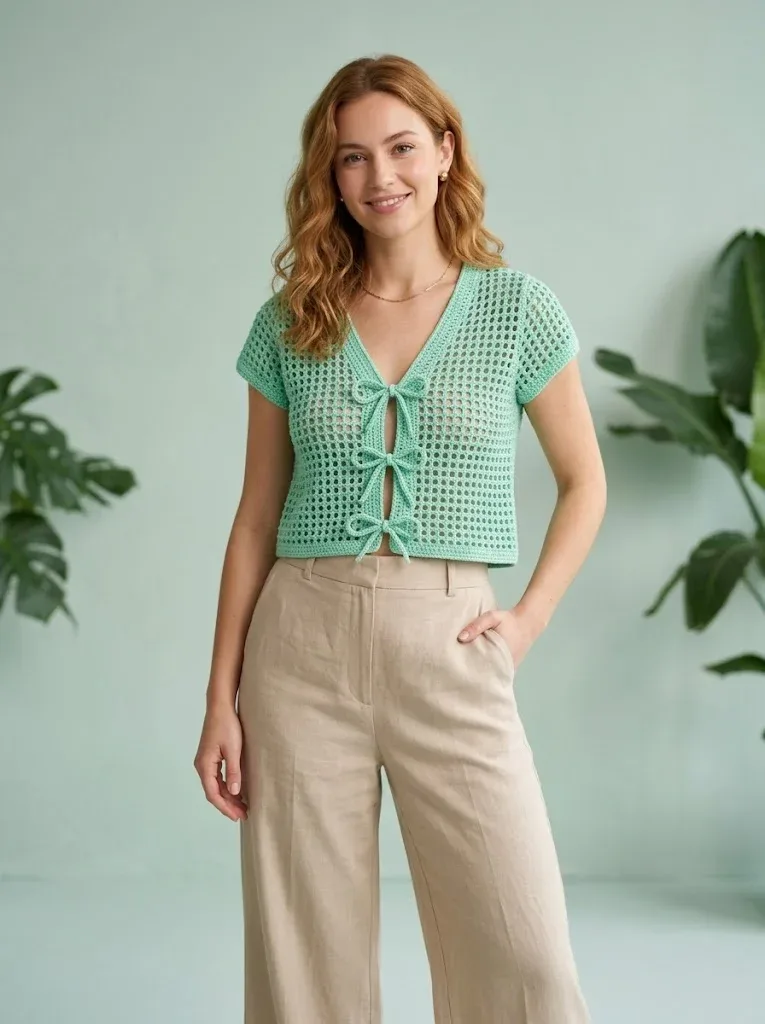
What comes off the hook is a loose, airy cardigan in mint green cotton, finished with ties instead of buttons. It drapes rather than clings, thanks to the open squares and the cotton-bamboo blend recommended for it. I'd call it a throw-over piece — something for layering, not for keeping out real cold.
Worth knowing
I like projects where one small trick repeats until it becomes a whole garment, and this is that. The mesh square — dc, chain one, skip one — is simple enough to memorize by the second row, which the practice swatch exists to prove. Once it is in your hands, the back panel grows fast, row after row of neat little squares stacking on top of each other. The V-neck shaping is satisfying in a quieter way: no complicated math, just squares dropped at the edge and a ch-1 space skipped each row until the neckline curves in. Cotton and bamboo blends let the lace actually read as lace instead of collapsing into a solid blob.
Common mistakes
- Skipping the practice swatch Work it anyway. It is the fastest way to find your rhythm before the real panels are on the line.
- Forgetting the turning chain counts as a stitch Remember the ch 3 at the start of each row stands in for the first dc, or your square count will drift.
- Crocheting into the chain instead of the space Each dc after row one goes into the ch-1 space, not into a chain stitch itself. Check the gap, not the loop.
- Losing count during the V-neck decrease rows Count mesh squares at the end of each shaping row before moving on, since the pattern expects a specific number at each stage.
- Seaming before blocking Block the lace flat first. Mesh fabric curls at the edges until it has been wet and pinned.
Intermediate
Progress Tracker
0 of 0 rounds
Tap a round to tick it off — your place is saved on this device.
The kit
Yarn
- Approximately 600 to 800 yards of DK weight yarn (weight category 3)
- The sample shown uses a cotton or cotton blend yarn in mint green
- Cotton and bamboo blends work beautifully for this lacy design
Hook
- 4.0mm (G/6) crochet hook
- Adjust hook size as needed to achieve gauge
Notions
- Tapestry needle for weaving ends
- Stitch markers
- Scissors
- Measuring tape
Gauge
- 4 mesh squares = approximately 2 inches
Practice Swatch
Ch 22.
Round 1Dc in 4th ch from hook, *ch 1, sk 1, dc in next ch*, repeat across. (10 mesh squares)
Round 2Ch 3 (counts as dc), turn, *dc in next dc, ch 1*, repeat across, ending with dc in top of turning ch.Repeat Row 2 until you feel comfortable with the rhythm. See how the double crochets stack directly on top of each other? That is what creates those neat little squares.
Foundation
Ch 74 (or adjust for your size in multiples of 2, plus 4 for turning chain).
Round 1(RS): Dc in 4th ch from hook (skipped chains count as first dc), *ch 1, sk 1 ch, dc in next ch*, repeat from * across. (36 mesh squares, 73 sts total including chains)
Round 2Ch 3 (counts as dc throughout), turn. Dc in first ch-1 sp, *ch 1, dc in next ch-1 sp*, repeat across, ending with dc in top of turning ch. (36 mesh squares)Rows 3 through 34: Repeat Row 2. Your back panel should measure approximately 16 inches from foundation to top edge.Fasten off and weave in ends. Set aside.
Foundation
Ch 38.
Round 1(RS): Dc in 4th ch from hook, *ch 1, sk 1 ch, dc in next ch*, repeat from * across. (18 mesh squares)
Round 2Ch 3, turn. Dc in first ch-1 sp, *ch 1, dc in next ch-1 sp*, repeat across, ending with dc in top of turning ch. (18 mesh squares)Rows 3 through 20: Repeat Row 2. Begin V-Neck Shaping (Row 21): Ch 3, turn. Work in pattern across first 16 mesh squares only. Leave remaining 2 mesh squares unworked. (16 mesh squares)
Round 22Ch 3, turn. Sk first ch-1 sp (this creates the neck decrease), work in pattern across. (15 mesh squares)Row 23: Work in pattern to last 2 mesh squares, leave remaining unworked. (14 mesh squares)Rows 24 through 28: Continue decreasing 1 mesh square at neck edge every row until 10 mesh squares remain for the shoulder.Rows 29 through 34: Work even in pattern on remaining 10 mesh squares. Fasten off.
Working the Sleeve
With RS facing, join yarn at underarm seam area.
Round 1Ch 3, work approximately 36 dc evenly spaced around the armhole opening, sl st to top of ch-3 to join.
Round 2Ch 3, *dc in next dc, ch 1, sk next dc*, repeat around, sl st to join. (18 mesh squares approximately)Rounds 3 and 4: Continue in mesh pattern.
Round 5Edging Ch 1, sc in each dc and ch-1 sp around, sl st to join. Fasten off. Repeat for second sleeve.
For each cord
Ch 60.
Round 1Sl st in 2nd ch from hook and in each ch across. (59 sl sts) Fasten off, leaving a 6 inch tail for attaching.
These cords should measure approximately 8 to 9 inches each.
Skill level
This pattern is perfect for you if you have mastered the basic stitches and want to try your first garment project. The mesh stitch is repetitive and meditative, and there is no complicated shaping to worry about.
Hook
4.0mm (G/6) crochet hook
Notions
Tapestry needle for weaving ends Stitch markers Scissors Measuring tape
Gauge
4 mesh squares = approximately 2 inches 4 rows = approximately 2 inches Always check your gauge before starting
To attach
Thread the tail of one cord onto your tapestry needle. Stitch the center of the cord securely to the front edge, making several passes through the fabric for a strong hold. Attach its matching cord to the opposite front edge at the same height.
Tie each pair into a bow when wearing. The bows shown in the photos have a sweet, slightly loose look. Do not pull them too tight.
Wet blocking method
1. Soak your finished cardigan in cool water with a drop of wool wash for 15 minutes.
2. Gently squeeze out excess water. Do not wring.
3. Lay flat on a blocking mat or towel.
4. Pin to measurements, gently stretching the mesh open.
5. Let dry completely before removing pins.
Your lace cardigan will look more professional and the mesh squares will be beautifully defined after blocking.
From the collection
Finishing
- Weave in ends on each panel before any seaming, since the open mesh makes loose tails hard to hide later.
- Wet block the finished pieces so the mesh squares sit even and the lace relaxes into its drape.
- Attach the cords to the front edges for the tie closure once blocking is done.
Why it works
The back panel is one flat piece grown from a single foundation chain, with no shaping until the top edge.
V-neck shaping happens by leaving mesh squares unworked at the front edge, then skipping a ch-1 space each following row to pull the neckline in gradually.
The sleeve is worked flat on its own, using the identical dc/ch-1 mesh from the practice swatch, rather than being built in the round.
What it becomes
- A layer over a tank top or sundress for a cool evening outdoors.
- A lightweight cover-up for a porch or patio gathering, paired with cropped pants.
- A loose indoor layer for reading or working from home in mild weather.
FAQ
Can I swap in a different cotton blend?
Yes, as long as it is a DK weight and gives you the stated gauge of 4 mesh squares to about 2 inches. Cotton and bamboo blends are recommended because they hold the open squares well without too much stretch.
Why bother with the practice swatch at all?
It is a small time investment that pays off once you start the real panels. Getting the dc-chain-skip rhythm steady before the back panel means fewer mistakes to rip back later.
How exactly is the V-neck shaped?
The front panel leaves a couple of mesh squares unworked at the neck edge partway up, then skips a ch-1 space each following row. It is a gradual, square-by-square decrease rather than a sharp cut.
Are the sleeves worked in the round?
No, they are worked flat using the same mesh stitch as the rest of the cardigan. That keeps the technique consistent across every piece.