Free Pattern
Step-by-Step
Crochet
Home DecorA heart-shaped crochet basket for small keepsakes
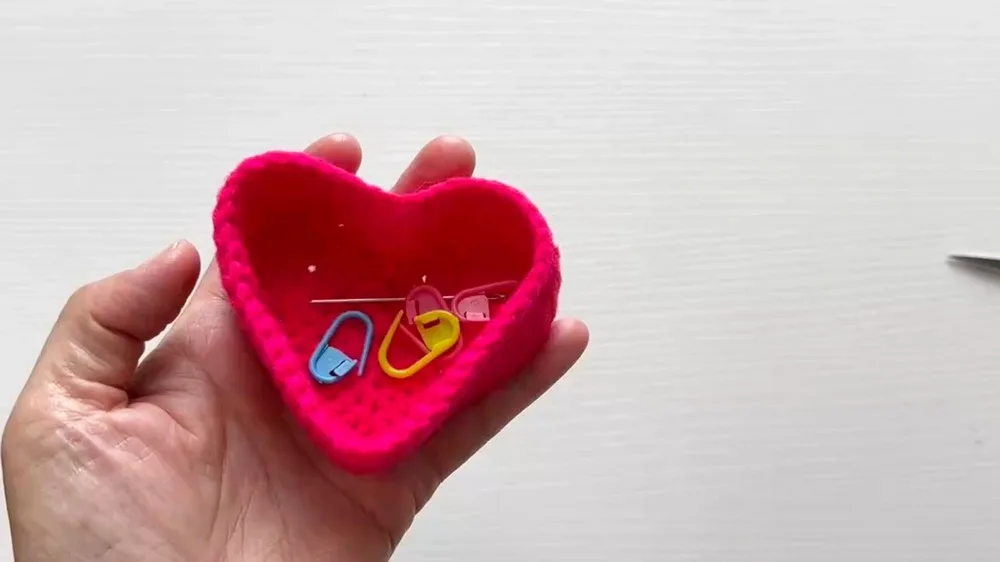
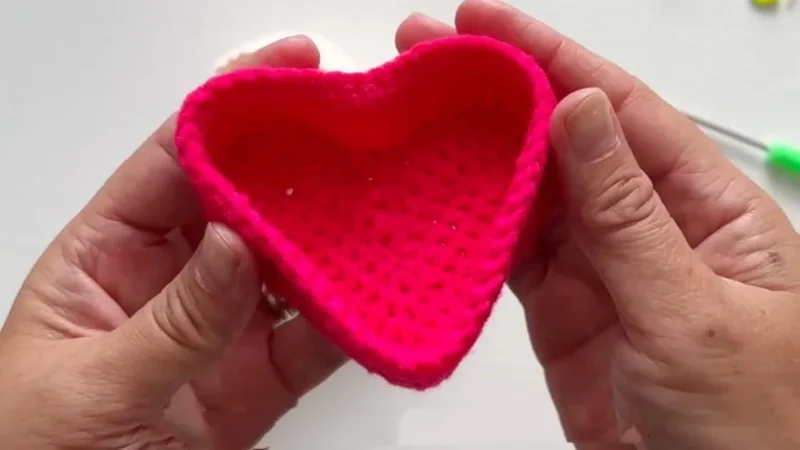
A heart-shaped crochet basket built from a curved base, ribbed sides, and waistcoat stitch.
- Level
- Intermediate
- Time
- 4-6 hours
- Hook
- 3.5 mm
- Yarn
- Worsted
Pattern highlights
- Chain a short foundation and work into the back bumps to shape the heart's curves.
- Turn to the chain's underside, skipping the stitch just beneath the last one worked.
- Add more heart rounds, increasing at the curves and decreasing at center to keep its point.
- Join the sides with a back-loop-and-base spike stitch to square off the top edge.
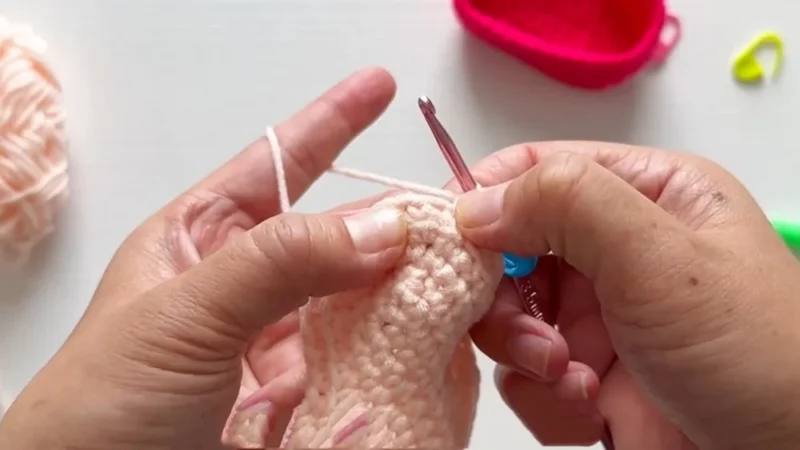
- Work upward in waistcoat stitch, into the V of each stitch below for a dense wall.
- Close the last round with an invisible join so it blends in without a seam.
- Weave in the ends, then starch cotton versions to help the basket hold its shape.
About This Pattern
A heart basket earns its place among my shape experiments. Most amigurumi starts with a magic ring, growing outward in circles. This one starts flat, from a chain worked into back bumps. The heart shape gets built before a single side stitch exists. It only becomes a basket once the sides rise. I file it under 'chain tricks' — foundations that do more than sit still.
The techniques are the real draw here. Working into back bumps sets up both edges of one chain. That's what gives the heart two lobes early on. A 3-to-1 decrease pulls the center into its notch. Later, the sides join with a BLO-and-base spike stitch. From there, waistcoat stitch takes over — dense, knit-like fabric worked into the V of each stitch below.
What comes off the hook is small and structured. It has a heart silhouette from above. The walls read as firm and ribbed-looking. Cotton versions starch up crisp; acrylic stands fine on its own. It's an easy size to tuck onto a narrow shelf. It suits small items — spools, buttons, stray earrings — better than anything bulky. It works as a display piece as much as a container.
Worth knowing
The satisfaction is in watching two techniques solve one shaping problem. Back-bump starts and a 3-to-1 decrease build the heart flat. No short rows, no separate motifs to seam together — just increases and one small decrease. Then the sides take over. A modified spike sc into the back loop and base of each stitch locks the round tight. From there, waistcoat stitch takes it upward. Waistcoat stitch alone is worth the practice — it reads like knitting, stitch by stitch. It makes a wall firm enough to skip a liner. The invisible join finishes the last round without a seam or a lump.
Common mistakes
- Missing the back bumps Work only into the back bump of each stitch, not both loops. That keeps the underside free for the second row.
- Fumbling the 3-to-1 decrease Pull up a loop in each of three consecutive stitches. Then yarn over through all four loops at once.
- Crocheting the sides too tight Keep tension relaxed on the BLO-and-base join round, since it already produces dense fabric on its own.
- Forgetting the turn-and-skip step Skip the stitch directly under the last one worked before starting along the chain's underside.
- Misplacing the waistcoat V Insert the hook between the legs of the stitch below, not under the top loops. Otherwise the knit-like texture disappears.
Intermediate
Progress Tracker
0 of 0 rounds
Tap a round to tick it off — your place is saved on this device.
The kit
- Worsted weight cotton yarn or sturdy acrylic yarn (holds shape better)
Hook
- 3.5 mm (US E) or size needed for firm fabric
Optional
- Spray starch (for shaping cotton baskets)
Tools
- Stitch markers (recommended)
- Tapestry needle
- Scissors
Chain
Round 1Ch 14. Working into the back bumps of the chain: In second bump from hook: 3 sc (creates first curve of heart).Sc in next 4 bumps. 3-to-1 dec over next 3 bumps (see Special Notes). Sc in next 4 bumps. In last bump: 3 sc (other heart curve). Turn to work along the underside of the foundation chain: Sk next st (directly under the last st just worked). Sc in next 5 sts. In next st (above first increase): 3 sc. Sc in next 5 sts. Sl st to first sc to join. (Round 1 complete.)
Round 2Ch 1. (Mark your first st in each round!) Inc (2 sc) in each of the next 3 sts (around the rounded heart curve) .Sc in next 3 sts. 3-to-1 dec over next 3 sts. Sc in next 3 sts. Inc in each of next 3 sts. Sc in next 6 sts. Inc 3 sc in next st (center dip of heart). Sc in next 6 sts. Sl st to first st.
Round 3Ch 1. [Sc in first st, inc in next st] x3. (So: sc, inc, sc, inc, sc, inc) Sc in next 2 sts.3-to-1 dec over next 3 sts. Sc in next 2 sts. [Sc in next st, inc in next st] x3. Sc in next 7 sts. Inc 3 sc in next st (bottom point). Sc in next 7 sts. Sl st to first st.
Round 4Ch 1. [(Sc in next 2 sts, inc in next st)] x3 (across heart curve) . Sc in next 2 sts .3-to-1 dec over next 3 sts. Sc in next 2 sts. [(Sc in next 2 sts, inc in next st)] x3. Sc in next 9 sts. Inc 3 sc in next st. Sc in next 9 sts. Sl st to first st.
Sides
Round 5Create sides with special ribbing join Ch 1. Working BLO AND into the base/root of each st (for sturdy vertical sides): Insert hook into back loop as well as through bottom of stitch (forms a strong angle), and work sc around. (This is a modified spike sc)Sl st to first st to join.
Round 6and Up – Waistcoat Stitch (Knit-like Single Crochet) Ch 1. Waistcoat stitch (center sc): Insert hook between the V/legs of next sc, through the thick fabric, yarn over and pull up a loop, finish as sc.Repeat for all sts of round. Sl st to first st at end of round. Repeat Round 6 until sides are at desired height (commonly 6 rounds, or more for a taller basket).
Optional: Shaping For cotton yarn, shape the basket and spray with starch . Let dry overnight for firmness.
Acrylic yarn will generally hold shape better.
You’ve completed a structured, heart-shaped basket—perfect for storing stitch markers, tapestry needles, or gifts. This dense stitch makes for a sturdy, attractive accessory for your craft space.
If you lose track of stitch count , always check “corners” (the two heart curves, the middle dip, and center bottom).
Mark each round’s first stitch —especially crucial due to the dense fabric!
Waistcoat stitch is tight and can be hard on hands: take breaks as needed.
Using acrylic yarn improves shape retention; starch helps cotton.
For a larger or smaller basket, adjust starting chain (even number) and adjust increases at the curves.
Use a larger hook only if your fabric becomes too stiff .
Assembly
Step 1For the last round, finish with an invisible join for a neat edge:
Step 2Remove hook, thread the yarn on a tapestry needle.
Step 3Insert needle under both loops of first st (from outside to inside).
Step 4Then back into the last st’s back loop and through the fabric.
Step 5Pull gently to mimic the top of the last stitch.
Step 6FO and weave in all ends securely.
From the collection
Finishing
- Close the last round with an invisible join for a seam-free top edge.
- Weave in all ends through the dense waistcoat fabric so they stay hidden.
- Starch cotton versions, or steam-block acrylic, to help the basket hold its shape.
Why it works
The chain is worked into back bumps, then along its underside, to create the heart's two lobes.
Increases at each curve's end shape the heart's rounded top; center decreases mark its dip and point.
The BLO-and-base join at the sides' start locks the round before waistcoat stitch builds the wall upward.
What it becomes
- A catchall on a dresser for rings, spare buttons, or hair pins.
- A gift container for a small jar of jam or a bar of soap, minus the wrapping.
- A desk-side holder for paper clips, pushpins, or loose change.
Original pattern: https://redagapeblog.com/free-crochet-heart-basket-pattern/
FAQ
Why work into the back bumps of the chain?
It leaves the loops on the chain's underside free for a second row of stitches. That's how one foundation chain becomes both sides of the heart's base.
What if I don't have spray starch?
A light steam block on cotton gives some structure, though not as crisp as starch. Acrylic baskets hold their shape without either.