Free Pattern
Step-by-Step
Crochet
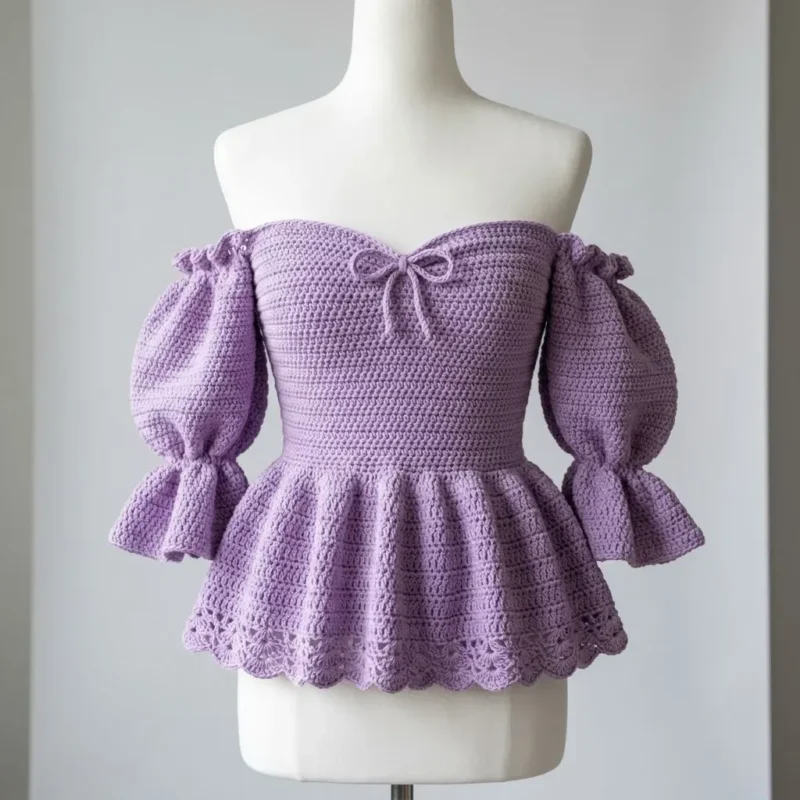
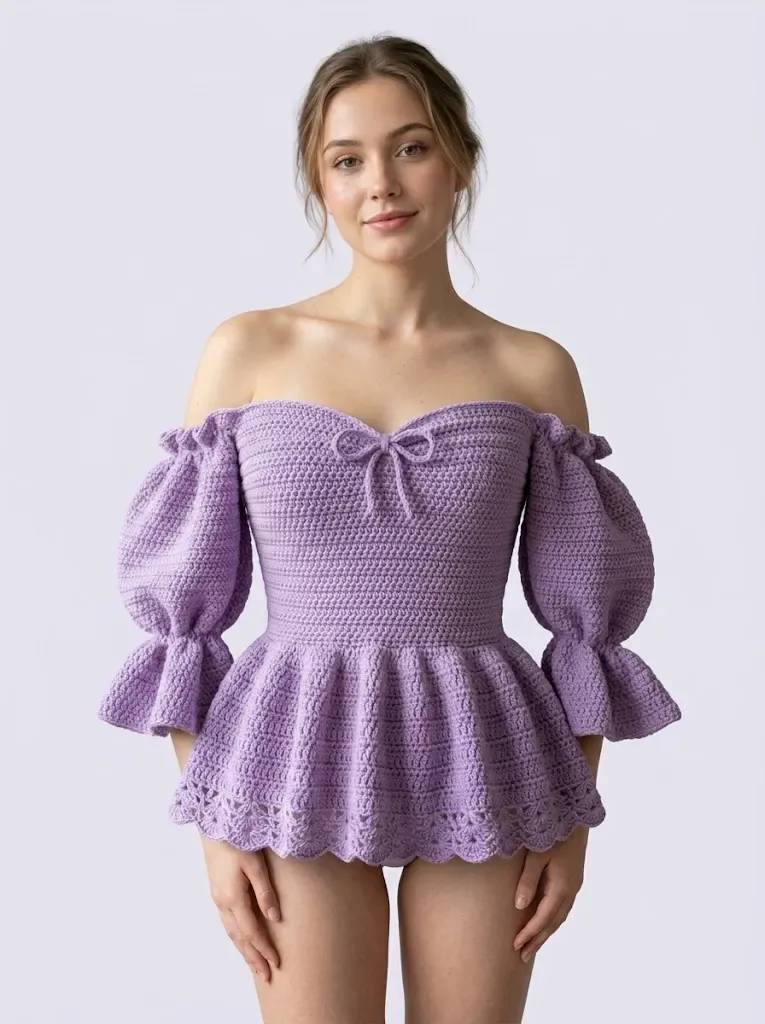
TopsLavender ribbed peplum crochet top with bow ties
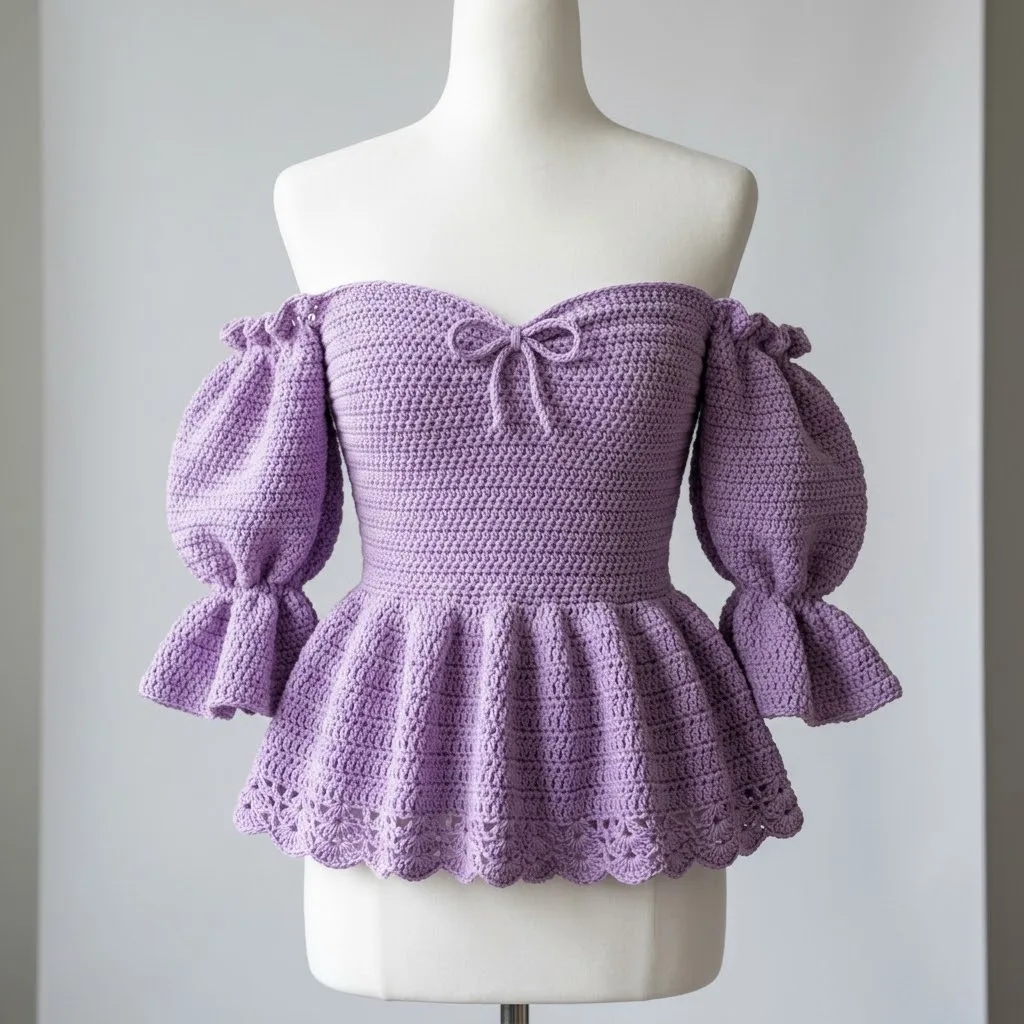
A lavender peplum crochet top with ribbed bodice, cup shaping, and bow-tie back closure.
- Level
- Intermediate
- Time
- 8-12 hours
- Hook
- 4.0 mm
- Yarn
- DK
Pattern highlights
- Start with the ribbed Foundation, working rows of back loop only single crochet to build the bodice.
- Work the Left Cup to mirror the Right Cup before joining both pieces into place.
- Add the Ruffle Cuff to finish the sleeve edges once the main shaping is complete.
- Finish the Back Neckline and attach bow ties, then crochet the Neckline Ruffle last.
About This Pattern
I keep a running list of garment patterns that actually use their stitches to do something. A peplum top with ribbed shaping earns a spot fast. Most of what crosses my hook lately is small — purses, clutches, baby blankets — so a full bodice with cup shaping and a flared hem feels like a bigger notebook entry. This one sits with the fitted tops in my collection, the kind built from rows before they ever become rounds.
What comes out the other end is a fitted top with a ribbed bodice, shaped cups, and a peplum that flares below the waist. A Ruffle Cuff finishes the sleeve edge, and bow ties close the Back Neckline instead of a zipper. It's the kind of top that photographs well under a cardigan and actually fits a body, not just a mannequin.
Worth knowing
What I like about this top is that every technique earns its keep. The BLO ribbing rows aren't decorative filler — they're what makes the bodice sit close before the cup shaping even starts. The Right Cup decreases at both ends of the row, sc2tog on each side, so the fabric curves instead of just narrowing. Then the whole piece flips to working in rounds for the peplum, and the increase rounds are spaced wide enough that the flare looks intentional, not accidental. Add a Ruffle Cuff and a set of bow ties at the Back Neckline, and you've got a top that uses four or five distinct moves without ever feeling like a sampler. That variety, more than any single stitch, is what kept me interested.
Common mistakes
- Working into both loops on ribbing rows Check each row — the ribbing rows call for back loop only. Working both loops flattens the ridge you're trying to build.
- Losing track of which row decreases The Right Cup decreases for several rows straight, then stops. Mark the last decrease row so you don't keep shaping past it.
- Skipping a marker on increase rounds Increase rounds change the repeat count partway through the peplum. Mark the start of the round so your stitch count stays accurate.
- Joining cups before checking they match Lay the Right Cup and Left Cup side by side before seaming. Uneven decrease counts show up fast under tension.
Intermediate
Progress Tracker
0 of 0 rounds
Tap a round to tick it off — your place is saved on this device.
The kit
Yarn
- 800 to 1000 yards of DK weight yarn (light worsted works too)
- Look for yarn with good stitch definition and slight drape
Hook
- 4.0mm (G/6) crochet hook for main fabric
- 3.5mm (E/4) hook for ribbed sections and tighter edging
Notions
- Stitch markers (at least 6)
- Yarn needle for weaving ends
- Measuring tape
- Scissors
Gauge
- 18 stitches and 20 rows = 4 inches in single crochet with 4.0mm hook
- Skill Level
- Intermediate
You should be comfortable with
- Working in rows and rounds
- Increasing and decreasing
- Reading written patterns
- Basic garment shaping
- Seaming pieces together
- Stitch Abbreviations and Definitions
- Let me walk you through every stitch you will use in this pattern.
Foundation
Ch 69.
Round 1Sc in 2nd ch from hook and in each ch across. Turn. (68 sts)
Round 2Ch 1, sc in BLO across. Turn. (68 sts)Rows 3 to 6: Repeat Row 2. This creates the horizontal ribbing visible on the bodice.
Round 7Ch 1, sc in both loops across. Turn. (68 sts)
Round 8to 10: Ch 1, sc across. Turn. (68 sts)
Round 11Ch 1, sc in BLO across. Turn. (68 sts)
Round 12to 14: Repeat Row 11 for another ribbed section. Continue alternating between 4 rows of BLO single crochet and 3 rows of regular single crochet until piece measures 8 inches from foundation chain.
Right Cup
Round 1Ch 1, sc in first 30 sts. Turn. Leave remaining stitches unworked. (30 sts)
Round 2Ch 1, skip first st, sc across to last 2 sts, sc2tog. Turn. (28 sts)
Round 3Ch 1, sc2tog, sc across to last 2 sts, sc2tog. Turn. (26 sts)Rows 4 to 6: Repeat Row 3, decreasing 2 stitches each row. (20 sts after Row 6)
Round 7to 10: Ch 1, sc across without decreasing. Turn. (20 sts) Fasten off.
Foundation
Round 1Ch 1, sc in each ch around. Join. (50 sts)
Round 2to 4: Ch 1, sc in BLO around. Join. (50 sts)
Round 5Increase Round Ch 1, *sc in next 4 sts, 2 sc in next st* repeat around. Join. (60 sts)
Round 6to 8: Ch 1, sc around. Join. (60 sts)
Round 9Increase Round Ch 1, *sc in next 5 sts, 2 sc in next st* repeat around. Join. (70 sts)
Round 10to 15: Ch 1, sc around. Join. This creates the puff portion. (70 sts)
Round 16Decrease Round Ch 1, *sc in next 5 sts, sc2tog* repeat around. Join. (60 sts)
Round 17Ch 1, *sc in next 4 sts, sc2tog* repeat around. Join. (50 sts)
Round 18to 20: Ch 1, sc in BLO around. Join. This creates the gathered band at the upper arm. (50 sts)
Ruffle Cuff
Round 21Ch 1, 2 sc in each st around. Join. (100 sts)
Round 22to 26: Ch 1, sc around. Join. (100 sts) Work 2 rounds of the scalloped border pattern from the peplum hem.Fasten off.
Hook
4.0mm (G/6) crochet hook for main fabric 3.5mm (E/4) hook for ribbed sections and tighter edging
Notions
Stitch markers (at least 6)
Yarn needle for weaving ends Measuring tape Scissors
Gauge
18 stitches and 20 rows = 4 inches in single crochet with 4.0mm hook Check your gauge before starting. This top is fitted, so gauge matters.
Finished Measurements
Bust: 30 to 32 inches (stretches to fit 32 to 34 inch bust)
Waist: 26 to 28 inches at narrowest point Length from underarm to hem: approximately 14 inches
For larger sizes, add stitch repeats to the foundation chain in multiples of 4 stitches. Each multiple adds roughly 1 inch to the circumference.
Left Cup
Skip the center 8 stitches on the original bodice row. Join yarn to the 39th stitch.
Work Rows 1 to 10 the same as the right cup, but reverse the shaping so the curves mirror each other.
Fasten off.
Foundation
Ch 69.
Work in the same ribbed pattern as the front for 8 inches.
Back Neckline
Simply work even (no decreasing) for the final 10 rows to create a straight back edge.
Fasten off.
Bow Ties
Ch 80. Fasten off. Make 2.
Weave one tie through the stitches at the center of the sweetheart neckline. Tie in a bow. Attach the second smaller bow at the center bust for decoration.
Neckline Ruffle
Join yarn at the back center of the neckline edge. Sc evenly around the entire neckline opening, working 2 sc in corner stitches to keep the edge flat. Join and fasten off.
From the collection
Finishing
- Block the ribbed bodice flat so the BLO rows lie even before seaming the cups in.
- Attach the bow ties at the Back Neckline last, once the Neckline Ruffle is in place.
Why it works
The bodice starts flat, in rows, so the sc2tog cup shaping has clear edges to decrease against.
The peplum Foundation's increase rounds space their repeats further apart as rounds grow, keeping the flare proportional rather than sudden.
The Right Cup decreases at both ends of the row for several rows straight, then stops, which is why the shaping reads as a curve instead of a point.
What it becomes
- Wear it over a slip dress as a light layering top for cooler evenings.
- Pair it with high-waisted jeans and let the peplum do the shaping.
- Style it as a going-out top with simple jewelry, since the bow ties are detail enough.
FAQ
Do I need two different hook sizes?
Yes — a 4.0mm hook for the main fabric and a 3.5mm hook for the ribbed sections and tighter edging. The smaller hook keeps those rows snug against the body.
What do the bow ties actually close?
They finish the Back Neckline, standing in for a zipper or button closure. It's a soft way to adjust fit without hardware.