Free Pattern
Step-by-Step
Crochet
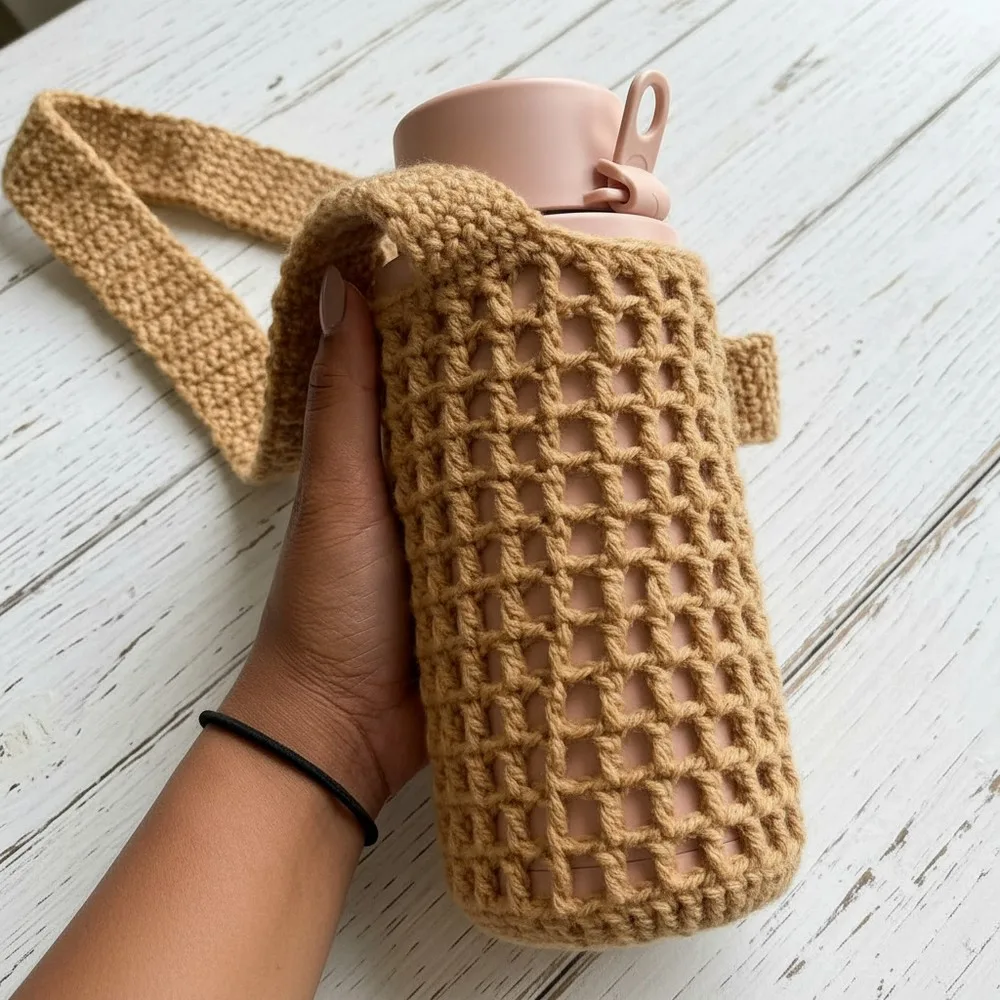
AccessoriesMesh water bottle holder crochet pattern with strap
A seamless crochet water bottle holder with mesh body, sturdy hem, and adjustable strap.
- Level
- Confident Beginner
- Time
- 3-5 hours
- Hook
- 4 mm
- Yarn
- Worsted
Pattern highlights
- Start the base with a magic ring, then build it up through a few rounds of steady increases.
- Join every mesh round with a slip stitch instead of working in a continuous spiral.
- Finish the top edge with rounds of single crochet for a firm, tidy hem.
- Work the strap separately as a flat piece, shaping it to the length you want.
- Slip-stitch the strap onto the holder, weave in your ends, and it's ready to wear.
About This Pattern
This one sits with the practical pieces in my notebook, next to market totes and pencil pouches. It is not decorative for its own sake. It earns its place by solving a small daily problem. A confident-beginner label suits it -- there is shaping here, but nothing mysterious. I like adding functional makes like this between fussier lace projects. It reminds me crochet can be useful, not just pretty.
The build starts with a magic ring, then four rounds of increases that flare the base flat. After that, the mesh takes over -- chain-one spaces and double crochets worked in joined rounds. Each round joins with a slip stitch, not a spiral. Rows of single crochet close the top into a sturdy hem. The strap is worked flat, then slip-stitched into place. Nothing here is hard alone; it's the sequence that reads as intermediate.
The finished piece stands about eight inches tall, not counting the strap, with a three-inch base. The mesh body breathes and stretches slightly around the bottle. The strap doubles as a crossbody or shoulder carry, whichever suits the outing. It's a small, quick make, using scrap yarn well. I'd call it a weekend project you can finish without much planning.
Common mistakes
- Magic ring left loose Pull the tail firmly until the center hole disappears completely. A loose ring leaves a visible gap at the base.
- Miscounting the base increases Count stitches at the end of each base round before moving on. It's easier to fix now than after the mesh is built on top.
- Treating the mesh as spiral Slip stitch to close every mesh round instead of crocheting straight into the next one. Skipping the join throws off the seam line.
- Chain-4 not counted as stitch Remember the starting ch-4 counts as a double crochet plus a chain-one space. Forgetting this shifts the whole mesh pattern out of alignment.
- Strap seam placed randomly Join the strap to the same relative stitch each time you attach it. Random placement makes the seam wander and show.
Confident Beginner
Progress Tracker
0 of 0 rounds
Tap a round to tick it off — your place is saved on this device.
The kit
- Worsted weight or cotton yarn (approx. 40–60g; more for longer straps)
- 4 mm or 5 mm crochet hook (adjust size as needed for yarn and desired tightness)
- Yarn/tapestry needle (for weaving in ends)
- Stitch marker (optional, for marking round starts)
- Scissors
1. The Base
Round 1Start with a magic ring (MR) . Ch 2 (does not count as a stitch). Work 12 dc into the ring.Pull tight, sl st to first dc to join. (12 sts)
Round 2Ch 2 . Work an increase (2 dc) in each stitch around. Sl st to join. (24 sts)
Round 3Ch 2 . (Increase in first st, 1 dc in next) – repeat this sequence around. [2 dc in one stitch, 1 dc in next] x 12 times.Sl st to join. (36 sts)
Round 4Ch 2 . (Increase in first st, 1 dc in next 2 sts) – repeat this sequence around.[2 dc in one stitch, 1 dc in next 2] x 12 times.Sl st to join. (48 sts)
Main Pattern
Rounds 1–12Or desired height Ch 4 (counts as dc + ch 1 ). Skip 1 st, dc in next . [ Ch 1, skip 1, dc in next ] Repeat from * around to end.Sl st into the 3rd ch of the starting ch-4 to join.Repeat the mesh pattern for 12 rounds or your preferred bottle height.
Core Steps
Round 1Magic Ring Start: Ensures a seamless, secure base with no large center hole.
Round 2Expanding Double Crochet Base: Four rounds of increases create a sturdy, circular foundation.
Round 3Mesh Body Chain and double crochet mesh turns into a flexible bottle-hugging form.
Round 4Sturdy Hem: Rows of single crochet for durability and a clean finish.
Strong Strap: Worked flat for comfort; slip-stitched on for security.
Completely Seamless Construction: Worked in the round with minimal sewing.
Practical Features
Fits standard bottles due to stretch.
Quick to make and customizable in length and color.
Lightweight and easily washable.
3. The Hem
Ch 1 .
Round 1Work 1 sc in EVERY st and ch-1 space around the top of the body.(1)
Round 2Sl st to the first sc to join the round.
4. The Strap
Width: Join yarn to any point on the rim.
Ch 1 .
6 sc across (either directly into the rim or into chosen stitches).
Rows: Ch 1, turn .
Work 6 sc across.
Repeat (ch 1, turn, 6 sc) until strap reaches your desired length — measure for shoulder, crossbody, or hand strap.
Attachment: Lay the bottle holder flat.
Turn inside out for joining.
Align the working end of the strap directly opposite its starting point.
Attach with sl st through the next 6 rim stitches and the strap stitches together, securing both layers.
Assembly
Step 1The holder is fully seamless, with base, mesh, hem, and strap worked directly onto the piece.
Step 2Final piece is approximately 8″ high (excluding strap), fits most water bottles securely, and can be worn with the strap as crossbody or over the shoulder.
Finishing
- Weave in tails from the base and hem before attaching the strap, while they're easy to reach.
- Slip-stitch the strap to the hem at the same relative spot each time, for a tidy seam.
- Weave in the remaining ends, then block lightly if the mesh stitches look uneven.
Why it works
Round two doubles every stitch, and round three increases only every other stitch, spacing the flare.
Each round of the mesh closes with a slip stitch into the starting chain, not a spiral join.
The strap is worked as a flat strip, then slip-stitched onto the body instead of sewn on.
What it becomes
- Clip it to a backpack for hikes, so the bottle stays upright and easy to grab.
- Wear it crossbody on errands, pairing it with a canvas tote for groceries.
- Send it along on school or gym days, worn over the shoulder alongside a light jacket.
Original pattern: https://redagapeblog.com/style-free-crochet-water-bottle-holder-pattern/
FAQ
Can I make the holder taller or shorter?
Yes, the mesh section is worked in repeating rounds, so you can add or remove rounds to match your bottle. Just keep the stitch count consistent as you go.
Do I need a stitch marker?
It's optional, but helpful for marking where each round starts. It makes counting and joining easier, especially in the mesh section.
Why does my base look bowl-shaped instead of flat?
That usually means the increases in the early rounds aren't landing evenly. Count stitches at the end of each round to catch it early.
Can I use a different yarn weight?
Worsted or cotton both work well, and the hook size can shift with it. Just expect the finished size to change slightly with a different weight.