
Free Pattern
Step-by-Step
Crochet
AmigurumiAmigurumi Mushroom Key Cover Crochet Pattern
A small crochet mushroom that slips over a key, worked in single crochet from the top down.
- Level
- Beginner
- Time
- 2-3 hours
- Yarn
- Worsted
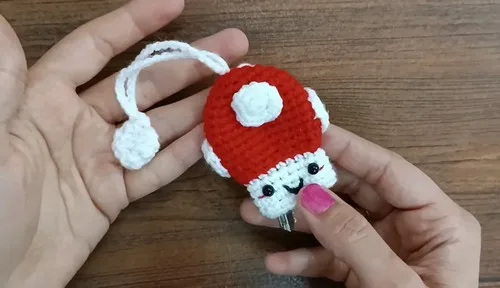
Pattern highlights
- Start the mushroom top with a magic ring and build outward through a run of increase rounds.
- Work a set of decrease rounds to curve the top back inward like a dome, changing to white yarn on the last decrease stitch.
- Crochet the white bottom piece, starting with a back loop only round to mark the seam.
- Make four small white spot circles separately, each a magic ring plus one increase round.
- Crochet a separate hanger piece with its own magic ring, increase round, and decrease round, then chain 40 stitches to form the loop.
- Sew the spots onto the red cap, then stitch the hanger loop in place at the top.
About This Pattern
This one lives in the odds-and-ends drawer of a collection, the small useful things between the big showpieces. A key cover is not a centerpiece. It is the kind of pattern I keep coming back to when I want something finished before the kettle boils, and I like that about it.
The techniques here are the basics doing quiet, disciplined work. A magic ring starts every piece, increases build the cap's curve, decreases pull it back in, and a run of back loop only stitches marks a clean line partway through. Nothing exotic, just single crochet asked to behave in three different ways.
What comes off the hook is a red-topped mushroom cap with four white spots and a plain white base, finished with a long chained loop. Slide it onto a key ring and it turns an ordinary key into something you'll actually find at the bottom of a bag.
Worth knowing
I like a pattern that teaches shape through stitch count alone, and this one does. The mushroom top goes wide with increases, narrows again with decreases, and somewhere in that arc a dome appears without any shaping tricks beyond sc and inc. The back loop only round on the bottom piece is the quiet star of the project, a single decision that leaves a visible seam line right where cap meets stem. Four tiny spot pieces, each just two rounds, are the kind of small repeatable task that makes a project feel productive fast. And the hanger is its own tiny crocheted piece finished with a long chain, a nice contrast to all that careful rounding on the cap. It is a small object, but it uses real technique to get there.
Common mistakes
- Loose magic ring center Pull the tail firm before the first round so no gap shows at the very top of the cap.
- Uneven increase placement Space each increase evenly around the round rather than clustering them, or the cap will pull to one side.
- Skipping the back loop only round Check each stitch on the bottom piece's first round; missing this step erases the seam line between cap and stem.
- Spots that don't match in size Work all four spot pieces with the same tension and round count so they read as a matching set on the cap.
- Hanger loop chained too loose Keep the chain stitches for the loop snug so it doesn't stretch or twist once a key ring is added.


Beginner
Progress Tracker
0 of 0 rounds
Tap a round to tick it off — your place is saved on this device.
The kit
- Worsted weight yarn in red (for the mushroom top)
- Worsted weight yarn in white (for the bottom, spots, and hanger)
- Crochet hook (size to suit your yarn)
- Yarn needle for sewing pieces together and weaving in ends
- Scissors
Mushroom Top (Red Yarn)
Step by step: Create a magic ring and chain 1.
Round 1Create a magic ring, chain 1, and crochet 6 single crochets (sc) into the ring.
Round 2Work 6 increases (inc), for a total of 12 sc.
Round 3Repeat the pattern of (1 sc, 1 inc) 6 times, for a total of 18 sc.
Round 4Repeat the pattern of (2 sc, 1 inc) 6 times, for a total of 24 sc.
Round 5Repeat the pattern of (3 sc, 1 inc) 6 times, for a total of 30 sc.
Rounds 6–10Crochet 1 sc in each stitch, for 5 rounds, maintaining 30 sc per round.
Round 11Repeat the pattern of (3 sc, 1 decrease) 6 times, for a total of 24 sc.
Round 12Repeat the pattern of (2 sc, 1 decrease) 6 times, for a total of 18 sc. Change to white yarn on the last decrease stitch.
Mushroom Bottom (White Yarn)
Round 13Crochet 1 sc in the back loop of each stitch, for a total of 18 sc.
Rounds 14–17Continue with 1 sc in each stitch for 4 rounds, maintaining 18 sc per round. Finish by slip stitching into the next stitch, chain 1, and cut the yarn.
For Mushroom Spots (White Yarn)
Create a magic ring and chain 1.
Round 1Crochet 6 sc into the ring.
Round 2Work 6 increases (inc), for a total of 12 sc. Finish by slip stitching into the next stitch, chain 1, and cut the yarn.Make a total of 4 spots.
Hanger (White Yarn)
Create a magic ring and chain 1.
Round 1Crochet 6 sc into the ring.
Round 2Work 6 increases (inc), for a total of 12 sc.
Round 3Crochet 1 sc in each stitch, for a total of 12 sc.
Round 4Work 8 decreases, resulting in 8 stitches.Finish by slip stitching, then chain 40 stitches to create the hanger loop.
Assembly
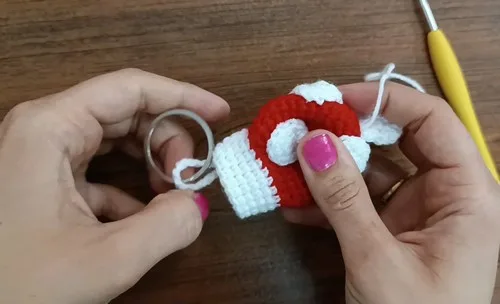
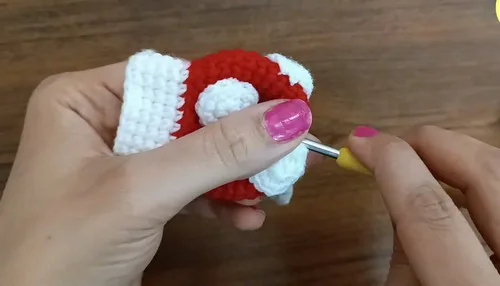
Step 1Sew the white spots onto the red mushroom top.
Step 2Sew the hanger to the top of the mushroom.
Step 3The key cover is now complete!
From the collection
Finishing
- Weave in every yarn tail from the top, the four spots, the bottom piece, and the hanger before assembly.
- Pin the four white spots onto the red cap and sew each one down around its edge.
- Stitch the chained hanger loop securely to the top of the mushroom so it can hold a key ring.
Why it works
The mushroom top increases every round early on, which is what pushes the cap outward into a dome before the decrease rounds pull it closed.
The four spots are worked flat as separate tiny pieces rather than joined into the cap, since each is only two rounds and easier to place by eye afterward.
The bottom piece opens with a back loop only round, leaving the front loops free as a ridge that visually separates the mushroom cap from its base.
The hanger is worked as its own small piece, magic ring, increase round, plain round, and decrease round, rather than a simple chain, giving the loop more body before the long chain-40 tail extends it into a loop.
What it becomes
- Slip it onto a house key so it's easy to find by feel in a crowded bag.
- Give it as a small handmade gift alongside a keychain or a set of coasters.
- Clip it to a backpack zipper as a soft charm that pairs well with other amigurumi keepsakes.
FAQ
Can I make the mushroom top bigger to fit a bulkier key?
Yes, working a couple of extra plain rounds before the decreases will deepen the cap. Keep the increase and decrease rounds as given so the dome shape still closes properly.
Do the spots need to be sewn on before or after the hanger loop?
I sew the spots on first while the cap lies flat and is easier to handle. The hanger is stitched on last since it's a separate piece finished with its own long chain.
Why does the bottom piece use back loop only?
That single round leaves the front loops free, which creates a visible ridge. It's what makes the join between cap and base look deliberate rather than plain.